 My Media (Beta)
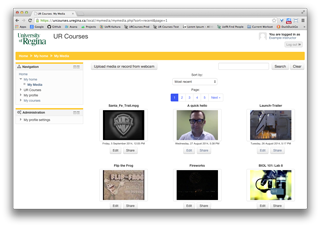
An open source streaming media server has been integrated that now enables a My Media area within UR Courses.
This area lists all media hosted on our urcourses-video.uregina.ca server that have been associated with your UR Courses account. You are able to record from your webcam or upload media, as well as preview, edit metadata, and share your media assets with other courses, if desired.
Media recorded or uploaded to your My Media area will be accessible elsewhere in UR Courses where video submissions or media selection are required.
Your media is private to you until you share it with a course, embed it within content, or use it as a submission for an assignment. The media cannot be shared or accessed outside of UR Courses.
Guides
- Accessing the My Media area
- Embedding Video from the My Media area within a Forum
- Submit or record video for an Assignment (Media) activity
Accessing the My Media area
To access the My Media area, follow the steps outlined below or watch the first part of the screencast on Uploading Video and Submission for an Assignment.
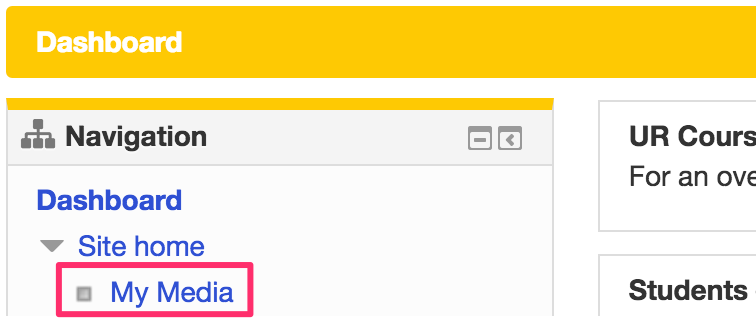
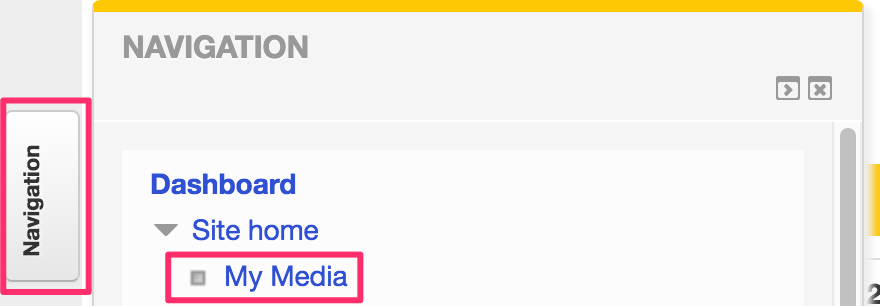
Once you have logged in to UR Courses, look for the Navigation block. It's typically near the top left area of the page, or it may be docked as pictured below.
-
Click on the arrow to reveal the My Media link beneath Site home.

The resulting page is your My Media area. Media you upload within UR Courses to our Kaltura CE streaming server will appear here.
Your media is private to you until you embed it within content, use it as a submission for an assignment, or share it with a course. The media cannot be shared or accessed outside of UR Courses.

-
Click the Upload media or record from webcam button to open the contribution wizard.

To upload video files, ensure the video tab is selected and click Browse to find the video you wish to upload. Multiple videos may be selected at once and a number of formats are supported.
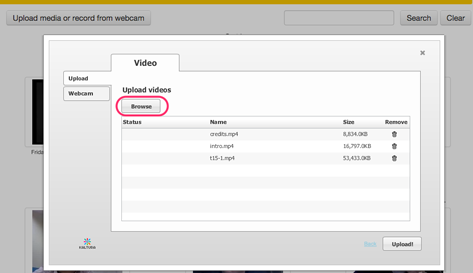
Once all videos have been selected press Upload.
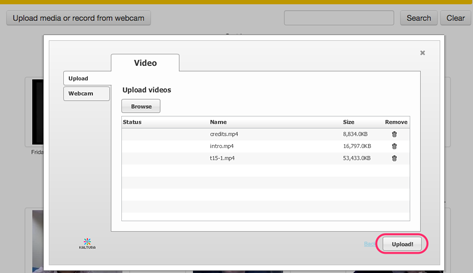
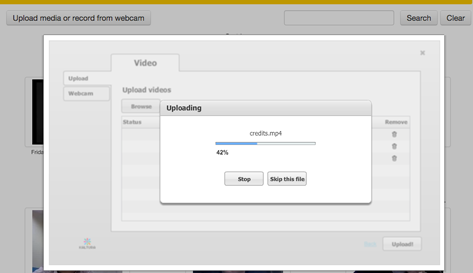
Videos will begin to upload to the server. Uploads performed on campus will be approximately 10 times faster than a typical home-based connection, so it's recommended to upload large files or make lengthy recordings while on campus.
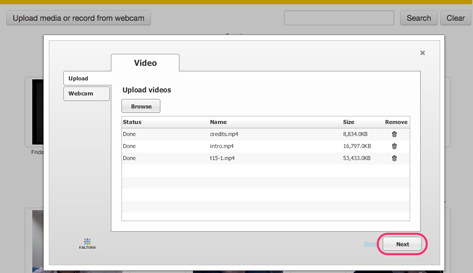
Once the videos have been uploaded, click Next to continue.
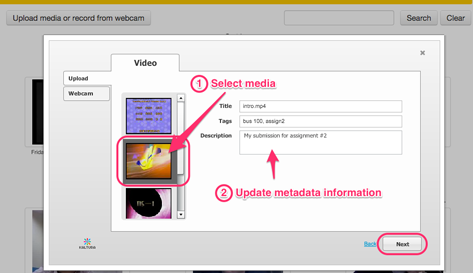
Enter the metadata information for each video by selecting the element on the left and provide a Name, Tags (to help you search your media later), and a brief description of the video or purpose for uploading.
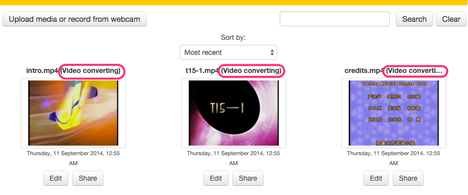
Once the videos have been uploaded successfully, they may take some time to convert to the various formats required for playback across multiple devices. The length of time depends on the duration and resolution of the uploaded video itself, and other videos that may already be in the queue for conversion on the server.
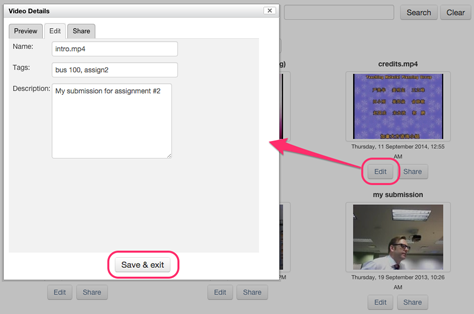
You can update the metadata for any media element by clicking the associated Edit button, update the information provided, then click the Save & Exit button.
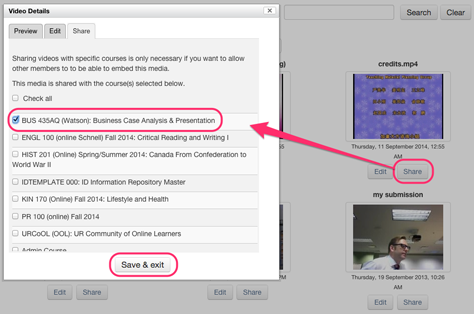
Media can be shared with a course or courses by checking the course name within the Share panel, then use the Save & Exit button. You would only need to do this if you wish to allow your instructor or others access to be able to embed the shared media within the specified course(s).
Embedding Video from the My Media area within a Forum
To embed a video recording within a forum, the video must first be uploaded to the My Media area for it to be available. If you are unsure, please review accessing the My Media area or watch the associated screencast.
Once your video has been uploaded, please follow the steps outlined below.
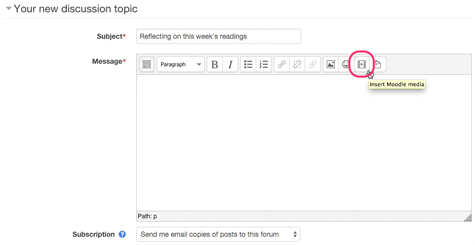
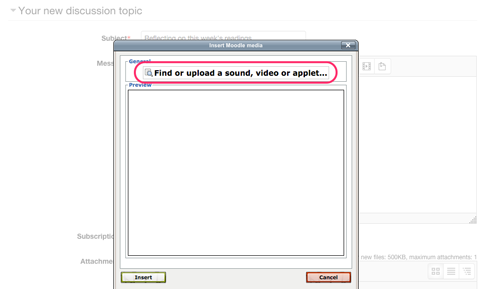
When creating a reply to a forum post, click the Insert Media button to begin the process of embedding a video within the content.
Press the Find or upload a sound, video or applet... button to open the File Picker.
Select the Kaltura CE location from the left side of the File Picker.
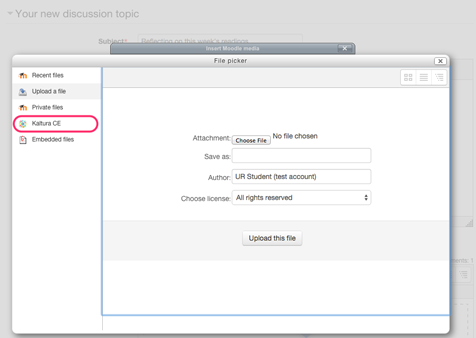
If you do not see this area, please contact ctl.support@uregina.ca.
The right side should now list a series of folders, such as My Media, Used Media, etc.
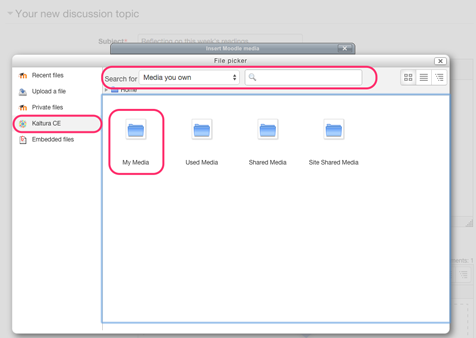
Navigate through the folders or perform a search to locate and select the media you wish to embed. Confirm your selection by pressing the Select this file button.
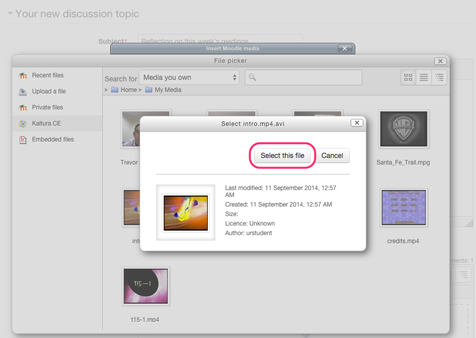
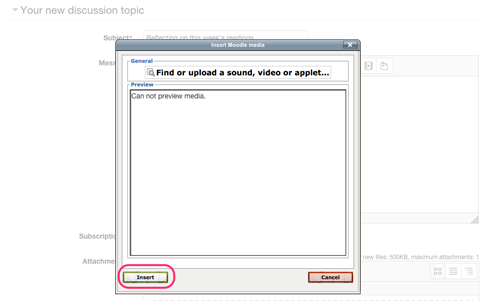
The preview may not be functional, but click Insert to continue embedding the selected the video.
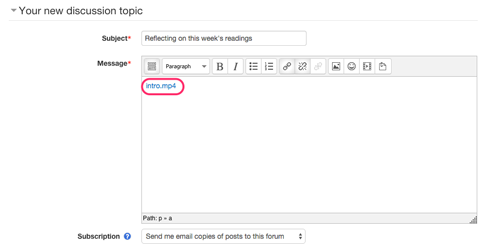
A link using the name of the media will have been created within the content. The text of this link can be changed if desired.
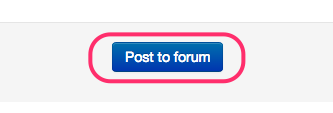
Once you have finished entering your content, click the Post to forum button.
If the Kaltura CE filter has been enabled by your instructor, you should now see the selected video has been embedded within the content.
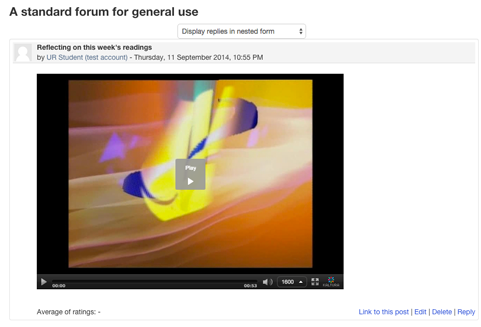
If an embedded video does not appear, ask your instructor if the Kaltura CE filter is enabled for the forum and/or course.
If you have any problems with this process or further questions, please contact ctl.support@uregina.ca.