Overview
Using filters allows UR Courses to perform some automatic formatting and linking within your course in a variety of contexts.
To enable or disable a filter:
-
Go to the course page that you want to enable or disable the Filter
-
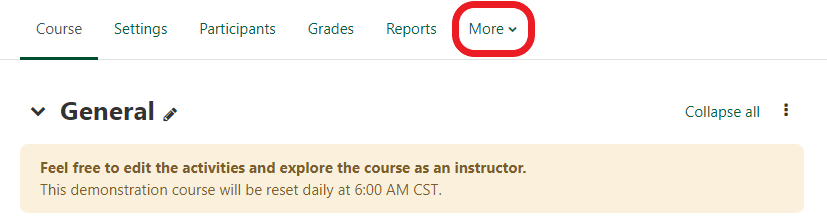
Click the More option in the navigation bar.
Note: It is not recommended to embed media on the main page of your course as it will be loaded for every visit to the course.
-
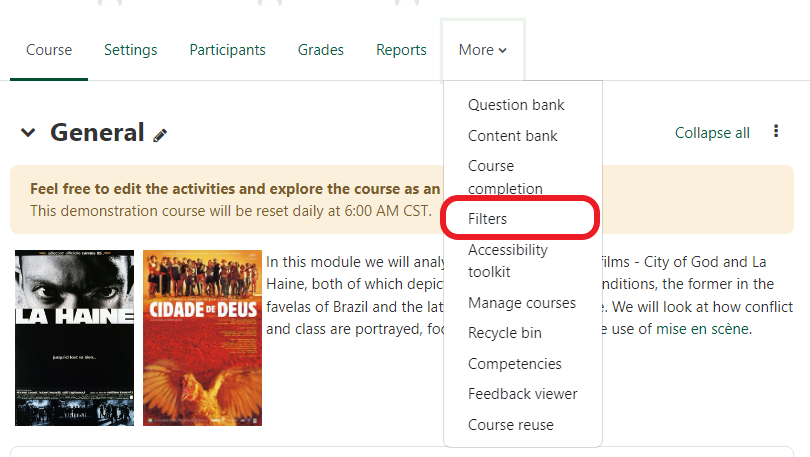
Click on Filters in the drop down menu.
-
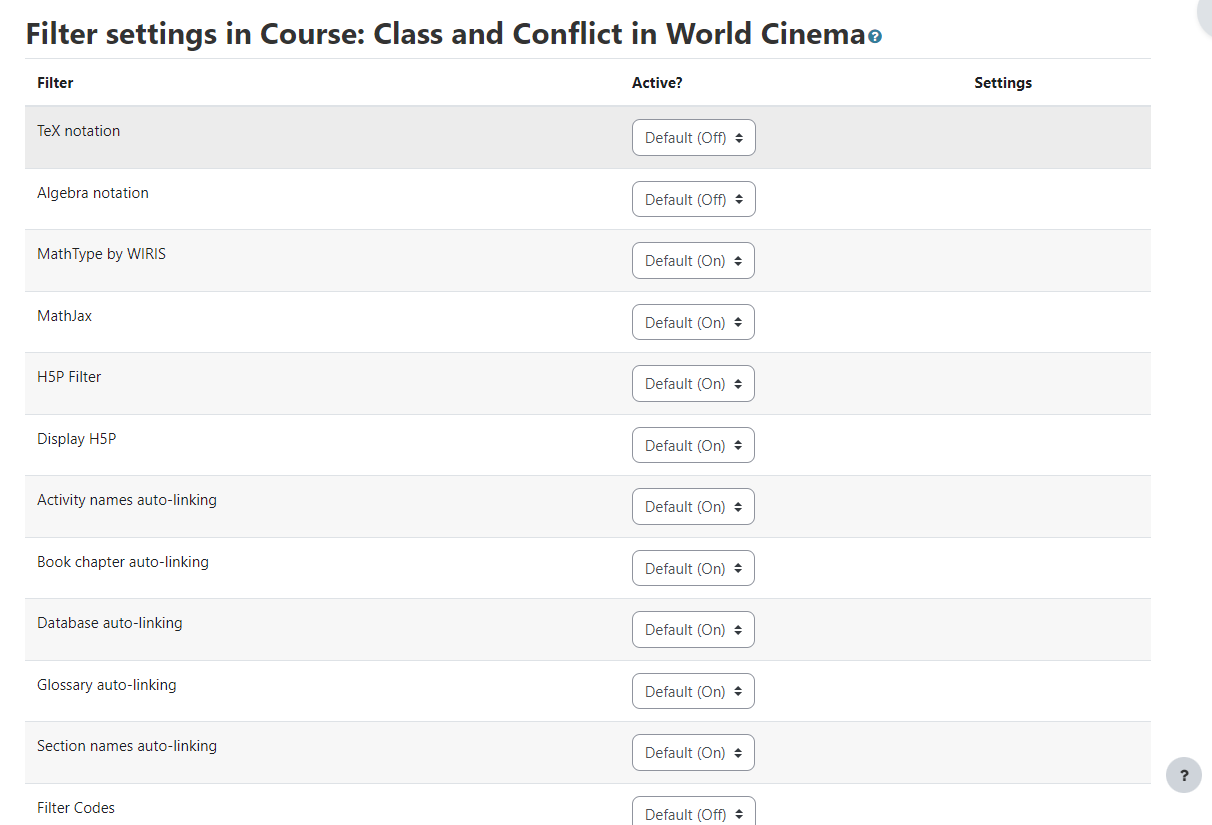
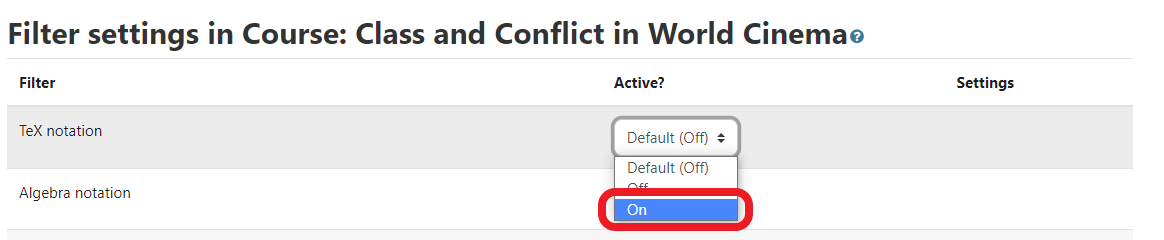
In the dropdown menu next to the filter, you wish to enable, choose On.
-
Scroll to the bottom of the page and click Save Changes.
- Visit What are filters? A basic guides for the Moodle plugin Filters resource.
Activity auto-linking
The Activity Auto-linking filter can automatically convert the name of any activity in the text of your course into a link.
Tip: Type the name of the activity exactly as it is titled in a text area of your course (e.g. label, book, assignment description, forum description or post, page, etc.). Note: The names must match exactly
Example:
In this example, you will notice that the activity name has now became a link as shown in the images below.

Sample output

Note: The auto-linking will not work for any activity that is currently hidden. It will only appear after the activity has been made available. It will work with activities that are available but not shown on the main page.
Book Chapter auto-linking
The Book Chapter Auto-linking filter will automatically convert exact matches for the name of any book chapter appearing within the text of your course into a link.
Tip: Type the name of the activity exactly as it is titled in a text area of your course (e.g. label, book, assignment description, forum description or post, page, etc.). Note: The names must match exactly.
Example:
In this example, you will notice that the book chapter name has now became a link as shown in the images below.

Sample output


Note: The auto-linking will not work for any book chapter that is currently hidden. It will only appear after the book chapter has been made available.
Glossary auto-linking
If you are using a Glossary in your course, you can turn on the Glossary Auto-linking filter to have the glossary entry linked to any included term in the course. Hovering your mouse over the term will pop up the glossary entry and provide a clickable link to navigate to that entry in the glossary.
This is useful for a few reasons:
- If there are numerous terms in the course that may be new or difficult for students, they can easily find the explanation
- Additional information can be provided for terms that are not explicitly covered in the course but are useful
- There is no need to manually add links to explanations of specific terms
Enabling Glossary filter video reference provided by Moodle
Example:
In this example we have created a link to glossary key adjective in our glossary acvity within the course page. If you don't know how to create a glossary items please check here how to add an entry.

Sample output
When you click the adjective word in the sample below, it will a popup window about the word adjective as shown in the image below.

Note: That turning this on for the entire course will also turn it on in the Quiz tool. If you do not wish it to function in the quiz tool but turn it on for the whole course, you will need to turn it off in the Quiz tool or anywhere else it should not be linking. This is why it is recommended to turn it on for particular activities and resources rather than applying it to the whole course.
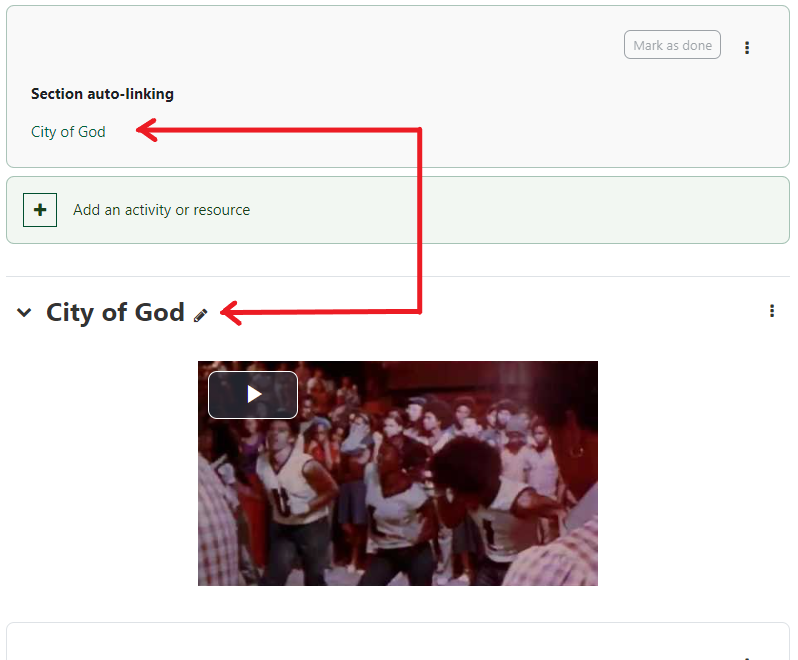
Section auto-linking
The Section Auto-linking filter will automatically convert exact matches for the name of any section appearing within the text of your course into a link to that section.
Tip: Type the name of the section exactly as it is titled in a text area of your course (e.g. label, book, assignment description, forum description or post, page, etc). Note: The names must match exactly so it is good to think carefully when you name your sections.
Example:
In this example, you will notice that the section name has now became a link as shown in the images below.

Sample output
Note: The auto-linking will not work for any section that is currently hidden. It will only appear after the section has been made available.
Convert URLs into links
As the name suggests, the Convert URLs into links and images filter converts a URL such as http://moodle.org into a clickable link http://moodle.org. In addition it can replace image URLs with images.
Any valid url that you have written in your course page sections will automatically be converted into URL links without you creating a link for them.
Example:
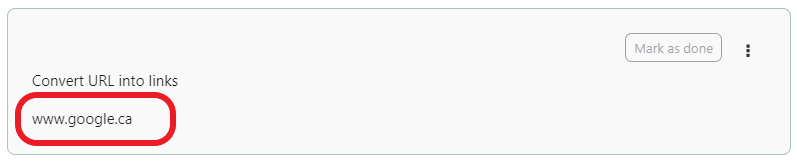
This URL links will be converted to clickable links as shown in the image below.

- Visit the Moodle docs for the Convert URLs into links Plugin Filter resource.
Poodll
Poodll has an audio recording feature available within the Atto html editor. The Poodll filter converts links to mp3 recordings into players that then play audio from right within the course without having to download the media.
What is Poodll Filter? video reference provided by Poodll.
Example:
In this example we will be using record audio button in the text editor, this will open audio poodll recorder in a popup window. Once the filter is turned on and properly configured it should display poodle audio player that will let you play the recorded audio in the course page.

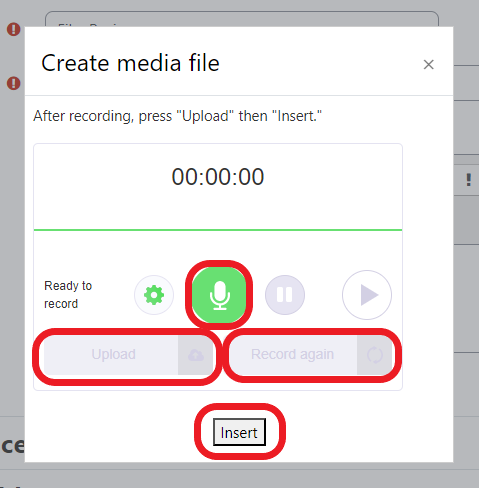
Sample output
- Display view if poodll filter is turned off or disabled

- Display view if poodll filter poodll filter is turned on or enabled

- Visit the Poodll Moddle Docs for the Poodll Plugin Filter resource.
Multimedia
The Multimedia Filter allows you to embed multimedia items in your course without the need for additional code.
The multimedia filter may be used
- To automatically embed YouTube videos by just pasting in the link
- To automatically embed mp3 audio files in context by linking to an audio file on the web or uploading the file to UR Courses and providing a link to the file
Example:
In this example we will be using YouTube URL link, click the Multimedia button in the text editor as shown on the images below.

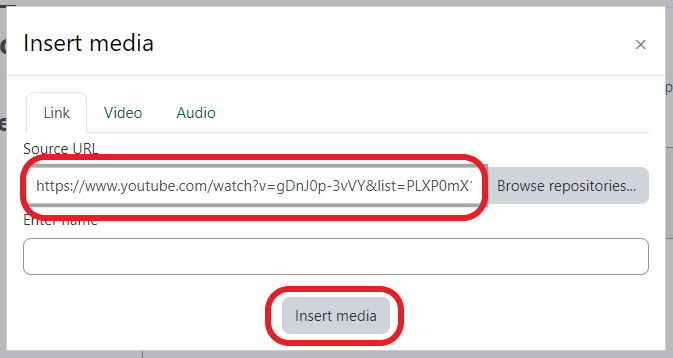
Sample output
-
Visit the Moodle 4.5 Docs for the Multimedia Plugin Filter resource.
Display H5P
H5P is a plugin for existing publishing systems that enables the system to create interactive content like Interactive Videos, Presentations, Games, Quizzes and more!
Note: Display H5P in UR Courses is enabled by default. It is recommended that this filter be left enabled to prevent any issues displaying H5P content within the course.
Here is a documentation referrence provided by h5p.org
- Please visit the H5P Instructor guides for the H5P Plugin Filter resource.
- The H5P Instructor guides will provide more detailed information on how to use and setup H5P in UR Courses
Media Collection
Allows you to have carousels of a media gallery or galleries displayed in your course in labels and such.
Sample output:
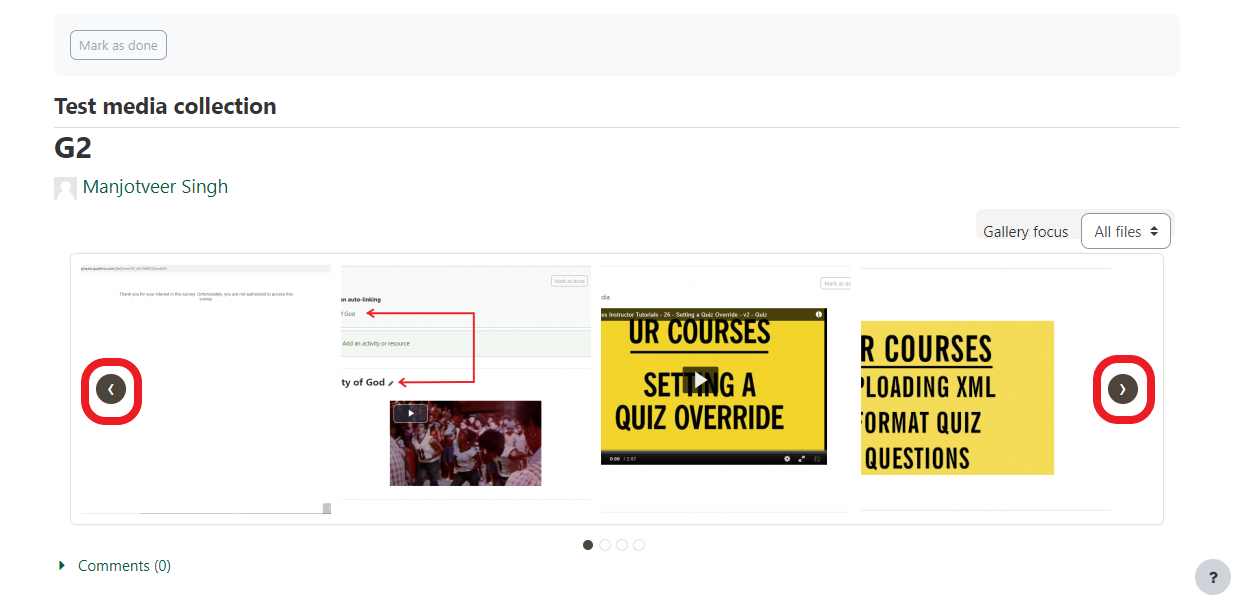
Note: For the carousel to be fully functional, your theme needs to have jQuery included on the page(s) the filter displays the carousels on. If you don't have jQuery loaded, the carousel will still appear, and clicking the images will still take you to the gallery.
- Please Visit the Media Collection Instructor guides for the Media collection Plugin Filter resource.
- The Media Collection Instructor guides will provide more detailed information on how to use and setup media collection in UR Courses
MathType by WIRIS
Wiris Quizzes is an assessment tool with computer-based grading that enhances the usual standard question types in UR Courses with mathematical and scientific functionalities.
Tip: if the Mathtype by WIRIS filter is not enabled and not configured correctly Mathtype and Chemtype button will not be visible in the text editor. And the equation or formulas will not display correctlly in text editor.

- Please visit the UR Courses Instructor WIRIS guides for the WIRIS Plugin Filter resource.
- The Wiris Instructor guides will provide more detailed information on how to use and setup wiris in UR Courses
Example:
Once the filter is turned on and properly configured you should be able to see the Mathtype and Chemtype button and the equation in the text editor should now be displaying correctly as shown in the images below.


Sample output
TeX notation
The TeX Filter is a core Moodle filter intended to allow one to convert tex expressions into GIF, PNG or SVG images. The filter relies on some additional binaries to accomplish this for expressions contained between appropriate tokens. Where these binaries are not available, Moodle provides for a fallback through the use of Mimetex. Versions of MimeTex for Linux (glib2.3 32bit), Windows, Mac OS X and FreeBSD are included in the Moodle distribution. There are other technologies available for displaying Tex (see the section on Mathematics tools for a discussion).
Note: being based on binaries it requires the availability of three PHP program execution functions: exec, shell_exec and system.
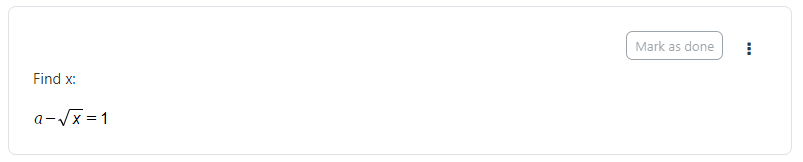
Example:
In this example, once the filter is turned on and properly configured you can make use of it by including a TeX expression delimited by double-dollar signs in the text editor.

Sample output

- Visit the Moodle Docs for the TeX notation Plugin Filter resource.
MathJax
MathJax is an open-source JavaScript display engine for LaTeX, MathML, and AsciiMath notation.
It requires no setup on the part of the user (no plugins to download or software to install), so the page author can write web documents that include mathematics and be confident that users will be able to view it.
Note: If the MathJax filter is used instead of the Tex filter for rendering equations, the drag math (plugin for the TinyMCE text editor) setting require tex should be set to off. If this is not done, TinyMCE users will not be able to use any equation editor.
Example:
In UR Courses if the MathJax filter is enabled, the equation editor button will appear on the text editor.
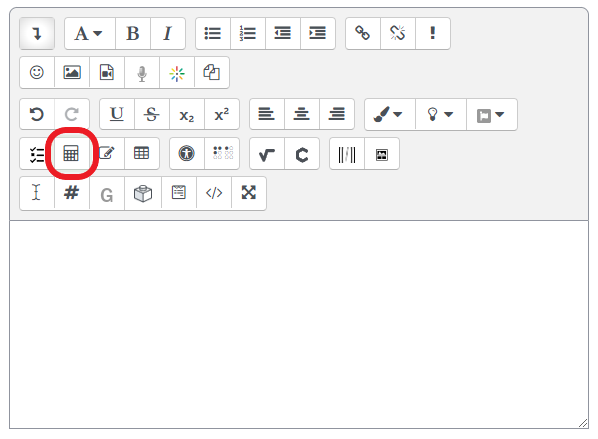
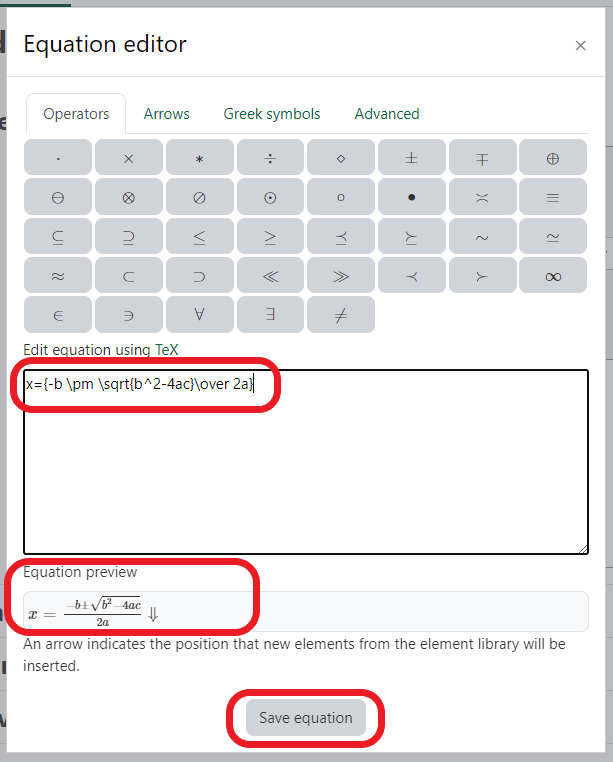
Sample ouput

- Visit the Moodle Docs for the MathJax Plugin Filter resource.
- MathJax Document Reference
FilterCodes
When enabled, the FilterCodes filter allows you to easily customize and personalize course content using numerous plain text tags that can be used throughout the course.
List of FilterCode tags
Profile Information
{firstname} : Display the user's first name.
{surname} or {lastname} : Display the user's surname (family/last name).
{fullname} : Display the user's first name and surname.
{alternatename} : Display the user's alternate name. If blank, will display user's first name instead.
{city} : Display the user's city.
{country} : Display the user's country.
{timezone} : Display the user's preferred timezone.
{preferredlanguage} : Display the user's preferred language in that language. Because of this, it will be encapulated in an HTML span tag with an appropriately set lang attribute.
{email} : Display the user's email address.
{userid} or %7Buserid%7D : Display the user's Moodle ID.
{idnumber} : Display the user's idnumber from their profile.
{username} : Display the user's username.
{userdescription} : Display the user's description.
{webpage} : Display the user's webpage as seen in their profile.
{institution} : Display the name of the institution from the user's profile.
{department} : Display the name of the department from the user's profile.
{userpictureurl X} : Display the user's profile picture URL. X indicates the size and can be sm (small), md (medium) or lg (large). If the user does not have a profile picture or is logged out, the default faceless profile photo URL will be shown instead.
{userpictureimg X} : Generates an HTML tag containing the user's profile picture. X indicates the size and can be sm (small), md (medium) or lg (large). If the user does not have profile picture or is logged out, the default faceless profile photo will be used instead.
{profile_field_shortname} : Display's custom profile field. Replace "shortname" with the shortname of a custom profile field all in lowercase. NOTE: Will not display if custom profile field's settings are set to Not Visible.
{profilefullname}: Similar to {fullname} except that it displays a profile owner's name when placed on the Profile page.
{firstaccessdate dateTimeFormat} : Date that the user first accessd the site. For information on the optional dateTimeFormat format, see Supported dateTimeFormats Formats in the FAQ section of the documentation.
{lastlogin dateTimeFormat} : Date/Time that you last logged into the site.
UI Elements
{courseprogress} : (ALPHA) Displays course progress status in words. Only works within a course.
{courseprogresspercent}: Displays course progress percentage as a number without a percentage symbol. Only works within a course.
{courseprogressbar} : (ALPHA) Displays course progress status as a status bar. Only works within a course.
{button url} : Display link as a button.
{hr} : Display a horizontal rule line.
{label backgroundtype}{/label} : Display text over a colour background.
{markborder}{/markborder} : Surrounds text with a red dashed border.
{marktext}{/marktext} : Highlight text using HTML5's mark tag.
{showmore}{/showmore} : (ALPHA) Toggle showing content between opening and closing more tags.
For use in courses
{coursename} : Display the full name of the current course or the site name if not in a course.
{courseshortname} : Display the short name of the current course or the site short name if not in a course.
{coursestartdate dateTimeFormat} : Course start date. Will display "Open event" if there is no start date. For information on the optional dateTimeFormat format, see Supported dateTimeFormats Formats in the FAQ section of the documentation.
{courseenddate dateTimeFormat} : Course end date. Will display "Open event" if there is no end date. For information on the optional dateTimeFormat format, see Supported dateTimeFormats Formats in the FAQ section of the documentation.
{coursecompletiondate dateTimeFormat} : Course completion date. If not completed, will display "Not completed". Will also detect if completion is not enabled. For information on the optional dateTimeFormat format, see Supported dateTimeFormats Formats in the FAQ section of the documentation.
{courseprogress}: (ALPHA) Displays course progress status in words.
{courseprogressbar}: (ALPHA) Displays course progress status as a status bar.
{course_fields}: Displays the custom course fields. NOTE: Respects a custom course field's Visible To setting.
{course_field_shortname} : Display's custom course field. Replace "shortname" with the shortname of a custom course field all in lowercase. NOTE: Respects a custom course field's Visible To setting.
{coursesummary} : Display's the course summary. If placed in a site page, displays the site summary.
{courseimage} : Display's the course image.
{courseparticipantcount} : Displays the number of students enrolled in the current course.
{courseid} or %7Bcourseid%7D : Display a course's ID.
{coursecontextid}: Display a course's context ID.
%7Bcoursecontextid%7D : Display a course's context ID - for use in URLs. Only for use in course activity modules.
{courseidnumber} : Display a course's ID number.
{sectionid} : Display the section ID (not to be confused with the section number).
{sectionname : Display the section name in which the activity is located.
{coursecontacts} : (ALPHA) List of course teachers with optional link to their profile, email address or Moodle messaging.
{coursegradepercent} : Display the current accumulated course gra of the student
{mygroups} : Display a list of groups to which you are a member.
Content
{note}content{/note} : Enables you to include a note which will not be displayed.
{help}content{/help} : Enables you to create popup help icons just like Moodle does.
{info}content{/info} : Enables you to create popup help icons just like the popup Help icons but with an "i" information icon.
{alert style}content{/alert}: (ALPHA) Creates an alert box containing the specified content. You can change the style by specifying an optional parameter. Example: {alert primary} or {alert success} . See List of styles.
{highlight}{/highlight} : Highlight text. NOTE: Must only be used within a paragraph.
{scrape url="..." tag="..." class="..." id="..." code="..."} : Scrapes the content from another web page. Must be enabled in FilterCodes settings.
{getstring:component_name}stringidentifier{/getstring} or {getstring}stringidentifier{/getstring}: Display a Moodle language string in the current language. If no component name (plugin) is specified, will default to "moodle".
{fa/fas/far/fal fa-...} : Insert FontAwesome icon. Note: FontAwesome Font/CSS must be loaded as part of your theme.
{glyphicon glyphicon-...} : Insert Glyphicons icon. Note: Glyphicons Font/CSS must be loaded as part of your theme.
- Visit the FilterCodes Moodle Docs for the FilterCodes filter.
Generico
Generico is a simple templating filter, that allows you to set up text and code snippet templates for use in Moodle text areas. It allows an unlimited number of templates to be registered. When Moodle encounters a Generico filter string it will use the data in the filter string to fill out the template, and insert it into the page.
It is useful for ad-hoc template purposes where writing a new plugin would be overkill, or just for re-using common pieces of text. It can be used to centralise and manage the embedding of iframe content from video hosting services, and educational app providers.
In the latest version there are approx. 20 presets from which you can make templates. They include templates for an info box, tabset, accordion, lightbox and image gallery. And there is a companion Atto editor plugin for Generico. The combination of these two features make it possible to use Generico like the Wordpress shortcode plugins.
Sample Generico Video reference provided by poodll.
Intro to Generico: This video discussed how generico filter is use in a course page
Generico basic setup: This video discussed the basic setup of generico in a course page
- Visit the Generico Moodle Docs for the Generico filter.
Display emoticons as images
The filter Display emoticons as images converts emoticon (smiley) characters into images.
Emoticons may be added using the button attoemoticon.png Insert emoticon in the Text editor or by typing the emoticon characters e.g. :-).
- Visit the Moodle docs for the Display emoticons as images Plugin Filter resource.
Samples of emoticons you can used in UR Courses:
| Emoticons | Meaning | Characters to type |
|---|---|---|
 |
smiley | :-) |
 |
biggrin | :-D |
 |
wink | ;-D |
 |
mixed | :-/ |
 |
thoughtful | V-, |
 |
tongueout | :-P |
 |
cool | B-) |
 |
approve | ^-) |
 |
wideeyes | 8-) |
 |
clown | ;o) |
 |
sad | :-( |
 |
shy | 8-. |
 |
surprise | 8-o |
 |
blackeye | P-| |
 |
angry | (grr) |
 |
dead | xx-P |
 |
sleepy | |-. |
 |
evil | }-] |
Database auto-linking
Database auto-linking is a site Filter that will create links to a database entry where the name/title (word or phrase) of the database entry is used within the same course in which the database is located. This includes forum postings, pages, labels etc.
- Visit the Moodle docs for the Database auto linking Plugin Filter resource.
Algebra notation
Unfortunately this filter is no longer being updated we recommend not enabling at the moment.
UR Courses has an "algebra filter" which can display mathematical expressions as if they were typeset.
Note: Although the Algebra filter is included in UR Courses, it is recommended that you use the MathJax filter for writing Mathematical equations and expressions.
- Visit the Moodle Docs for the Algebra notation Plugin Filter resource.