Media Collection Activities and Resources
A media collection is a tool that allows you to display image, audio, video and YouTube videos into gallery mode to your course page. Wherein students and teachers can add their comments on the media items.
If enabled, this activity allows instructors/teachers to create a space for students to submit. The galleries themselves can be used as part of gradeable assignments when used in conjuction with the media collection submission module.
Uploaded content can be displayed in either a carousel or grid format as thumbnails.
How to add Media collection to your course page
To create a media collection activity in your course page.
- Turn Edit Mode on.
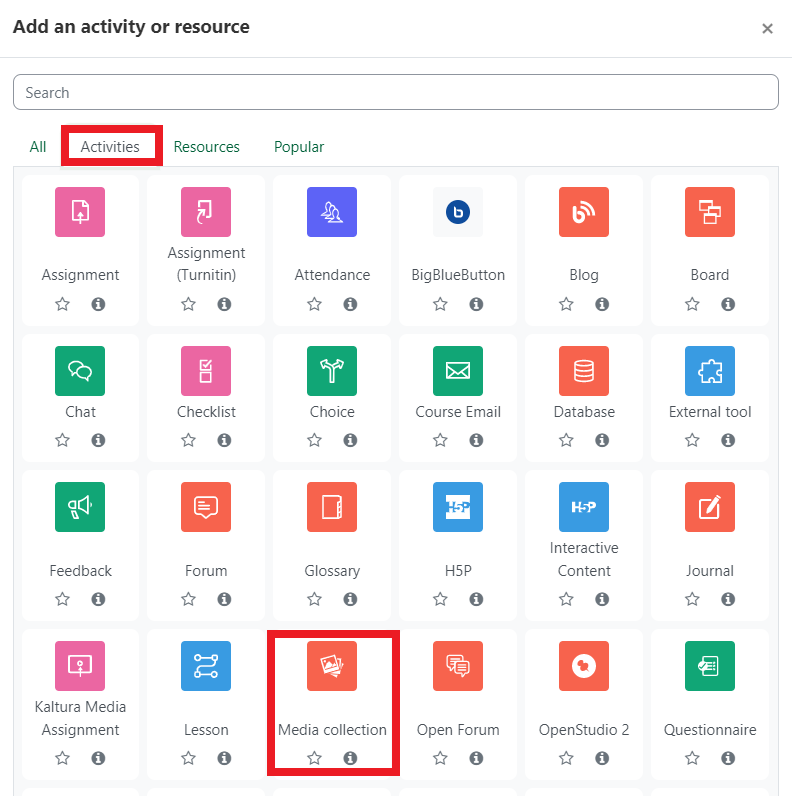
- Go to the section that you want to add the media collection activity, click Add an activity and resource button.
- Add an activity or resource window will popup, select Activities and Media collection as shown in the image below.
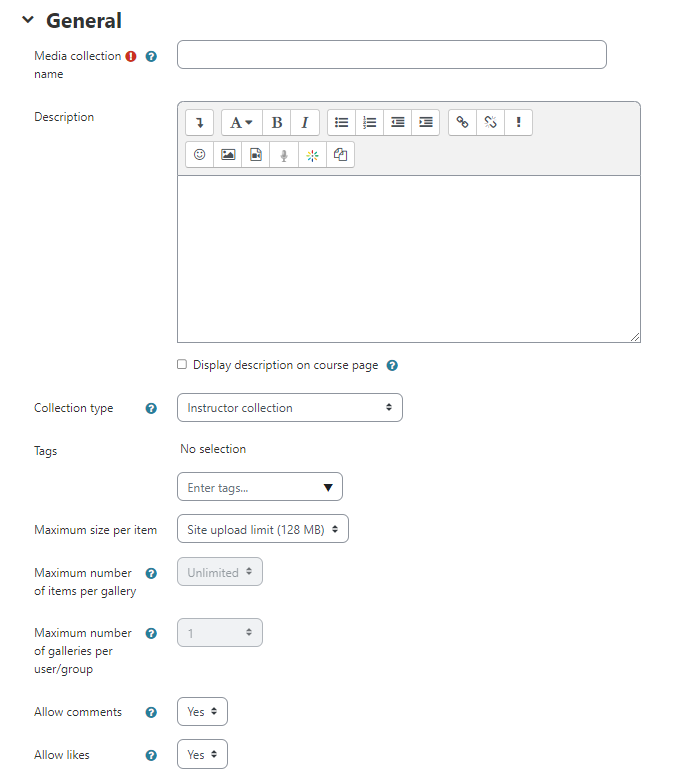
- On the Adding a new Media collection page fill up the following:
- General Section: Fill in the required field and choose the other options that you like to be added in your activity setup
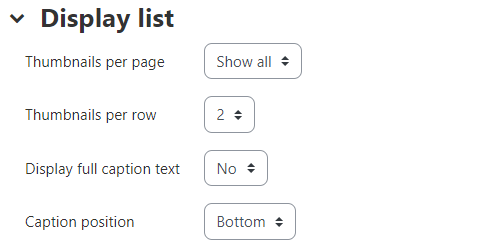
- Display list Section: Select how you want the collection thumbnails arranged, and whether where you want captions to display with each item.
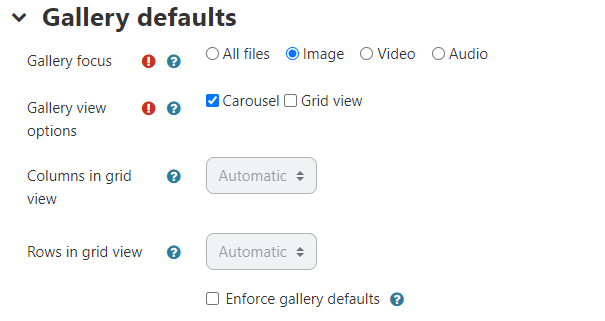
- Gallery defaults Section: In the Gallery defaults section: Select the default Gallery focus. This option allows you to define what types of media are displayed by default. Students will have a dropdown to change gallery focus when viewing a gallery. At Gallery view options, select what view mode (Carousel and/or Grid) are available when creating a gallery. If you select Grid view, specify how many Columns and Rows you want the grid to contain. Select whether you want to Enforce gallery defaults.
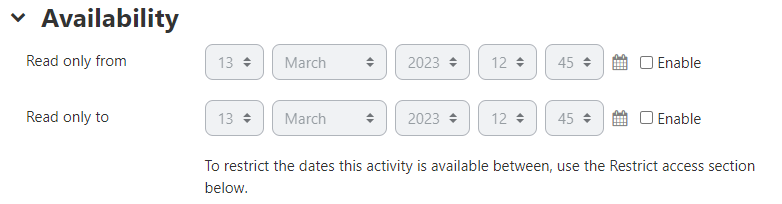
- Availability Section: Read only from if this is Enabled, the students will be able to start viewing the activity only from the specified date. Read only to if this is Enabled, The students will be able to view this activity only until the specified date.
- Complete the remaining sections of the page as desired, then click Save and display.
Add Gallery within this collection
To create a media collection activity in your course page.
-
Click Add gallery button.

-
Fill up the following:
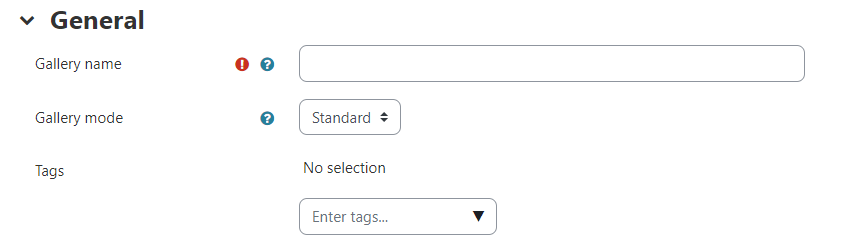
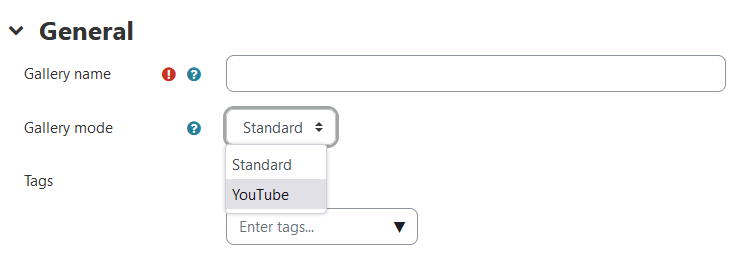
- General Section: Enter a Gallery name, a Gallery mode, and tags to organize your gallery.
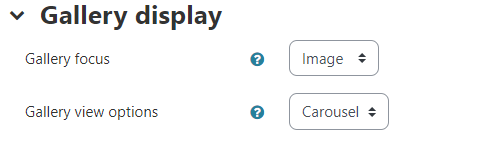
- Gallery display Section: Make selections regarding this individual Gallery display.
- Availability Section: If Visible to instructors only after is Enabled it will define the gallery as visible to course instructors after the specified date. This can be useful for allowing instructors to access before all other users. Course managers with appropriate permissions will always be able to see the gallery. If Visible to everyone in the course after is Enabled it will define the gallery as visible to other users after the specified date. Course managers with appropriate permissions will always be able to see the gallery..

- General Section: Enter a Gallery name, a Gallery mode, and tags to organize your gallery.
-
Click Save changes.
Adding items into your Gallery
You can upload single item into a gallery or add items in bulk.
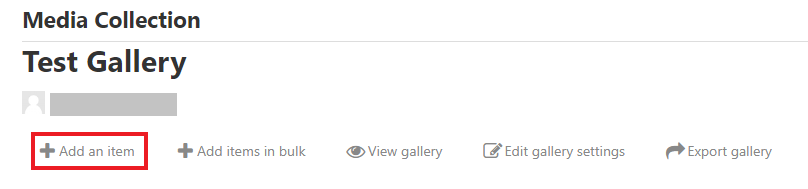
To add an item to a gallery:
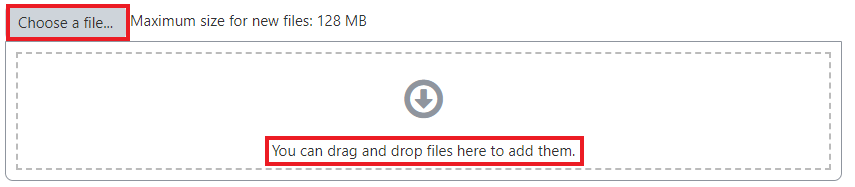
- Click Add an item button.
- On the gallery add item section Fill in the settings you wish and go to the content section option to add an Item.
- You either drag and drop item to the content box
- Or click choose a file button
Note: You can select an image to use as the thumbnail in the gallery for this item. If you don't supply one, one is generated for you from the uploaded resource (for images) or a file type icon used (for other files).
- Click Save Changes.
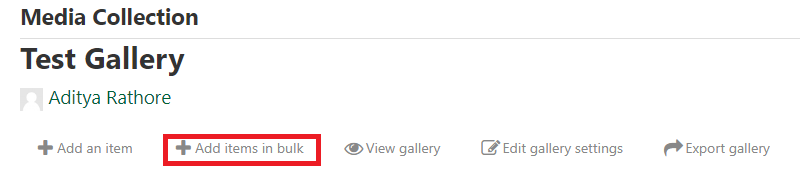
To add items in bulk to a gallery:
- Click Add items in bulk button.
- Here you can upload a zip archive full of media. Every file inside the zip archive will be added as an item in the gallery, so make sure only files you want uploaded are in the archive before submitting it. Folders inside the archive are ignored.
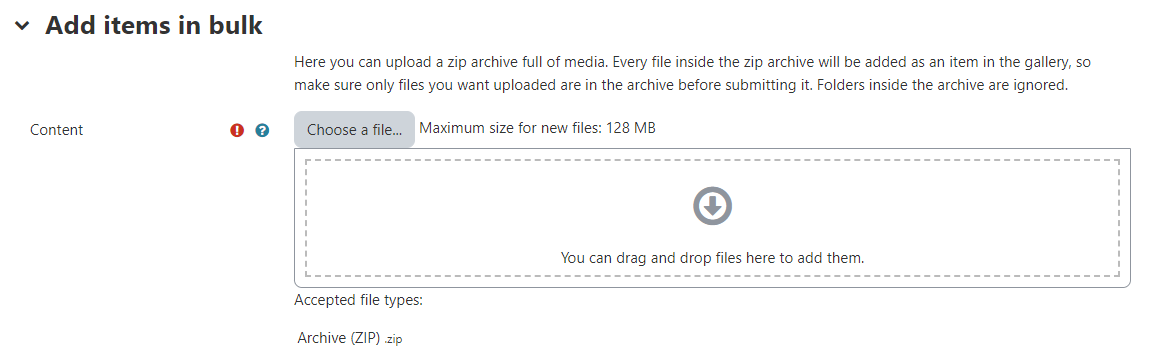
- You either drag and drop zipfolder to the content box
- Or click choose a file button to upload the zip folder

- Complete the remaining sections of the page as desired, then click Submit.
How to add YouTube gallery
This type of gallery allows users to search for existing videos in YouTube and organize them within a gallery. Users cannot upload other media items on YouTube gallery.
To add an Youtube gallery:
- Click Add gallery button.

- Enter a Gallery name.
- On the Gallery mode option choose Youtube on the dropdown option.
Note: Selecting YouTube gallery mode will change the gallery focus into Video and Carousel mode on the display settings
- Click Save changes.
To add items on a YouTube gallery:
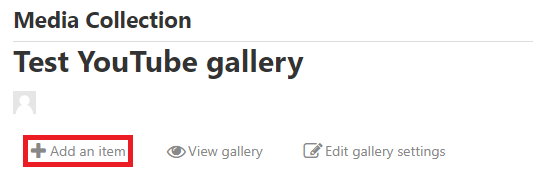
- Click Add an item button.
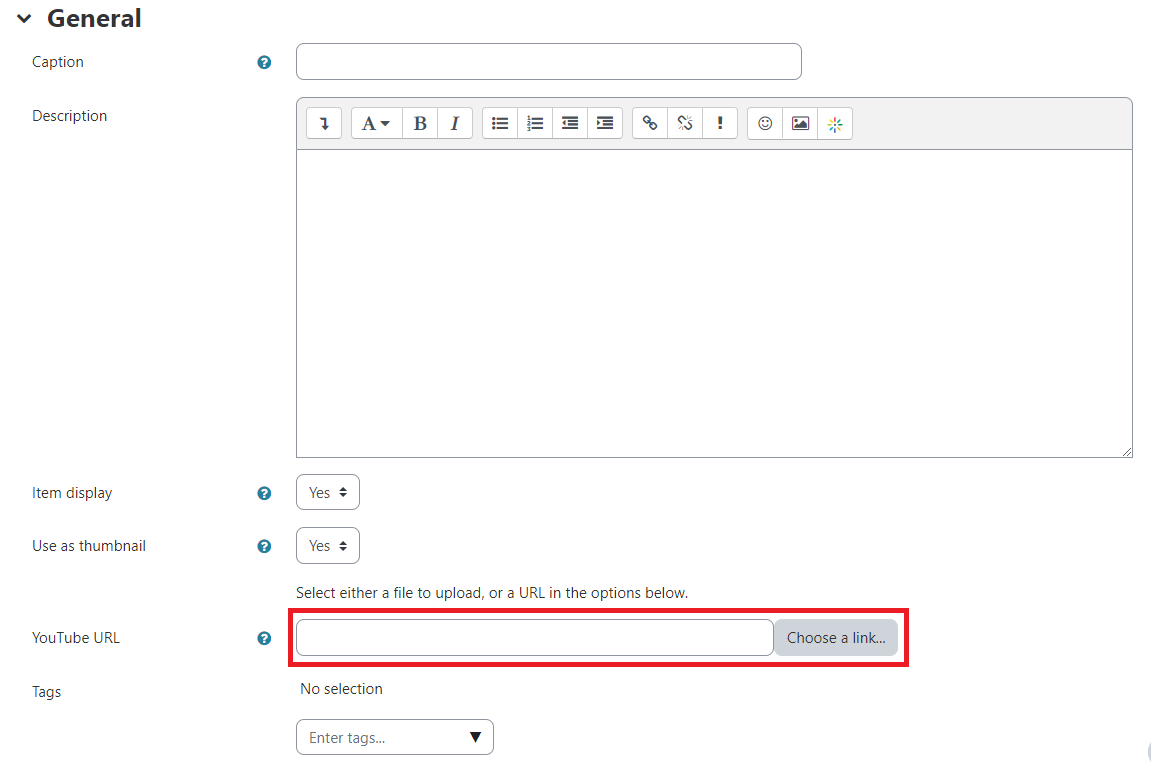
- On the gallery youtube item section fill in the forms and go to the YouTube URL section option then copy and paste the YouTube URL.
- Click Save changes button to save the item to the YouTube gallery.
Editing and deleting items
To delete a media collection:
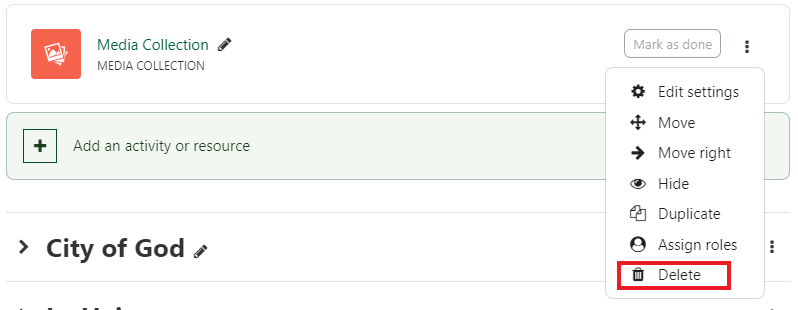
- On the course home page, switch the Edit mode and then go to the media collection item.
- Click three dots to show the dropdown options.
- On the dropdown options click Delete button.
Note: Deleting a collection, deletes all galleries and media items associated with it. Any other courses or websites that have linked to the collection, gallery and the items will no longer be available.
To edit a gallery:
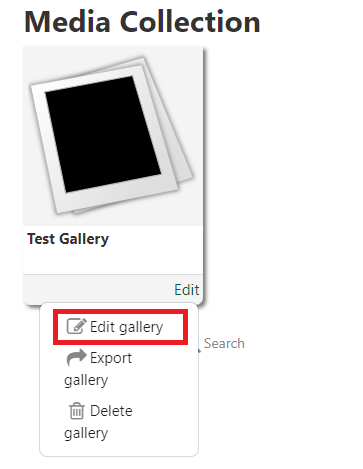
- Go to the Gallery item.
- Click edit button to show the dropdown options.
- On the dropdown options click Edit gallery button. Then repeat and follow instructions from Adding items into gallery section to save edited work.
To delete a gallery:
- Go to the Gallery item.
- Click edit button to show the dropdown options.
- On the dropdown options click Delete gallery button.
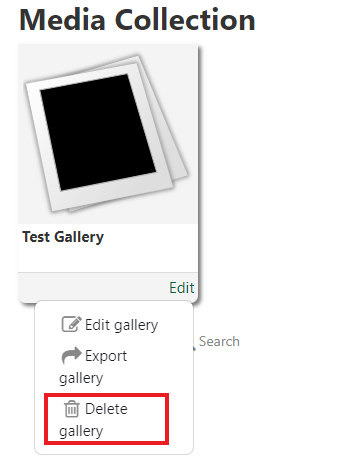
Note: Deleting a gallery, deletes all media items associated with it. Any other courses or websites that have linked to the gallery or items within it will no longer have access to the gallery and the media items.
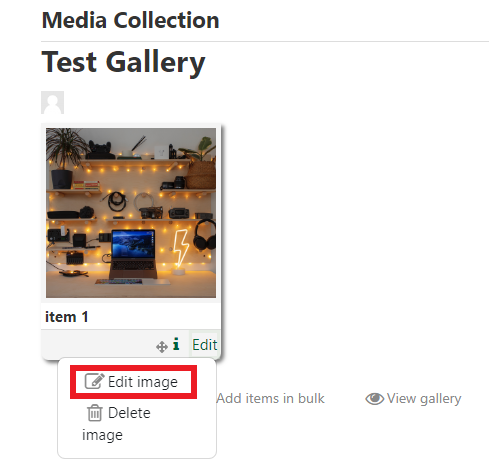
To edit an item in the gallery:
- Go to the Gallery item.
- Click Edit button to show the dropdown options.
- On the dropdown options click Edit image button. Then repeat and follow instructions from Add Gallery within this collection section to save edited work.
To delete an item in the gallery:
- Go to the Gallery item.
- Click Edit button to show the dropdown options.
- On the dropdown options click Delete image button.
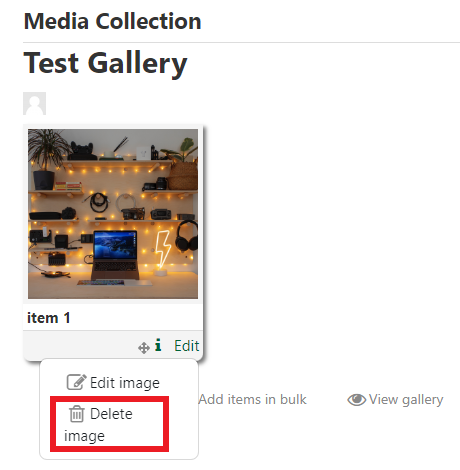
Note: Deleting an item deletes the item from the gallery. Any other courses or websites that have linked to the item will no longer have access to the item.