 Zoom Meeting activity

Zoom Meetings make it possible to add web conference meetings to your course using software supported by Information Services at the University of Regina.
If you haven't done so already, visit https://uregina-ca.zoom.us/signup to create a free Zoom account using your @uregina.ca email address. Be sure to download the Zoom Client for Meetings as well. Zoom is supported on desktop, tablet, and mobile devices.
The only limitation for free accounts is meeting duration and number of users allowed in the meeting.
Your account will become licensed, which increases the number of users and meeting duration time, once you have successfully created a Zoom meeting by using the plugin on UR Courses, or by contacting Service.Desk@uregina.ca.
Using Zoom meetings within your course
To use Zoom meetings within your course, use one of the methods outlined below.
- Add the Zoom meeting activity to your course The Zoom meeting activity let's you create Zoom meetings right from within your course.
- Add a Zoom meeting to your course manually Add a Zoom meeting to your course by inserting a link for students to access a Zoom meeting that you have already created.
- Add Zoom meeting recordings to your course Add your recorded Zoom meetings to your course.
- Make screencasts with Zoom Create screen recordings for use in your course.
Video Tutorial Playlist
Sit back and watch our short clips that explain how to do common tasks within UR Courses.
-

Using Zoom meetings
- For further information on using the Zoom software, please refer to their support documentation at https://support.zoom.us.
Using the Zoom activity in UR Courses
Add the Zoom activity to your course to create a link for students to access a Zoom meeting from within UR Courses. The activity also creates an entry in the course calendar for each scheduled meeting. The meeting can be positioned and configured much like any other activity or resource within your course. Meetings created with the activity also appear within the Zoom desktop client and website, as they are all connected.
NOTE:
-
To use the Zoom activity within UR Courses as an instructor, you will need to create a free @uregina.ca Zoom account by visiting https://uregina-ca.zoom.us/signup.
-
Once you successfully create your account, it will become licensed (able to host longer meetings with more users), and then you can directly create a Zoom meeting using the activity on UR Courses.
To add a Zoom meeting to your course, follow these steps .
-
Go to the course you want to add the Zoom meeting to and turn on Edit Mode.
-
Click Add an activity or resource within the section where you'd like to provide a link to a Zoom meeting.

-
Select Zoom meeting from the menu.
-
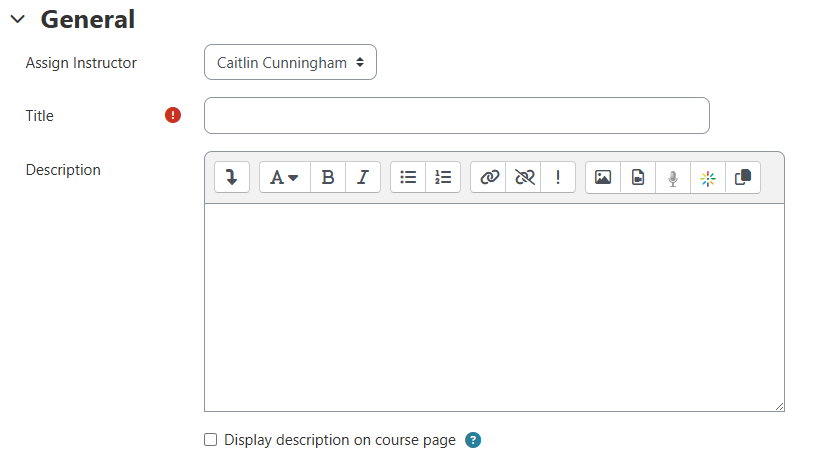
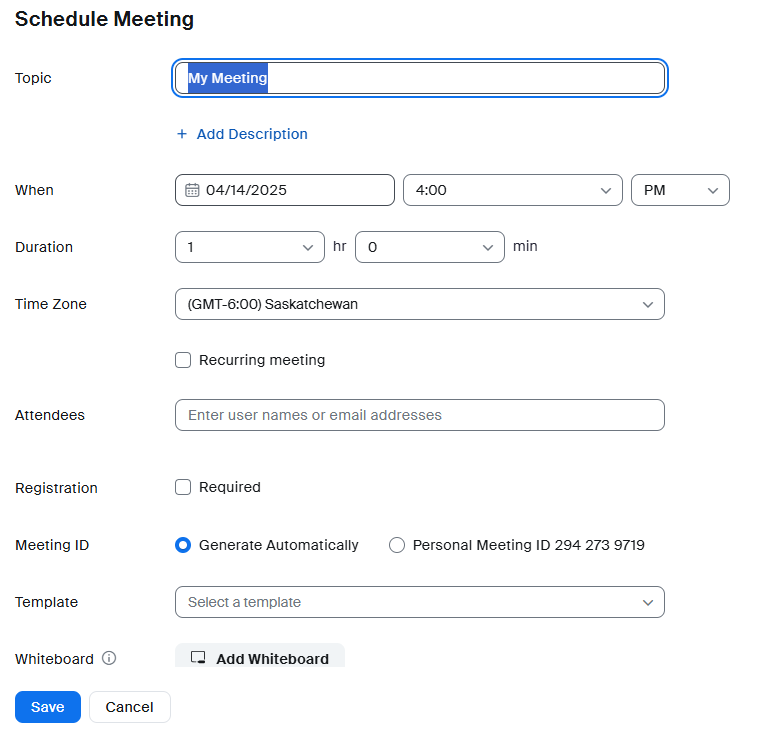
On the configuration screen, you must provide a title for the meeting. Adding a brief description will help students know what to expect for this meeting.
-
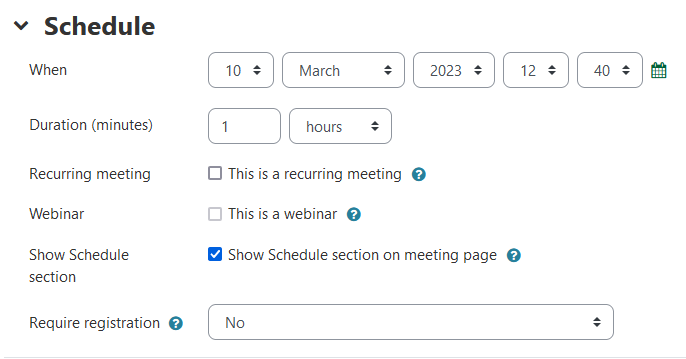
Enter a start date and time beside When for the meeting and a duration. If the meeting room is to be ongoing with no end date, select the Recurring option.
-
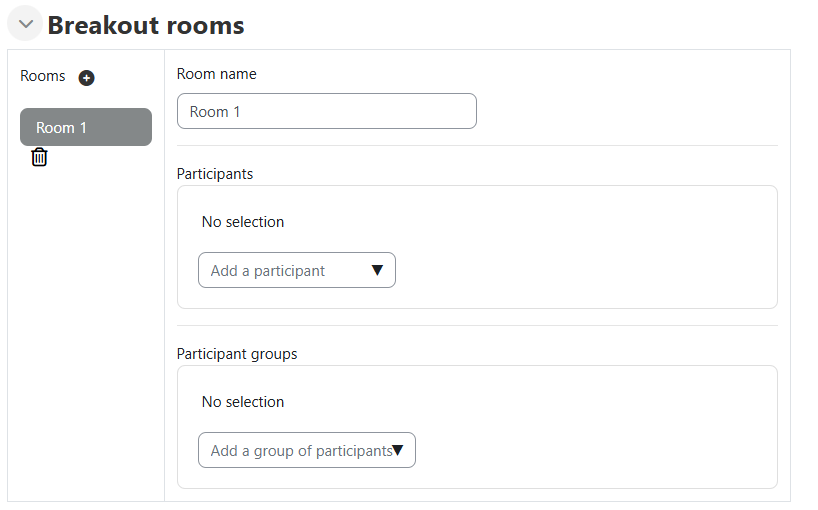
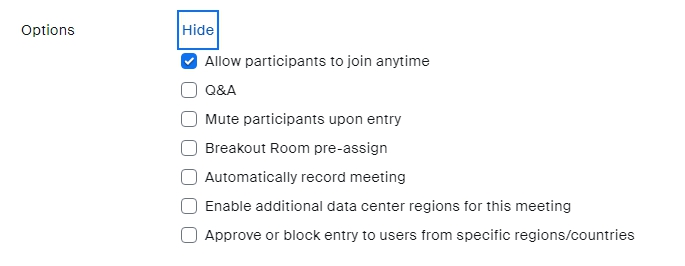
Add a Breakout Room and Participants for courses that require ongoing breakout rooms.
-
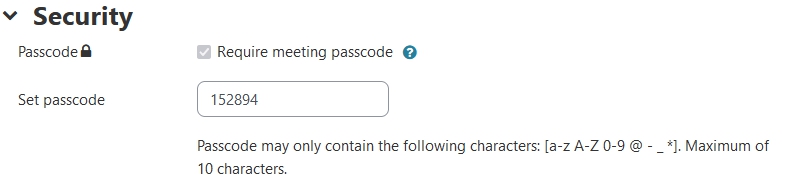
You can specify a password if you would like to further restrict access to the meeting. Typically only users with the link will be able to join.
-
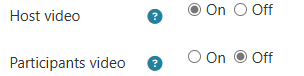
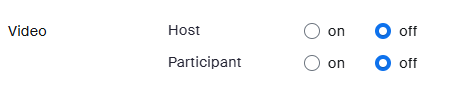
It is recommended to keep the host video on. If you intend for all participants to share their video, turn participants video on as well. In some cases, however, you may want to allow participants to decide on their own if they wish share their video, rather than starting it automatically, so you would leave the participants option turned off.
-
Within the Audio options, it is generally recommended to use the Computer audio option so that students do not incur any additional or unexpected phone charges.

-
Under Security:
- If you wish to create a meeting room for your students, or allow others to arrive early, then enable join before host

- If you wish to create a meeting room for your students, or allow others to arrive early, then enable join before host
-
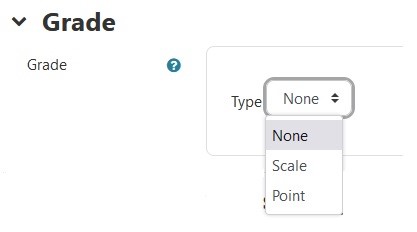
If you are going to use the Zoom meeting for a graded activity, you can enable grading by selecting a Grade Type from within the Grade section.
-
Continue to set any remaining settings as you would for any other activity.

- Click Save and return to course to see the meeting link on the course page.

- Clicking Save and display will show an overview of the meeting activity, which is what students will see when clicking the link from the main course page.
- Click Save and return to course to see the meeting link on the course page.
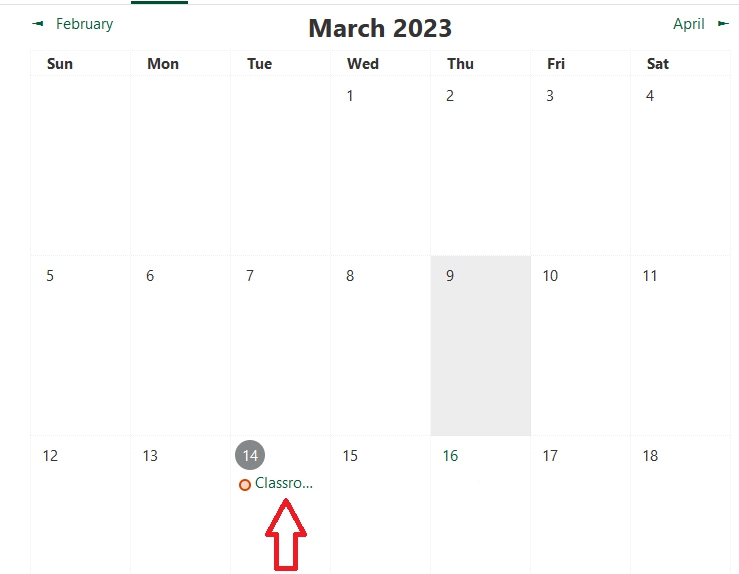
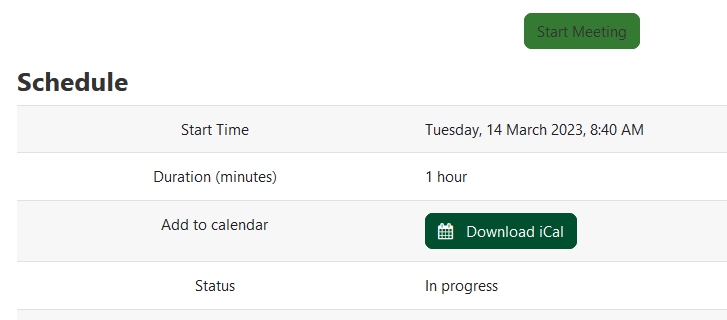
After saving the Zoom meeting activity, a calendar entry will be appear within the course calendar.
Once the meeting is about to begin, a Start Meeting button will appear on the activity page for both instructors and students. Clicking this button will open your Zoom client and prompt you to join the meeting.
Adding Zoom to your course manually
You can add links to Zoom meetings within your course by creating a meeting within the Zoom client or website. You can then copy and paste the meeting link into your course. For specific meeting dates, consider adding calendar entries to your course, or use the Zoom plugin to create your meetings, as the plugin will do this automatically.
To add a link to a Zoom meeting in your course, follow the steps outlined below.
- Start the Zoom client or login to the website and schedule a meeting.
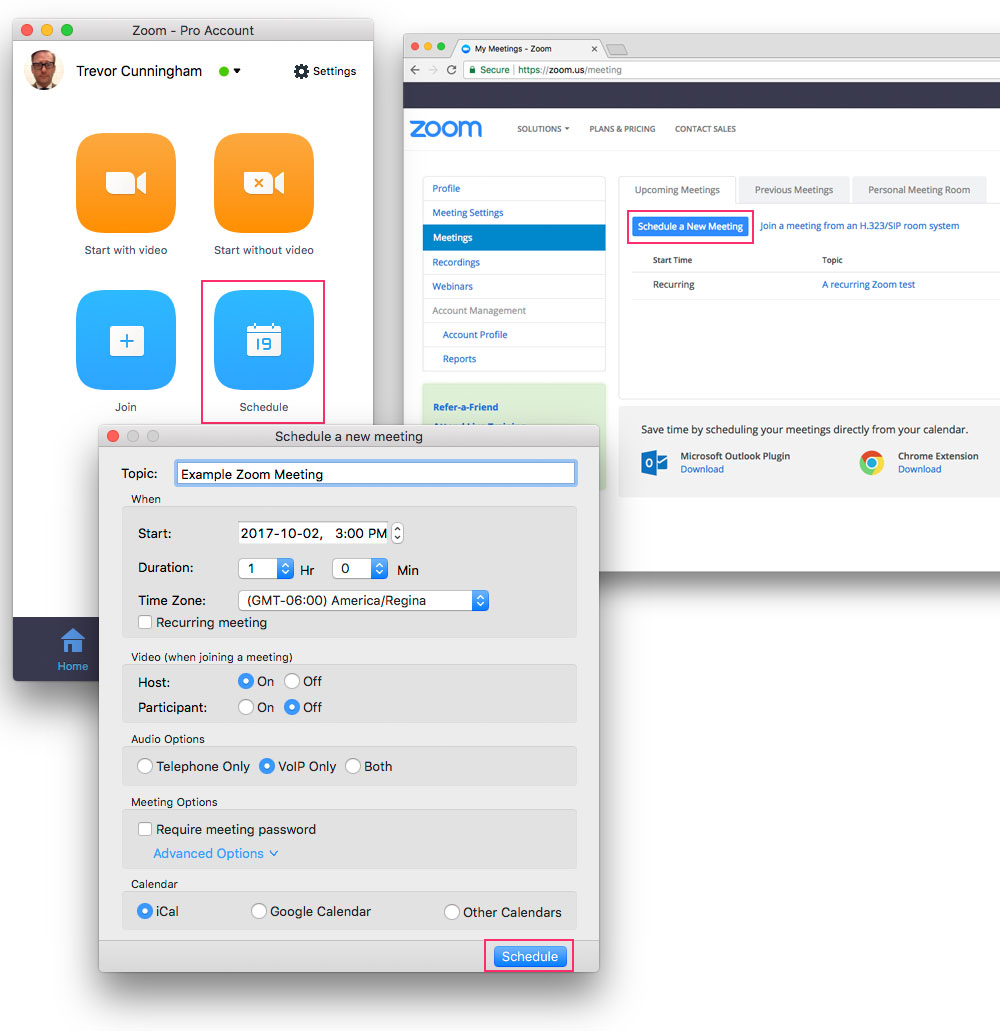
Enter a start date and time for the meeting, the duration, and whether or not it will be recurring.
-
Under the Video section, it is recommended to keep the host video on. If you intend for all participants to share their video, you turn participants video on as well. In some cases, however, you may want to allow participants to decide on their own if they wish share their video, rather than starting it automatically, so you would leave the participants option turned off.
-
Within the Audio section, it is recommended to use only the Computer Audio option so that students do not incur any additional or unexpected phone charges.

-
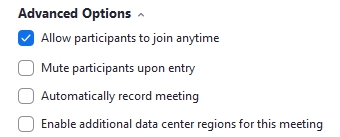
Under Meeting Options:
- You can specify a password if you would like to further restrict access to the meeting. Typically only users with the link will be able to join.
- If you wish to create a meeting room for your students, or allow others to arrive early, then enable allow participants to join anytime.
- If you intend to use the room for virtual office hours, you may wish to enable Use Personal Meeting ID as a convenience. You can learn more about the Personal Meeting ID on Zoom's support site.
- Consider whether or not you would like the meeting to be recorded automatically.
-
If using the Zoom desktop client, select the calendar format you prefer and click Schedule.
 If using the Zoom website, add any optional host addresses and click Save.
 To get the information required to share with students, you can look at the calendar invitation itself, or click on Meetings within the Zoom app or website. Once you have the meeting URL, it can be
Add Zoom recordings to your course
Zoom offers two recording options, either saving the recordings locally or within the Zoom cloud.
Local recording allows you to record meeting video and audio locally on your computer. The recorded file can then be uploaded to UR Courses using Zoom Video Management, or posted to other services such as Youtube, Vimeo, etc.
Cloud recording allows you to record meeting video (active speaker) and audio in the Zoom Cloud where the file can then be downloaded and/or streamed from a browser. In this case, the video is hosted with Zoom and you can place a link to the recording within your course. The link to this video could be shared to members outside of the course.
To upload a local recording within UR Courses, follow the steps outlined for uploading media and adding Zoom Video to your course.
To add a link to a recording on the Zoom cloud, simply create a link in the course with the URL to the Zoom recording.
Make your own videos and screencasts using Zoom
Zoom has the ability to record your screen and camera even when no one else is in the meeting, so it can be used to make simple screencasts such as slide presentations including audio/video narration, software demonstrations, etc. To record your screen, simply start a meeting without any other participants, start your video or share your screen, and start recording. Follow the steps below for a more detailed explanation.
If you are looking for more features when creating video presentations, please refer to our video recording software recommendations page.
To record a video using Zoom, follow the steps outlined below.
- Start Zoom and click New Meeting.

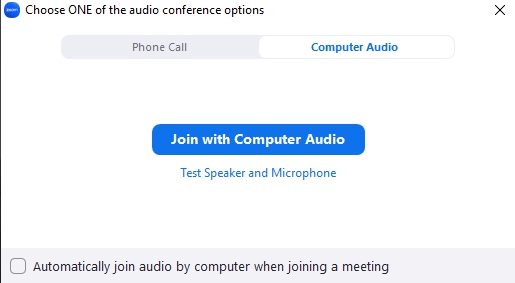
- You may be prompted to select from the audio conference options. For a recording you would typically want to select the Computer Audio tab, and then click the Join Audio Conference by Computer button.
- Once the meeting opens, make sure your video has been enabled on the menu bar at the bottom
- If recording a screencast, click the Share screen button in the bottom menu of the Zoom client and select the Desktop or application window to share and click Share Screen button.

- If recording a screencast, click the Share screen button in the bottom menu of the Zoom client and select the Desktop or application window to share and click Share Screen button.
- To start the recording, find the record button along the bottom menu of the Zoom client and select Record on this Computer or Record to the Cloud.
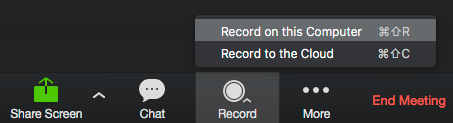
- Once recording begins, the record button will be replaced by a Pause/Stop Recording button. Once you have completed your video, click Stop Recording.

- Click End Meeting and the recording will begin processing.

Note: If the video was recorded locally on your computer, you will see a progress indicator as the recording is being converted and saved.
For further information on using the Zoom software, please refer to their support documentation at https://support.zoom.us or contact Service.Desk@uregina.ca.
Additional Features
Shared Screen - Collaborative Document Annotation in Zoom
Using a Whiteboard in Zoom
Breakout Rooms
Breakout rooms allow you to split your Zoom meeting into separate sessions (up to 50). The meeting host can split the participants into these separate sessions automatically or manually, or they can allow them to select and enter breakout sessions on their own. The host can switch between sessions at any time.
Breakout rooms can now be created in advance when using the Zoom activity in UR Courses. A new section in the Zoom activity settings allows you to create and modify break outbreakout rooms in advance of the meeting. Once created, you can assign students to specific breakout rooms before the meeting.
Uploading Video
To share or use Zoom recordings within UR Courses, follow the steps outlined for uploading Zoom Video.
Youtube or Vimeo
You can upload video to online services such as Youtube or Vimeo. You can also link to videos directly from outside UR Courses.
Do note that there are extra privacy concerns when using a service such as Youtube or Vimeo. With Youtube you can’t easily restrict access to a video, but you can make it Unlisted when you upload the video. An Unlisted video means that the video won’t show up in search results or in your channel, so it’s pretty hard to find if you don’t have the link to the video, but this is not security in and of itself. You can make a video Private on Youtube, but to use this you’ll need to manually share the video by entering the email addresses of anyone you want to share the video with – if you have a large class this is going to time consuming and error-prone.
UR Courses Meeting Expired
Zoom meetings in UR Courses when it is not used are going to expired.
A non-recurring meeting ID will expire in 30 days after the scheduled date. If you restart the same meeting ID within those 30 days, it will remain valid for another 30 days. You can restart the same meeting ID as many times as you would like before it expires.
A recurring meeting ID will expire in 365 days after the meeting is started on the last occurrence. You can re-use the meeting ID for future occurrences. Scheduled meetings can be started at any time before the scheduled time. The links will not expire or become invalid unless it is past the 30-day period for a non-recurring meeting, has not been used for over 365 days for a recurring meeting, or has been deleted from your Zoom account. An instant meeting link will expire as soon as the meeting is over.
When a meeting is Expired
- In UR Courses if a meeting is expired a notification to recreate or delete a meeting will be visible at the bottom of the Zoom activity or in the quiz activity settings as shown in the image below.

Zoom activity settings
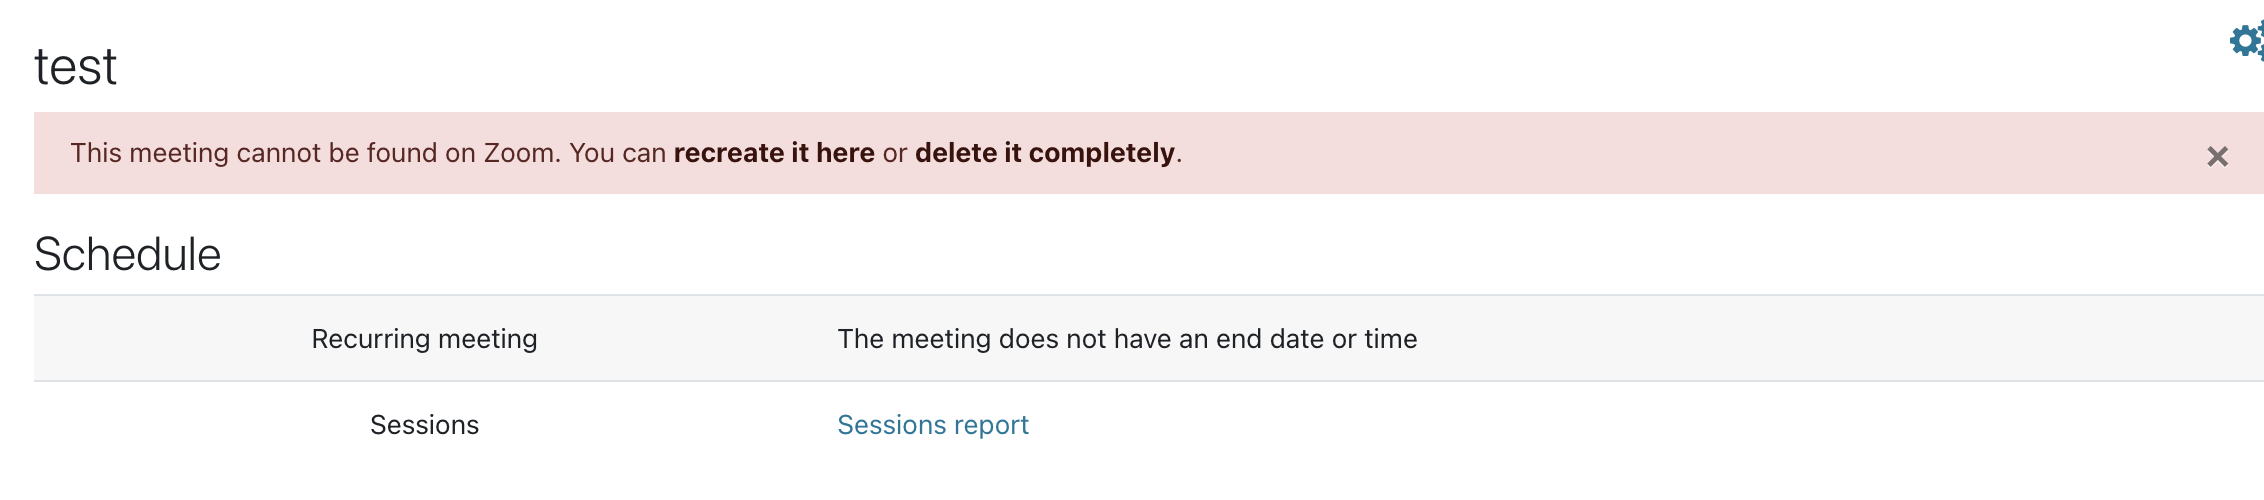
Note: We recommend to recreate zoom meeting link if you are planning to use it again or delete it if you are not planning to use it again.
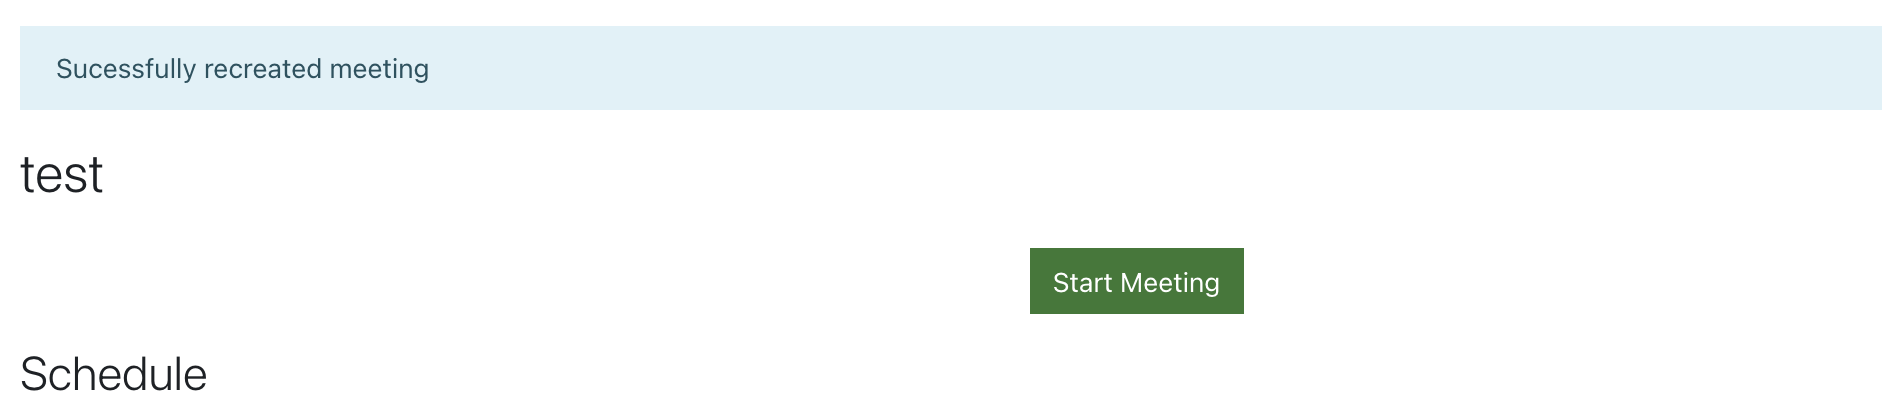
Succesfully recreated a Zoom meeting.
- If a meeting is successfully recreated, a button to Start Meeting will be visible again at zoom meeting settings.
Resources
Zoom for Students Anytime
It is possible to leave your Zoom room accessible to students at all times for them to use as a meeting or gathering space. If you have enabled "join before host," students can log into your room at any time, whether or not you are there. You can choose to make them aware of this fact if you wish and encourage them to use the room, or even provide a schedule for students to "book" time. Note that without a pro account, any group of more than 2 people will have their meeting end after 45 minutes.
If you plan to use your Zoom account for more than one course or for other meetings, it is best to either have students schedule time or to create specific meetings which would have a different meeting ID to avoid a student accidentally joining a meeting in progress. Alternately, students can sign up for their own free accounts and host meetings themselves. At least one student in a group will need to have signed up for an account to be able to create their own Zoom room which they can then share. Note: At this time, only instructors and staff can request a pro Zoom account.