Adding/Uploading Content
There are many options for adding content to your course. These are the most commonly used:
Files
The File module enables an instructor to provide (upload/add) a file as a course resource. As you upload the file to UR courses, the file is either directly viewed within the course interface or students can download it to their own computers.
A file may be used to do the following:
- To share presentations
- Post class lectures (PowerPoint, PDFs, etc.)
- To share documents.
- To provide draft files of certain software programs (e.g. Photoshop .psd) so students can edit and submit them for assessment
- To share audio/video files for recordings
- Post a (revised) course syllabus
Files can be in a large list of formats (PDF, Word, Excel, Quicktime, zip,...etc). A file resource may include supporting files, for example, an HTML page may have embedded images or Flash objects.
Upload Files
- Turn on Edit mode
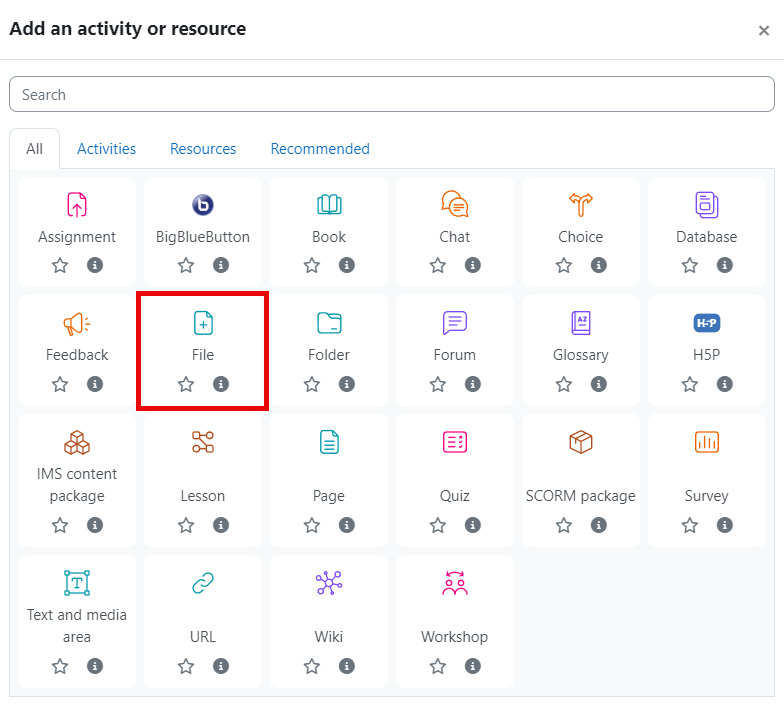
- Click Add an activity or resource in the course section you want to add the file to
- Click File under the Resources tab.
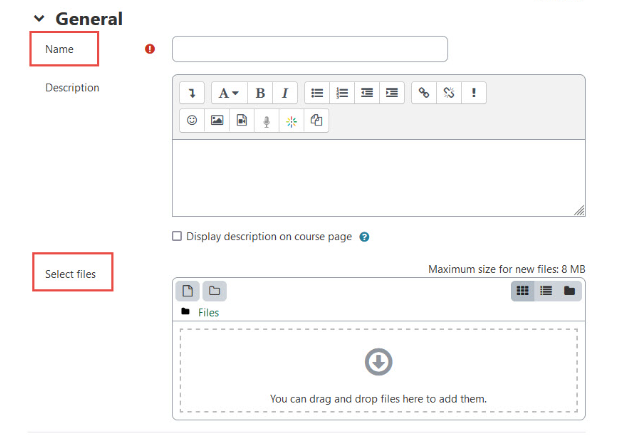
- Fill in the Name field. Enter any other required information in the remaining fields.
- Either drag and drop the file in the Select files area or click in the Select files rectangle and use the File picker to locate your file.
- Click Save and return to course or Save and display at the bottom of the page.
Note: Please ensure that you have copyright ownership or clearance for any files you provide to students through UR Courses.
Text and media area (Label)
Text and media area (Label) modules allow for inserting text and/or multimedia into the course page in between links to other resources and activities. Example usages include:
- To split up a long list of activities with a subheading or an image
- To display an embedded sound file or video directly on the course page
- To add a short description to a course section
To add a Text and media area (Label):
- Turn on Edit mode
- Click Add an activity or resource in the course section where you want to add a Text and media area (Label).
- Click File under the Resources tab.
- Click Text and media area (Label)
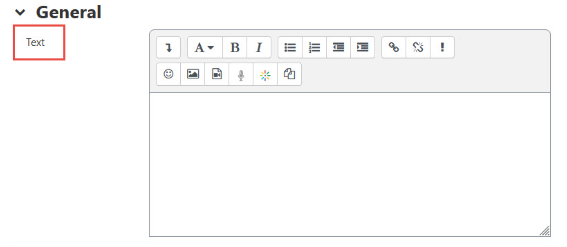
- In the Text section, use the editor to insert pictures/videos/audio/text.
- Click on Save and return to course at the bottom of the page.
Topic Titles
The default topic titles (e.g., Topic 1, Topic 2...etc) can be renamed to reflect the outline of a course. This can include the textual titles for the main modules of your course. You can also name each topic by week. For example, your topic titles would be “Week 10 - March 20-27.”
To rename Topics:
- Click pencil icon next to the topic title. Click Enter after you have typed your title in the Title box. OR
- Click Edit settings from the three dots menu in the top right of the topic. You can also edit the description text to display on the main page from here.
- Click Save and return to course at the bottom of the page
URLs
Can be used to add links to external resources such as
- Websites
- YouTube videos
- Google Drive folder (using the share link so all students will have access)
- Zoom cloud recordings
Adding a URL
- Turn on Edit mode
- Click Add an activity or resource in the course section you want to add a URL.
- Click URL under the Resources tab.
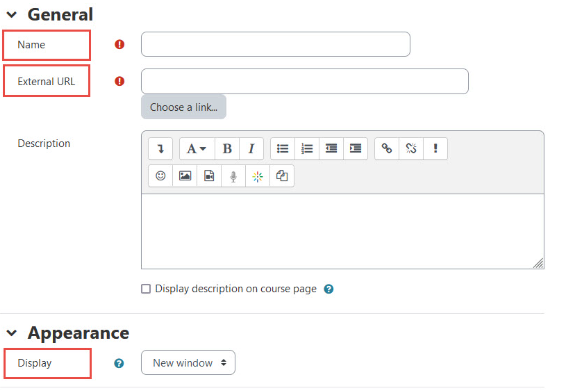
- Enter the text to be used as the link name in the Name field.
- Paste the address to link to in the External URL field.
- Expand the Appearance section and select the Display setting.
- Click on Save and return to course or Save and display at the bottom of the page.