Logs
UR Courses includes numerous reports that allow you to monitor activity in your course site. The most commonly used are the Logs and Live Logs. Both of these reports allow you to see a variety of participant reactions with the course, including viewing pages, submitting assignments, and beginning or ending quizzes. The log options can be found in the Reports area located in the top navigation.
Logs can be useful for checking on student activity within a particular course site. They cannot, however, monitor other browser tabs a student may have open. Logs can only provide limited information.
Any problems with a person's internet connection outside the University's network such as home wifi connectivity, or problems with Internet service providers (e.g. Sasktel) will not be tracked in the logs.
Note: If a person is connecting to UR Courses using a VPN, the VPN address will be logged instead of their IP. There are many reasons people use VPN connections, and this by itself is not necessarily cause for suspicion.
Viewing Logs
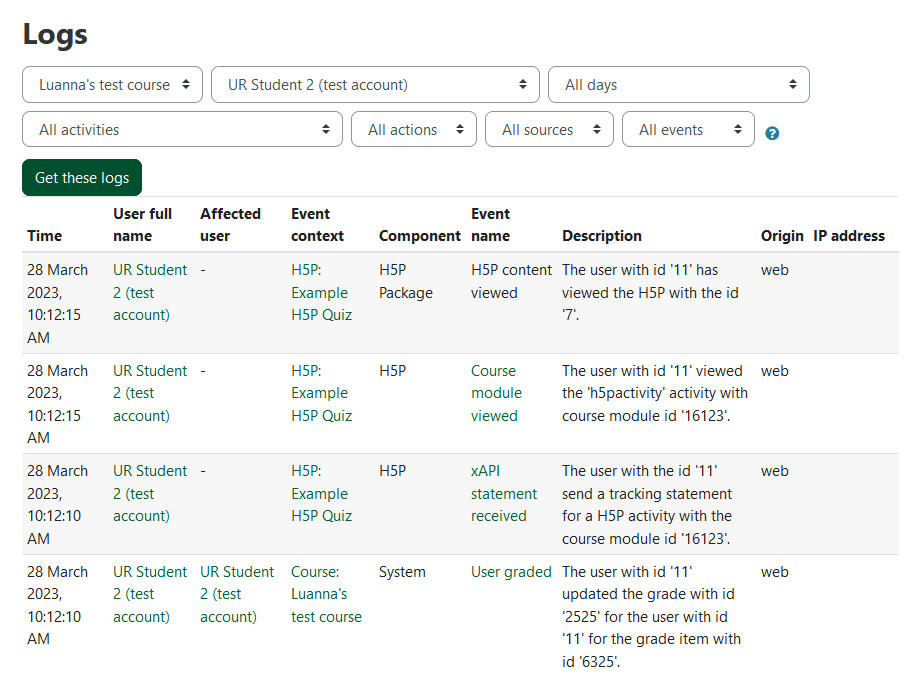
The logs will provide you a reverse chronological list of activity in the course, based on the filters you used. Each entry is a particular activity by a particular user. The logs tell you what kind of activity it was, such as "viewed" or "attempt submitted," and the time it happened. It will register loading a particular page but cannot tell you if a student actually viewed a video or read a page. With these logs you can identify if a student loaded a page during a closed book exam, they did not attempt to submit an assignment until after the deadline, they did or did not view forums. The logs cannot tell you for certain if a student cheated but they can give you information which can be useful in determining how active they have been in the course and whether a story seems plausible or if a student was loading a page they should not have been at a particular time.
To view the Logs:
- Within your course, click on Reports option from navigation bar.

- Select Logs.
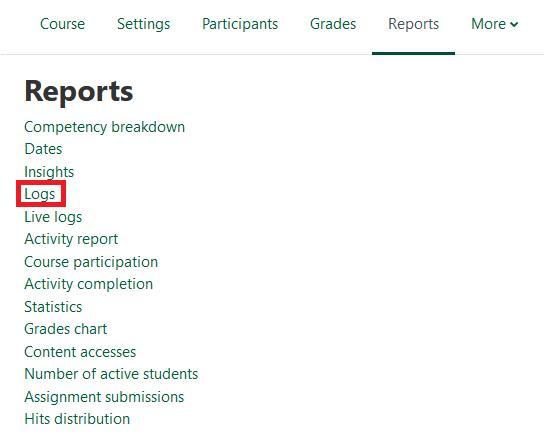
- Use the dropdowns to do any filtering you may want. Click Get these logs to view results.

You can filter by as many criteria as you like. The more criteria you filter by, the more specific the results. The most useful criteria to filter by are:
- Participant - select one particular person in the course, which is useful if you want to see only interactions from one student
- Day - select a particular date to view activity, useful for monitoring a day an assignment is due or a quiz date. Can also be used to check activity to see if it potentially matches a students' account of a technical difficulty.
- Activity - select a particular element of the course to see ineractions relating to that particular activity only

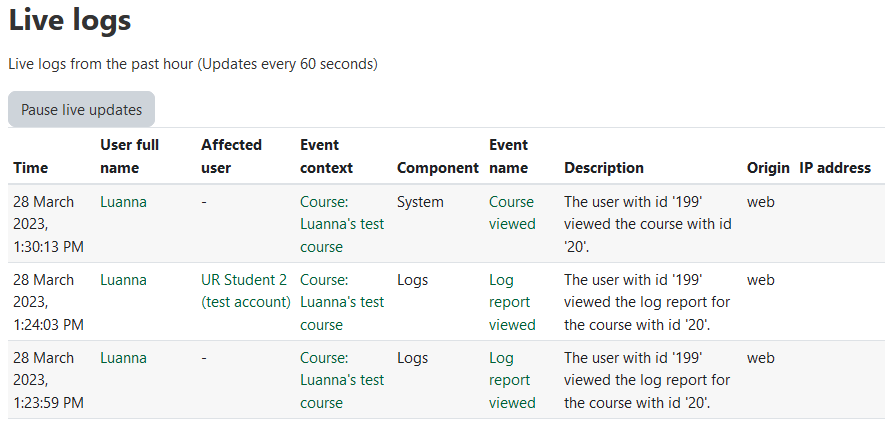
Viewing Live Logs
The Live log is a report of activity in the previous hour. It will automatically update if you remain on the page unless you pause it. This can be used to monitor activity on the site during an exam if there are concerns about students loading other pages during a closed book exam. It includes the IP address of the user although this may or may not be useful information given the prevalence of virtual networks and the possibility of student travel during a semester.
To view Live Logs:
- Within your course, click on Reports option from navigation bar.

- Select Live Logs.
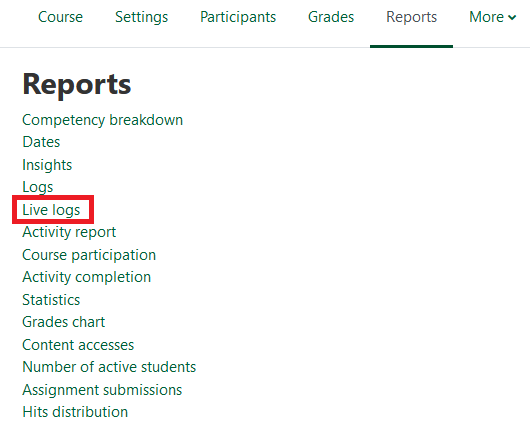
- View the Live Logs.
Additional Reports
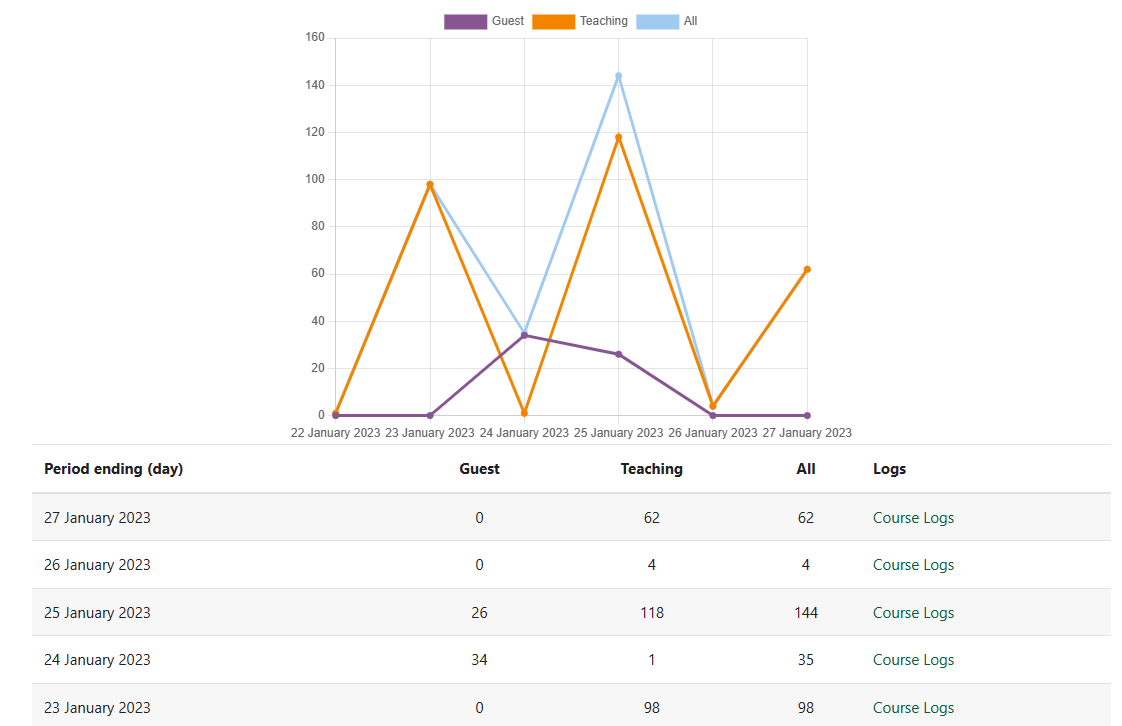
UR Courses allows instructors to request reports telling which resources and activities in a course have been accessed, when, and by whom. Reports can show how many students opened an article that students were to read before the lecture. More importantly, it can show who did not open the article. Reports can identify when students are logging into a course the most. For instance, if Sunday always has twice as many views as Thursday perhaps material can be posted on Saturdays instead of Wednesdays to better fit the activity of students.
Reports
- Select the Reports tab from course navigation.
- Select the Report to be viewed.
- Dates: This report is actually a tool that allows all dates for all activities to be updated on a single page.
- Logs: Shows a filtered report showing information about a particular activity or student.
- Live logs: Shows who accessed the course and what they access on the current day.
- Activity report: Generates a simple unfiltered report showing the number of views for each activity and resource.
- Course participation: Generate lists of who participated in an activity and how many times.
- Activity completion: See Chapter XXXX
- Statistics: Shows all users and the actual amounts of activity on a daily basis.
Dates
Using the Date report tool, all dates for all activities can be updated on one screen instead of opening each activity/resource and updating individually.
Statistics
Progress Reports
There are a few different ways to account for student progress within a course, such as:
- Conditional activities – a group of settings in a resource or activity which sets conditions upon entry into, or if any activity or resource can be even seen by the student.
- Activity completion – activity setting that sets the completion standard for that activity or resource.
- Course completion – allows for a course to be officially marked as finished, either manually or automatically according to specified criteria.
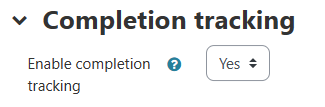
Enable Completion Tracking
Completion tracking must first be enabled within the course settings.
- Open Settings from course navigation.
- Within the Completion tracking section, ensure the Enable completion tracking setting is Yes.
Applying Tracking on Conditional Activities
Once Completion tracking has been enabled within a course, resource and activity settings will now have a section called Activity completion.
To activate Completion Tracking in an Activity or Resource:
- Create or edit an activity or resource. The below example uses the Forum activity. Different activities or resources will have different options for completion tracking.
- Scroll down to the Activity completion section.
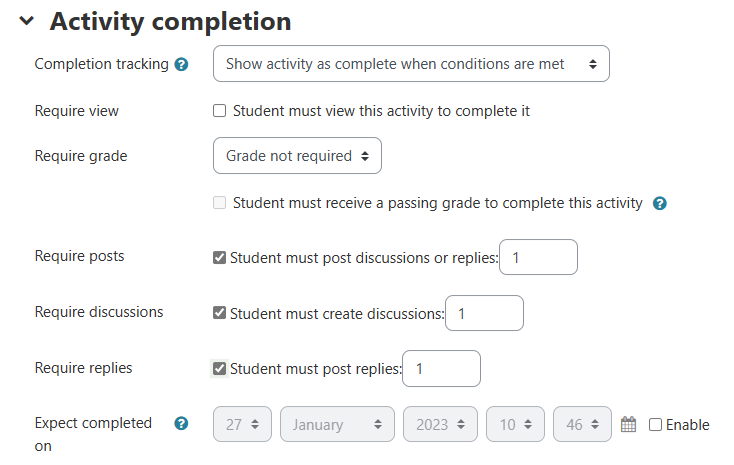 Completion tracking – if enabled, activity completion is tracked, either manually or automatically, based on certain conditions.
- Require view – Students must open the activity/resource for it to be considered complete.
- Require grade – Students must receive a grade for the activity/resource.
- Other options will differ based on the particular type of activity/resource.
- Press Save and return to course.
Restricting Access Based on Conditional Activities
Once Completion Tracking is enabled in an activity or resource, students can now be required to meet a particular requirement before they can access a particular activity or resource.
In the following example, a student must complete the Discussion Forum activity in order to access the Week 1 PowerPoint.
To apply completion tracking
- Edit or create a new resource or activity.
- In the settings, go to the Restrict Access section.
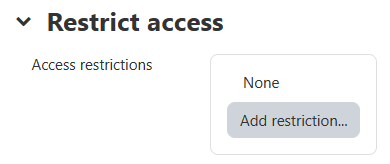
- Click Add restriction.
- Choose Activity completion.
- Generally, select Student must match the following.
- In the Activity completion dropdown menu, select the Activity that must first be marked as complete. Note that only activities that have a completion setting will appear here.
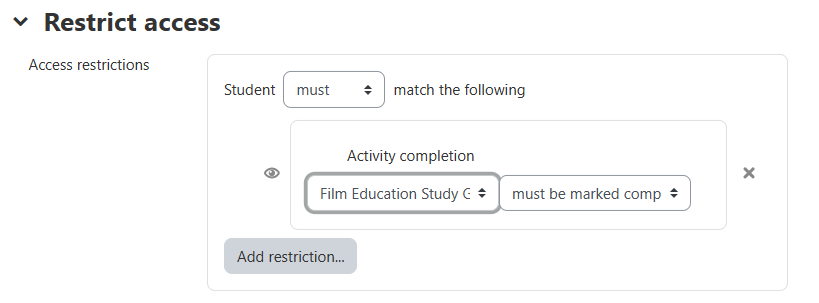
- Press Save and return to Course.
Manually Marking Activities as Complete
Instructors can manually mark activities as complete or incomplete on behalf of students.
To manually mark an activity as complete or incomplete:
- Open the Reports tab from course navigation.
- Select the Activity completion report.
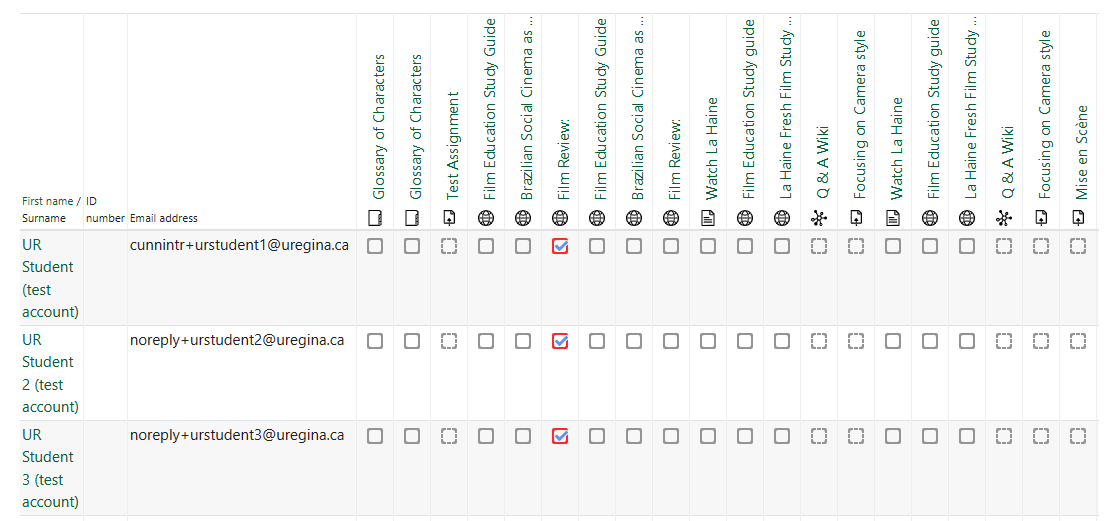
- Each student will be listed with a checkmark identifying which activities/resources the student has completed. Only resources or activities that have completion tracking enabled will appear.