Assignments
The Assignment tool allows instructors to collect work from students. Students can submit files (example: word-processed documents, images, or other file types), type text directly in the text editor online, or a combination of both! Instructors can also leave feedback, fill out a rubric, or upload a response file when grading.
Submitting a file-based assignment
- Click on the assignment link.
Note: Details such as submission status, grade status, due date, and time remaining will be listed.
- Click Add submission.
- You can add your submission by either:
a. dragging and dropping the file onto the box with the arrow
b. OR you can add your submission by using the upload menu within the file picker:
- Click on the file icon (Add button) within the File submission box.
- In the File Picker pop up, select the Upload a file option on the left side
- Select the Choose File button and select your file
- Click the Upload this file button
- All files will appear in the File submission box
- Select the Save changes button to complete your submission

Submitting a Zoom Video-based assignment
Zoom Videos are submitted to an assignment in much the same way as submitting a file. The submission form will include a Selected Zoom Video section, and may or may not include a file submission.
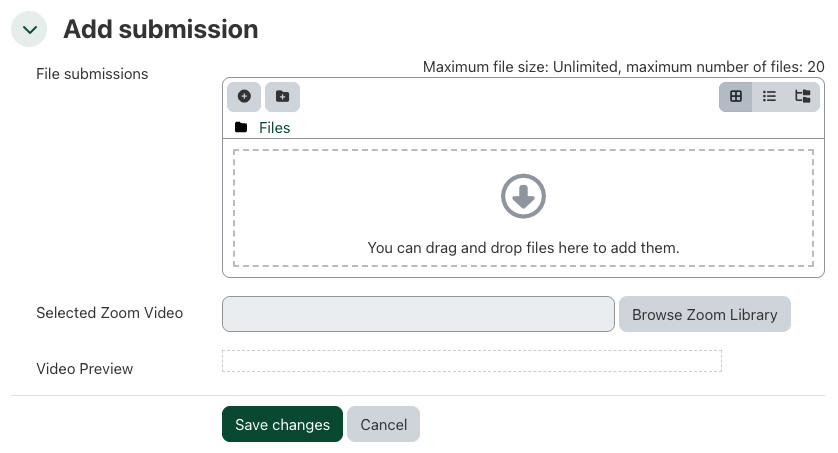
Clicking Browse Zoom Library opens the Select Zoom Video window, allowing you to select the appropriate video for your submission.
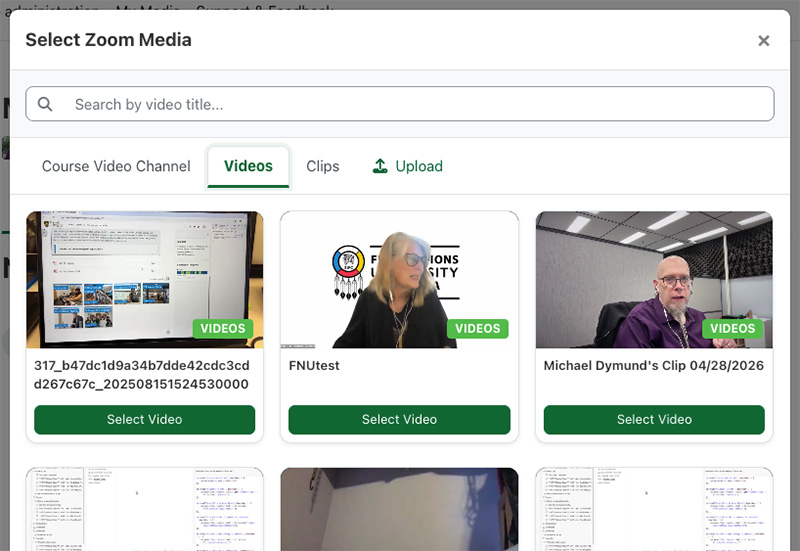
The form will update to include a preview of the video. Click Save changes to upload a copy of your video to UR Courses.
Any further changes you make to the video will not be included in the submission.
Submitting an online text assignment
In some cases, you will be asked to type directly into UR Courses to complete an online assignment.
- Click on the Assignment link.
- Details about the specific assignment such as submission status, grade status, due date, and time remaining will be listed.
- Click on the ‘Add submission’ button.
- In the Online text, editor box, type as you normally would in a word-processing program.
- Format icons are located at the top if you would like to bold, italicize, number, bullet, or add a hyperlink.
Note: click on the button at the top left corner of the text box to expand the toolbar for additional formatting options 
- When finished, select the ‘Save changes’ button.
Note: In some cases you may be asked to complete an online text area AND submit a file. Please read your assignment instructions carefully to be certain.
Submitting a Turnitin assignment
A Turnitin assignment activity allows students and instructors to interact with Turnitin.com directly from within their course.
Students can submit files or type text directly in the text editor online, depending on the assignment's configuration.
- Click on the Assignment link.
Note: Details such as submission status, grade status, due date, and time remaining will be listed.
- Click on the Submit Paper button in the submission table at the bottom of the page.
Note: The first time submitting a document, you will be asked to agree to terms and conditions of Turnitin enabled assignments.
- Select the submission type from the dropdown menu (if available).
- Provide a name for your submission. Attach a file or enter content into the text area.
- Click Add submission
- If your instructor has allowed students to view their originality report, you can access it by clicking on the Similarity result. You may need to refresh the page if Turnitin takes longer than usual to generate the report.
For information on viewing your submission within Turnitin's Feedback Studio, please refer to our Turnitin page.
Feedback
Feedback for assignments can consist of both a grade and, potentially, additional comments within UR Courses or a file which can be downloaded. Students can view grades in the Gradebook by clicking on Grades in the Administration Block or by clicking on the assignment name from the main page or selecting it through the Assignments in the Activities block and clicking on the specific assignment. Feedback comments can be viewed in the gradebook as well as on the assignment page. Feedback files need to be accessed through the assignment page. Click on the name of the feedback file to download it.
Rubrics
What is a rubric? A rubric is a popular way for instructors to communicate expectations for an assignment. Some instructor may provide a simple rubric within the course outline or they may include a rubric within the Assignment tool. The rubric outlines what you need to do in order to achieve the marks you want. The following is an example of a simple rubric:
|
1 point |
2 points |
3 points |
|
|---|---|---|---|
|
Use of language |
very basic writing |
some errors but fairly accurate |
high level of accuracy |
|
Relevance of content |
none of the required points covered |
some points covered, but has some irrelevance |
most content is covered |
|
Appropriateness of style. |
style not appropriate |
fairly good style |
very appropriate style |
Hypothesis
Creating an Annotation
The steps to create an annotation within the Hypothesis activity are:
- Highlight the copy that you would like to annotate.
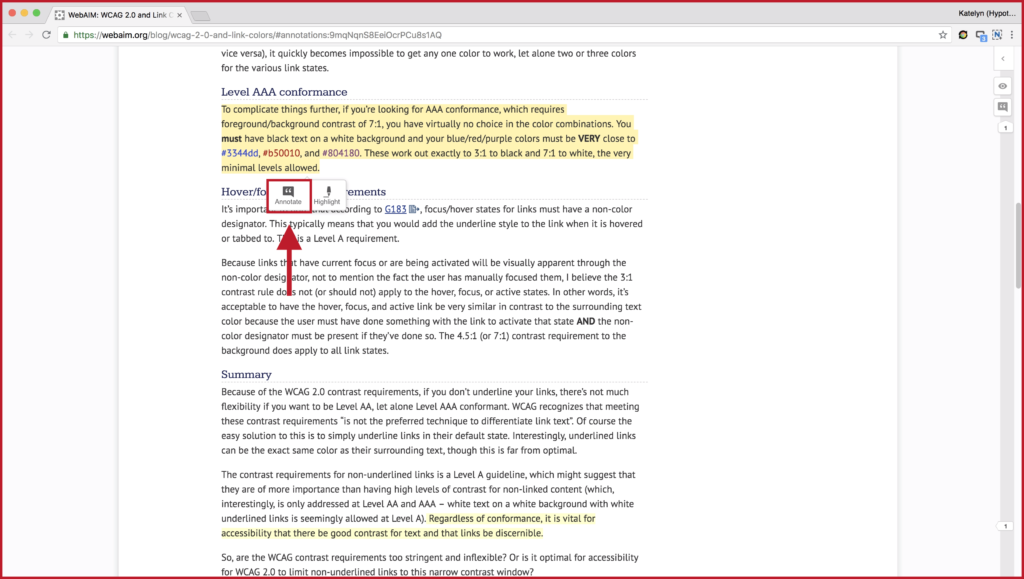
- Write your annotation
- Save your annotation with the Post button
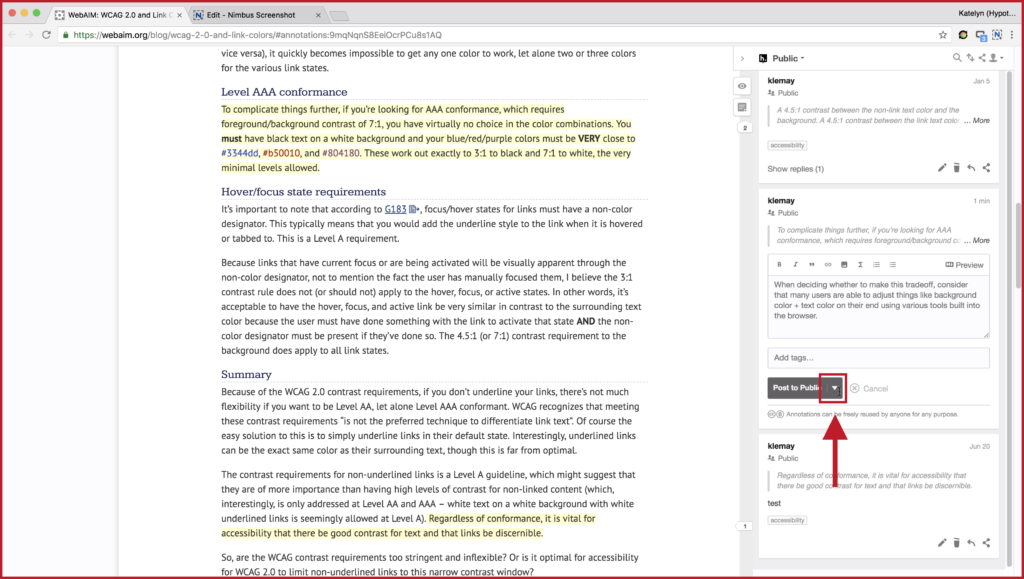
Creating a Private Annotation
Once you have made your annotation, click the triangle next to the Post button.

Select Only Me from the drop-down list. The text on the button will change to Post to Only Me.
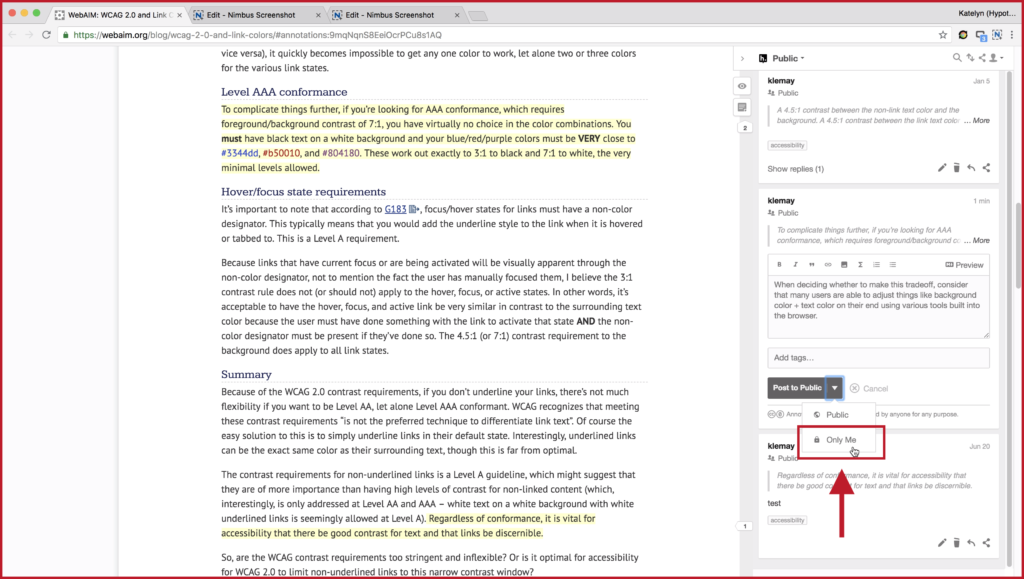
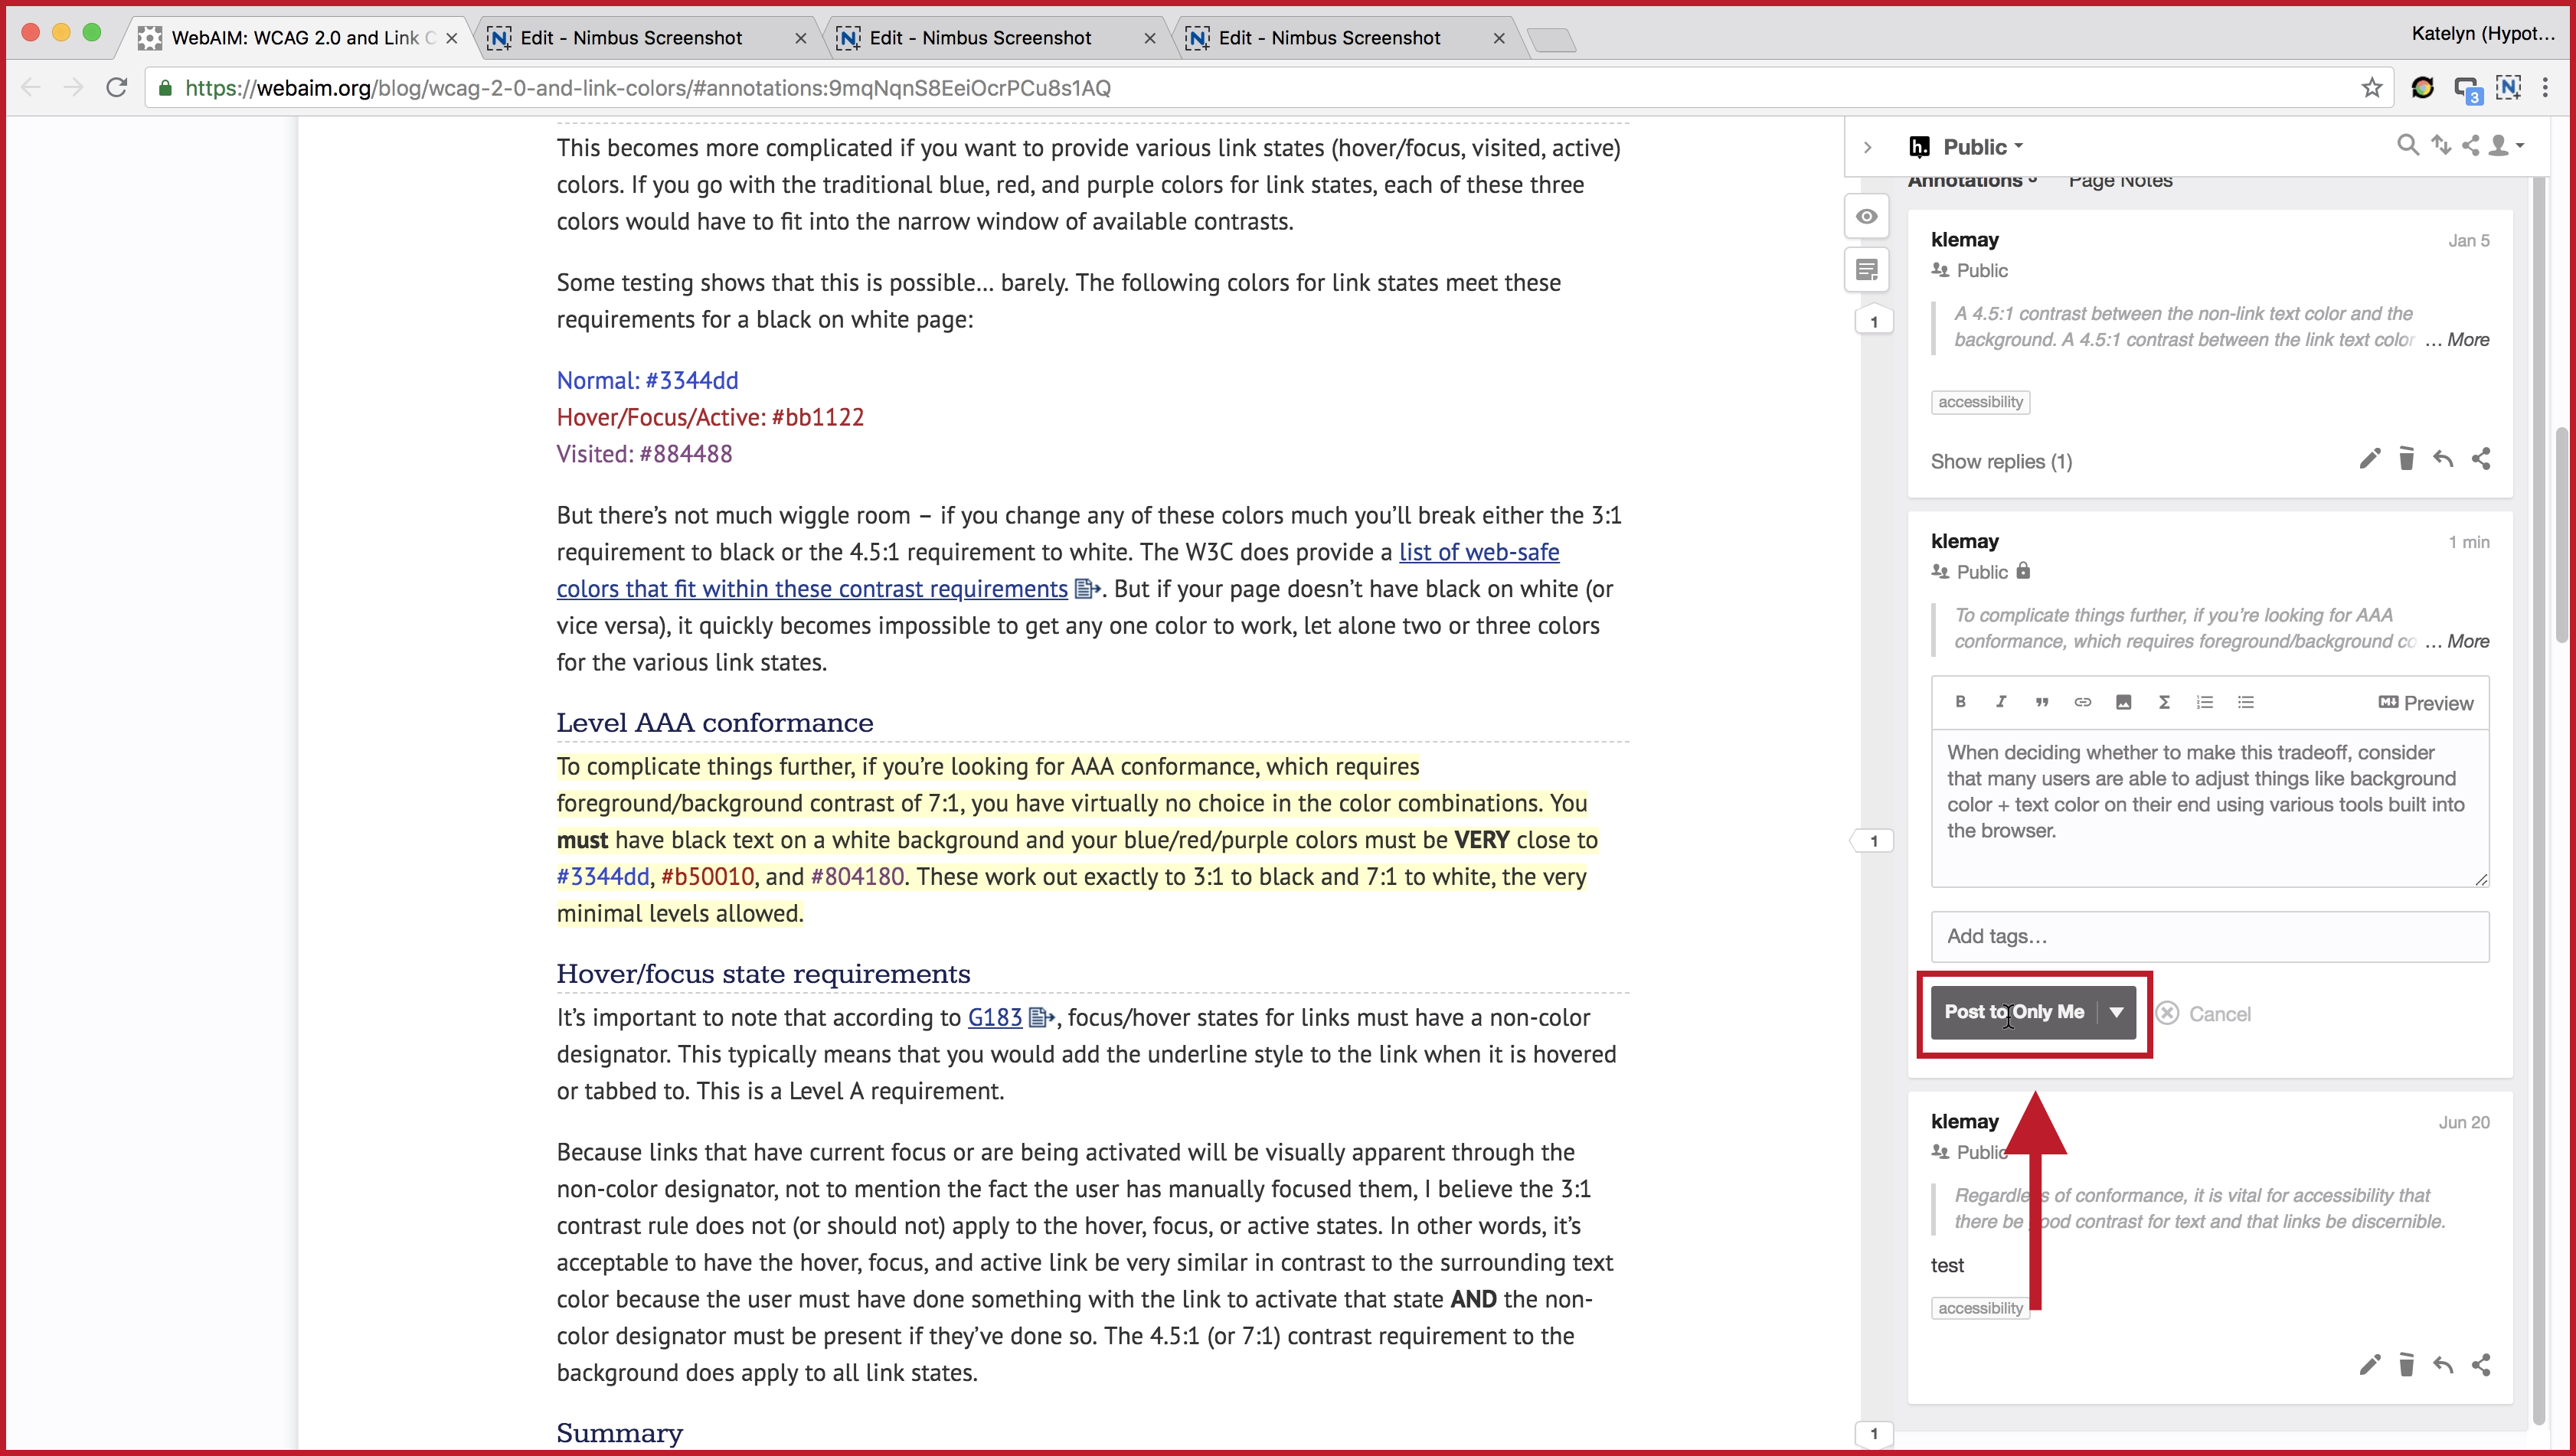
Click this button to save your annotation.
You will see a lock icon in the annotation card, indicating that your annotation is private. Clicking the pencil icon in the bottom right corner of the annotation card will allow you to make changes to this setting.
Annotations vs. Highlights
Annotations are margin notes, useful for attaching a note to a specific passage of text within the content. Annotations can be public, private, or visible to other members of your group.
Like their real-world counterpart, Highlights are yellow markers over a passage of text. Highlights are always private.
Replies can be made to both annotation types, and to other replies. These can also be public, private, or visible to other members of your group.
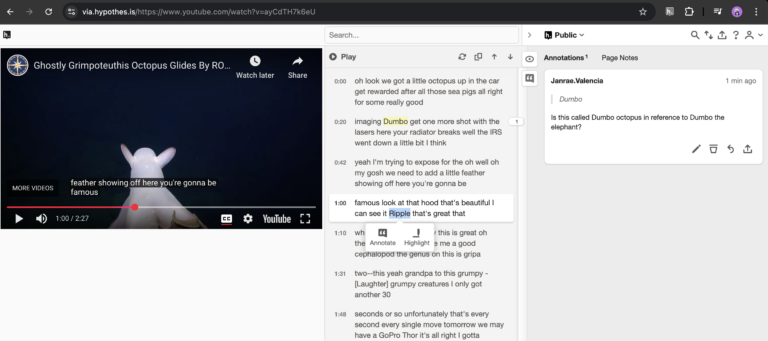
YouTube Video Annotation
When annotating a YouTube video, your browser will display the video, its transcript, and the annotation list. The transcript will autoscroll as the video plays. Make your selection in the transcript to create an annotation or highlight. As you annotate, the video and the transcript may fall out of sync. Click the Sync Transcript button to re-sync the transcript.
Deleting an Annotation
While viewing the Hypothesis annotations for a web page or document, you can delete your annotations by clicking on the trashcan in the bottom right corner of the annotation card. You will be prompted for confirmation.
Saving an Annotation Failed
Under some circumstances annotations that you have made to your Hypothesis assignment may fail to save.

Hypothesis requires a stable internet connection to save your annotations. If your connection drops out, the application is unable to save your work. Try connecting to a more stable network connection and try your annotations again.
Another possibility is that your have had your assignment open for more than 60 minutes with no activity, and UR Courses requires you to log in again. When this happens, Hypothesis is unable to verify your account and fails to save. But you do not need to lose your work. Copy your unsaved annotation(s) into another application or document, close and re-open the Hypothesis assignment, and then paste your annotation(s) back into.
Macmillan assignments
Some of your classes will include Macmillan Achieve assignments and there is an extra step that you need to take to ensure that your grades are made available to you from within URCourses.
If your instructor has indicated to you that there is an Achieve integration, click through the Achieve assignment to complete your enrolment. Note: You will need to allow pop-up windows in your browser to use these activities.


You may be prompted for your name and email address. If you do not have a Macmillan Achieve account, use the email address you use with URCourses.
Once this step is complete, each time you click on an Achieve link in URCourses you will be sent directly to that resource in Macmillan Achieve, and the grades for these assignments will appear in your gradebook in URCourses.
Multimedia
Some assigments may require you to make a multimedia submission, which could use an audio or video recorder, a whiteboard, or request a snapshot from your webcam.
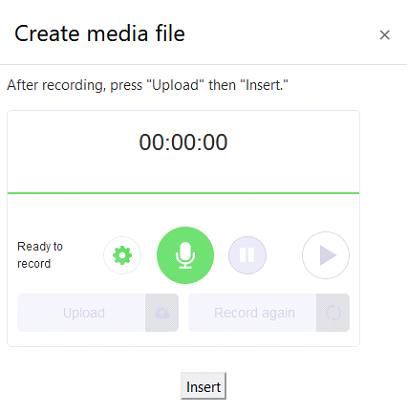
Audio
If your assignment is requesting an audio submission, a single button audio recorder may appear. Follow the steps below to create your own audio recording.
Recording tips
- Try to minimize background noise
- Use headphones and a microphone if possible
-
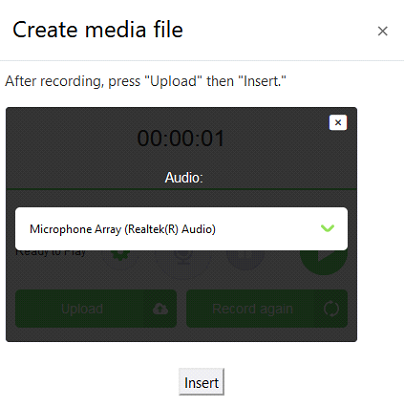
The audio recorder should detect your default microphone. To select another input device, click the gears icon.
-
Click the centre green button to record. Click it again to review your audio recording.
-
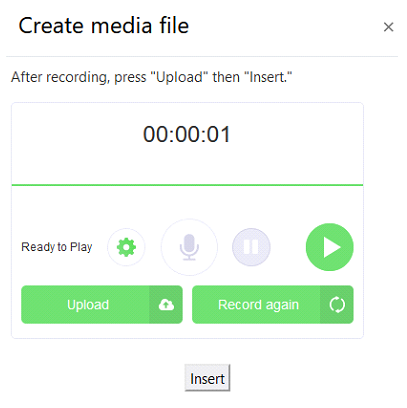
If you would like to make a new recording, click the Restart button below the recorder button.
-
Once you are satisfied with your recording, click Upload. Click Insert to save the recording to the server and submit it to the assignment.
-
Once the submission has been uploaded, click the Save changes button.
Video
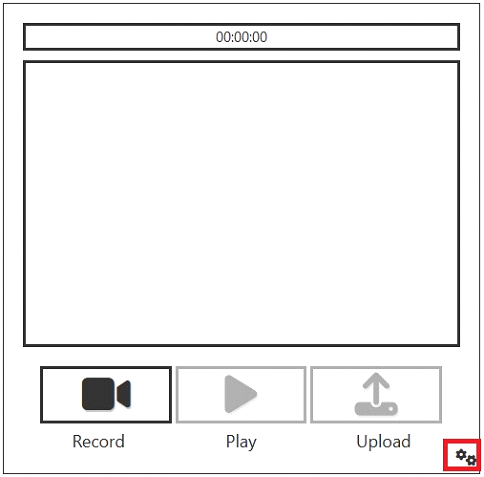
If your assignment is requesting a video submission, a 3-step video recorder may appear. Follow the steps below to create your own video recording.
Recording tip
- Try to minimize background noise
-
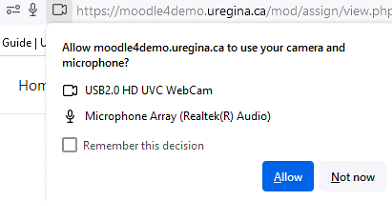
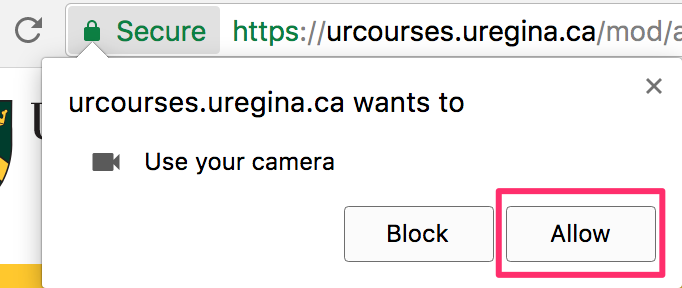
If you haven't allowed UR Courses to access your camera, your web browser will prompt you for access. Ensure the URL is correct and allow access.
-
The video recorder should detect your default camera. To select another input device, click on the gears icon.
-
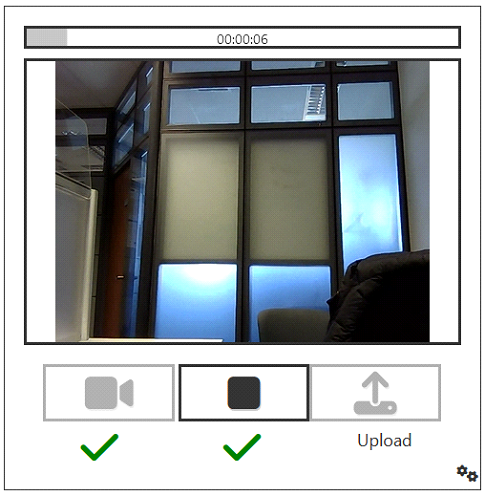
The maximum duration for your recording is displayed in the bar above the camera preview. It will begin counting once the recording is started.

-
Click on the record button to begin recording. Click the same button again to stop recording.

-
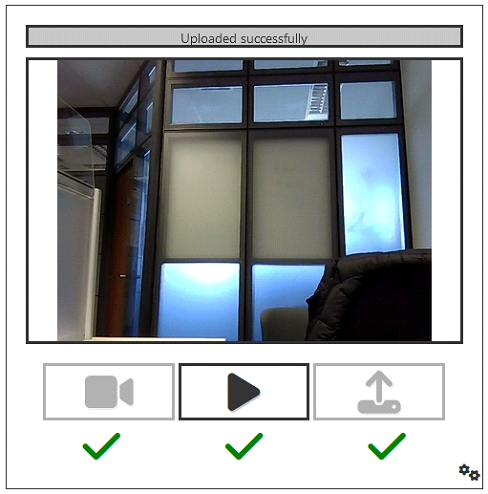
Click the Play button to review your recording.
-
If you would like to make a new recording, click the Record button again. This will replace the current recording from the previous step.
-
Once you have reviewed your recording and are satisfied, click the third Upload button to save the recording to the server.
-
Once the submission has been successfully uploaded, click the Save changes button below.
Whiteboard
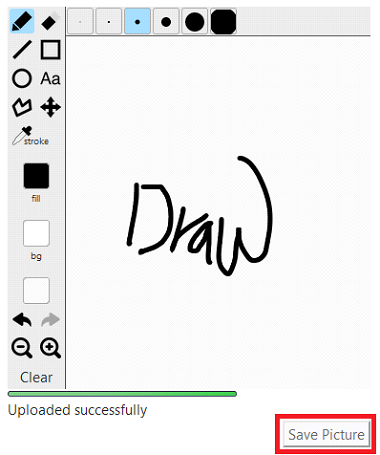
If your assignment is requesting a whiteboard submission, a whiteboard area will appear that allows you to draw, create shapes, add text, and save the result as an image.
-
Use the drawing and text tools to make your submission.
-
Once satisfied with your submission, be sure to click the Save Picture button if the whiteboard has not already been uploaded automatically.
-
Finally, to make your submission click the Save changes button below.
Snapshot
If your assignment is requesting a snapshot submission, a prompt will appear requesting access to your camera. Once permitted, a preview of your default webcam will appear above the following buttons.

-
If you haven't allowed UR Courses to access your camera, your web browser will prompt you for access. Ensure the URL is correct and allow access.
-
Click Take Picture to create a snapshot.

-
If you are not satisfied with the result, click Cancel.

-
Once you are satisfied with the result, click Upload.

-
Once the snapshot has been uploaded, click Save changes button below.
If you are having difficulty submitting to an assignment, please contact Service.Desk@uregina.ca with a link to the assignment, or the name of the course and assignment, and a detailed description of the problem.
WeBWorK
WeBWorK is a system that allows professors to put homework problems on the web and allows you to solve these problems online. Using WeBWorK, you typically may try to answer homework problems more than once. After each try, a message appears telling you whether the answer is correct or not. This allows you to find out what you did wrong and to understand the topic of the question better.
Each WeBWorK problem set is individualized; each student has a different version of each problem (for example, the numerical values in the formulas may be slightly different).
Most problems require a numerical answer, consisting of a value followed the abbreviation for the unit. Answers for WeBWorK problems must conform to WeBWorK conventions in order to be correctly interpreted and graded. Numbers can be written as a floating point decimal, in scientific notation, or as an algebraic expression.
Units
This is a list of the basic units that can be used in WeBWorK.
| Unit | Abbreviation |
|---|---|
| Time | |
| Seconds | s |
| Minutes | min |
| Hours | hr |
| Days | day |
| Years | yr |
| Milliseconds | ms |
| Distance | |
| Feet | ft |
| Inches | in |
| Miles | mi |
| Meters | m |
| Centimeters | cm |
| Millimeters | mm |
| Angstroms | A |
| Light years | light-year |
| Mass | |
| Grams | g |
| Kilograms | kg |
| Slugs | slug |
| Volume | |
| Liters | L |
| Cubic Centimeters | cc |
| Milliliters | ms |
| Force | |
| Newtons | N |
| Dynes | dyne |
| Pounds | lb |
| Tons | ton |
| Work/Energy | |
| Joules | J |
| Kilo Joules | kJ |
| ergs | erg |
| foot pounds | lbf |
| calories | cal |
| Kilocalories | kcal |
| Electron Volts | eV |
| Kilowatt House | kWh |
| Electric | |
| Charge Coulombs | C |
| Voltage Volts | V |
| Millivolts | mV |
| Kilovolts | kV |
| Megavolts | MV |
| Capacitance Farad | F |
| Millifarad | mF |
| Microfarad | uF |
| Resistance ohms | ohm |
| Kilo-ohm | kohm |
| Miscellaneous | |
| Amperes | amp |
| Moles | mol |
| Degrees Centigrade | degC |
| Degrees Fahrenheit | degF |
| Degrees Kelvin | degK |
| Angle degrees | deg |
| Angle radians | rad |
Operators
These are the operators that WeBWorK recognizes, by precedence.
| Operator | Precedence | Description |
|---|---|---|
| _ | 9 | Vector and matrix element extraction |
| ! | 8 | Factorial |
| ^ | 7 | Exponentiation |
| ** | 7 | Exponentiation |
| + | 6 | Unary plus (indicates a positive value) |
| - | 6 | Unary minus (indicates a negative value) |
| / | 3 | Division |
| * | 3 | Multiplication |
| . | 2 | Vector dot product |
| >< | 2 | Vector cross product |
| U | 1.5 | Union |
| - | 1 | Subtraction |
| + | 1 | Addition |
| , | 0 | List separator |
Grouping
You can use any pair of (parentheses), [brackets], or {braces}, but they must match by pair.
Completing Homework Sets
Homework sets can be in four different states:
- Open sets can be worked on now.
- Sets not yet open will be open in the future and can not yet be worked on. The date that you will be able to begin will be listed.
- Recently closed sets can no longer be worked on for credit, but answers are not yet available
- Closed sets can no longer be worked on for credit, but answers are available for viewing.
When viewing an open set, problems will include blank boxes in which you enter your answers. Enter your answers in plain text, using the guidelines above, and click Preview Answers to see your entry in mathematical form. Once you are ready to submit your answers for grading, click Submit Answers.
You will see other problems in the homework set in the left column of the page.
Printing Homework Sets
You can print the homework and work out the included problems on paper before entering them into the WeBWorK assignment. This also means that you will have a copy of the problems in the assignment to help with studying.
In the Homework Sets menu in the left column, choose the assignment that you would like to download. At the top of the page, you will see a link to Download a hardcopy of this homework set. You can then print the downloaded PDF file.