Zoom Video Management
Zoom Video Management makes it possible to add video to your course using software supported by Information Services at the University of Regina.
If you haven't done so already, visit uregina-ca.zoom.us/signup to create a free Zoom account using your @uregina.ca email address. Be sure to download the Zoom application as well. Zoom is supported on desktop, tablet, and mobile devices.
Using Zoom Video within your course
To use Zoom within your course, use one of the methods outlined below.
-
Add a Zoom Video resource to your course The Zoom Video resource provides an easy way to embed Zoom video right within your course.
-
Add a Zoom Video within course content You can add Zoom Video to your course by using the Zoom Video button with the Atto or TinyMCE text editors.
- For further information on using the Zoom software, please refer to their support documentation at https://support.zoom.us.
My Media
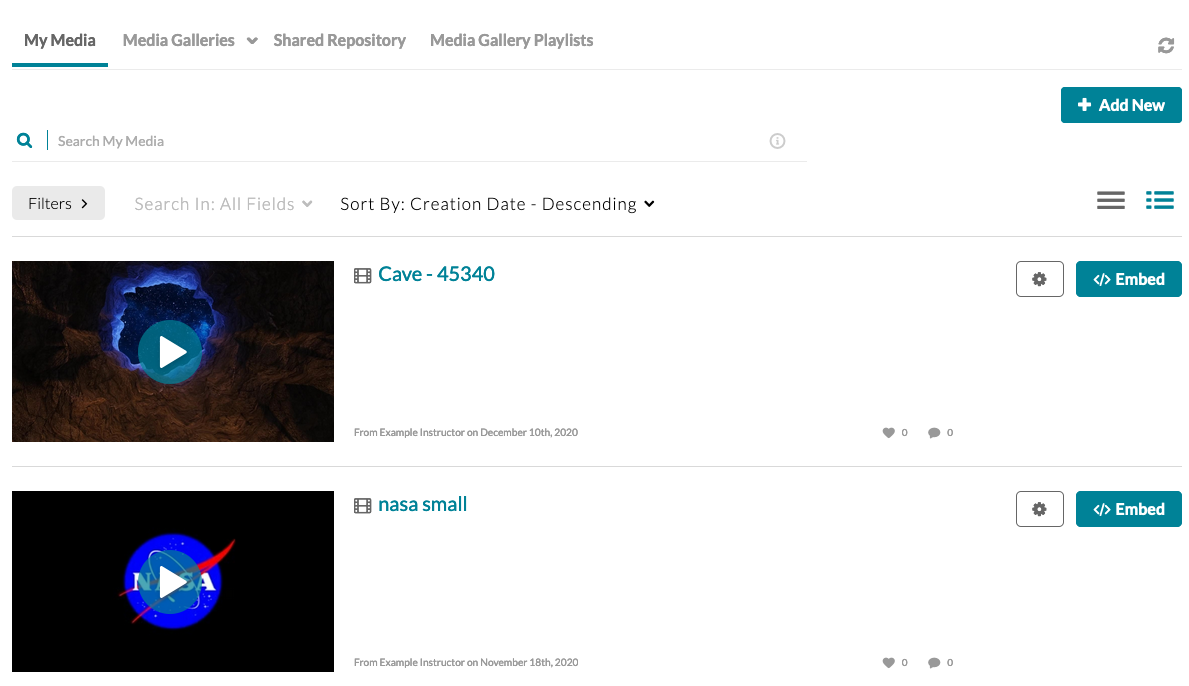
The My Media page available in UR Courses can be accessed from within the Navigation menu, at the top of the page.

Media that has been uploaded to your My Media page will be available elsewhere where video submissions or media selection are required.
The My Media page allows you to preview, edit, and share your media assets with other courses.
Accessing the My Media page will list all media hosted on Kaltura that has been associated with your UR Courses account.
Uploading Media
Upload media to Kaltura by following the steps outlined below.
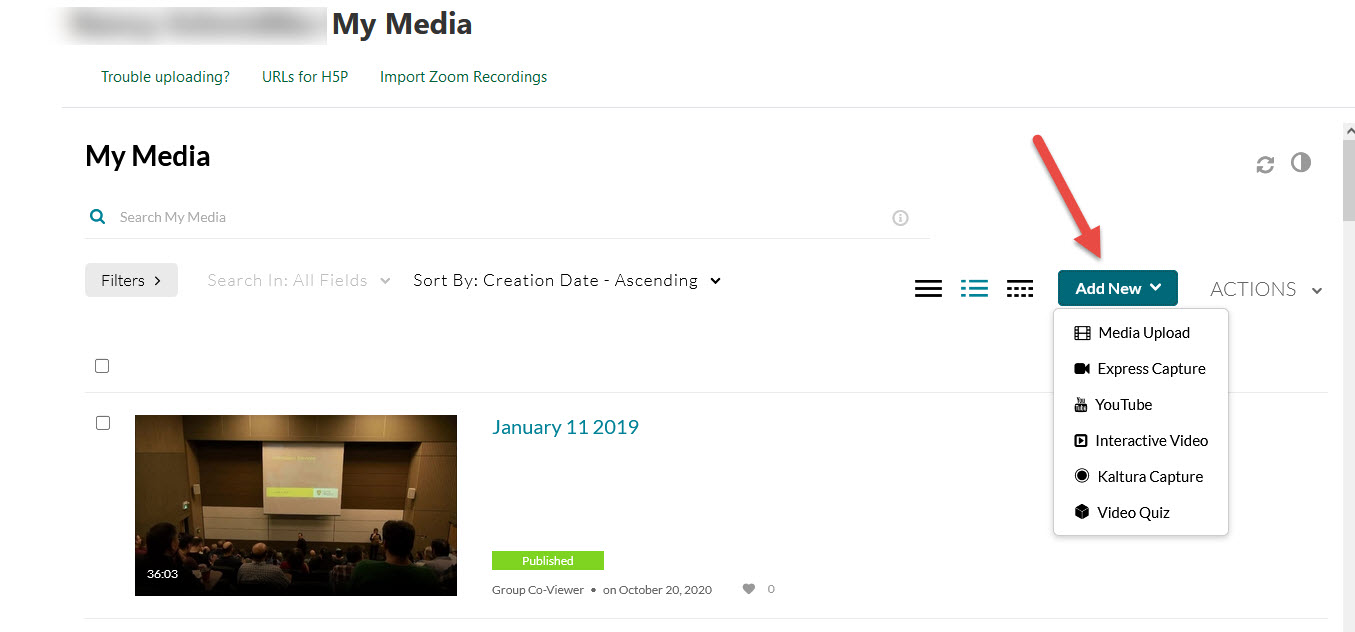
Navigate to My Media using the link in the Navigation menu.

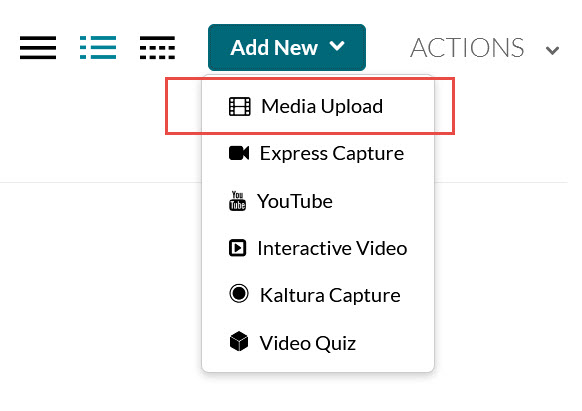
On the My Media main page, click Add New and select Media Upload.
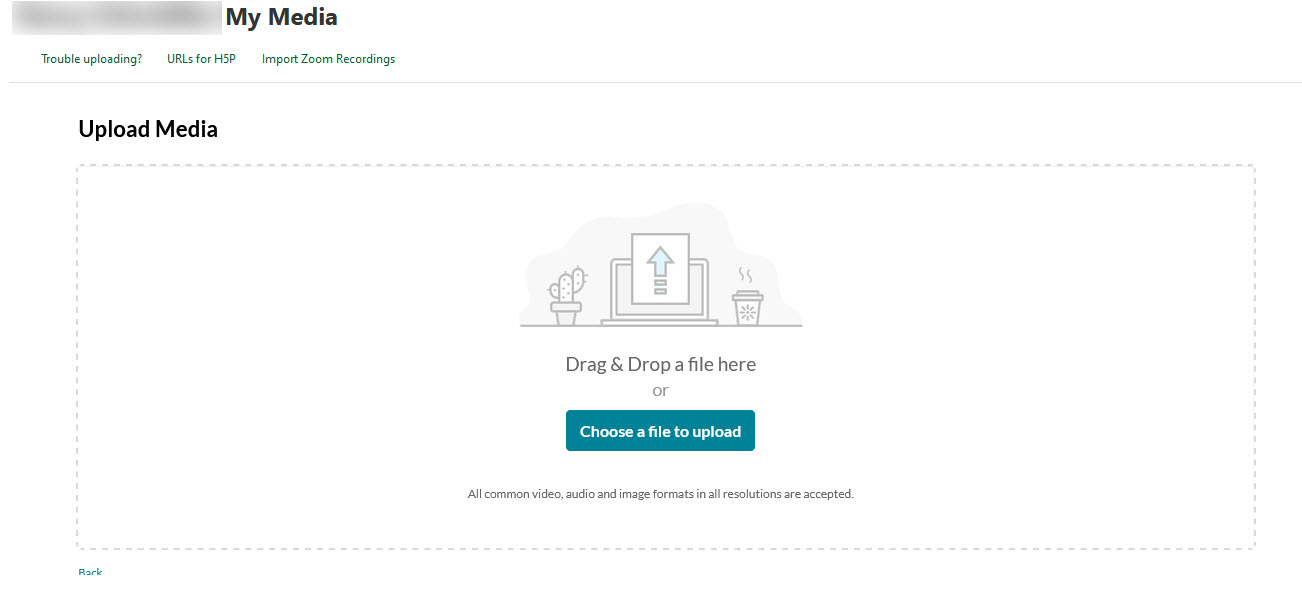
On the Media Upload page, you can add a file by dragging and dropping the file into the box, or by clicking on the blue Choose a file to upload button and then browsing to select the file you wish to upload.
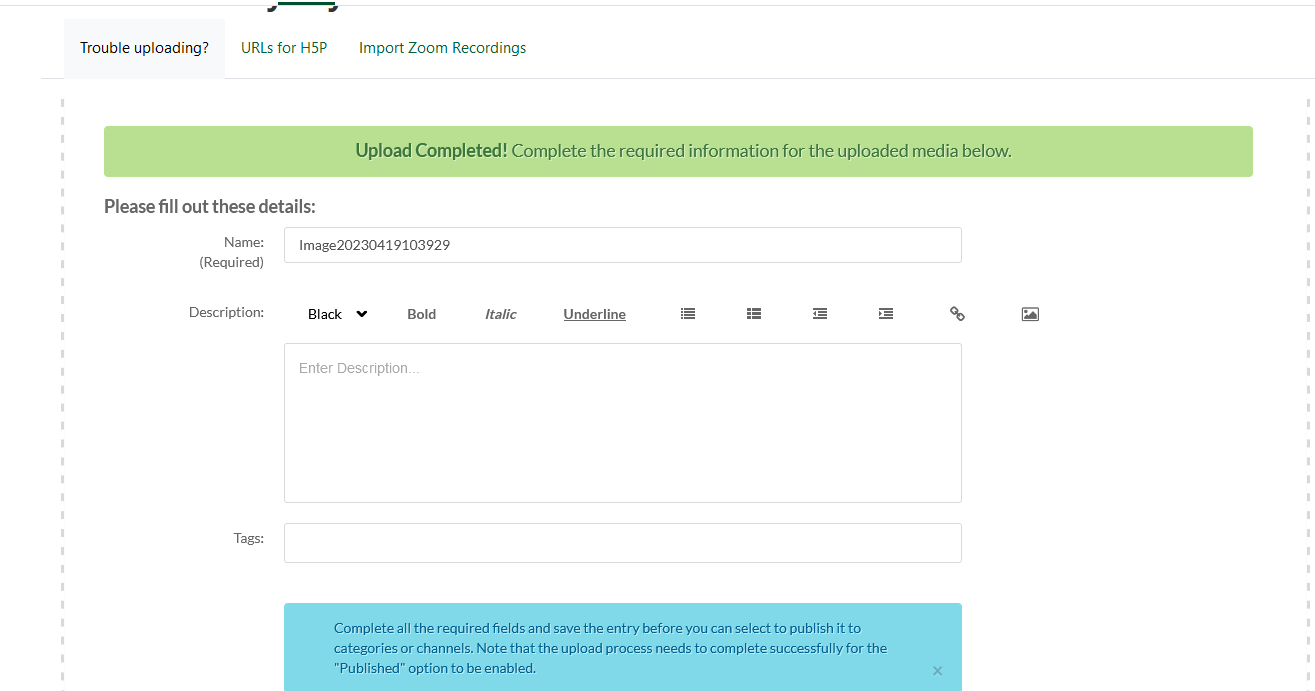
Review or update the Name that has been generated based on your uploaded filename. Add tags, and a description if desired.
Complete all of the required metadata fields within the shared repository so that the entry is available for publishing.
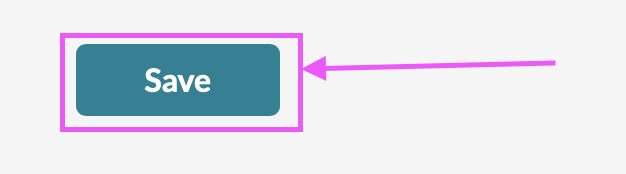
Once ready, click the Save button at the bottom of the form to complete the process.
On the My Media page, new entries will show that they are converting. This is the process where alternate versions are created for slower bandwidth and smaller devices. This process varies in length depending on the size and quality of the original file.
Linking to YouTube Media
YouTube media can be embedded directly into your course using their embed option, but it is also possible to use Kaltura to embed publicly available YouTube media. Using Kaltura removes many undesirable features that accompany the YouTube Embed, such as ads and unwanted related media suggestions, and allows you to see analytic results for the media.
You can link to YouTube media using Kaltura by following the steps outlined below.
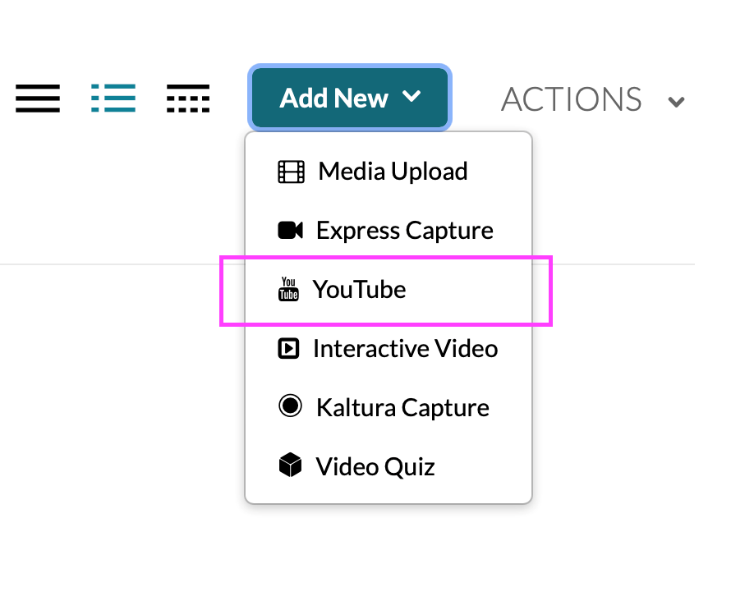
- Navigate to My Media using the link in the Navigation menu.

- On the My Media main page, click Add New button and select YouTube Media Upload.
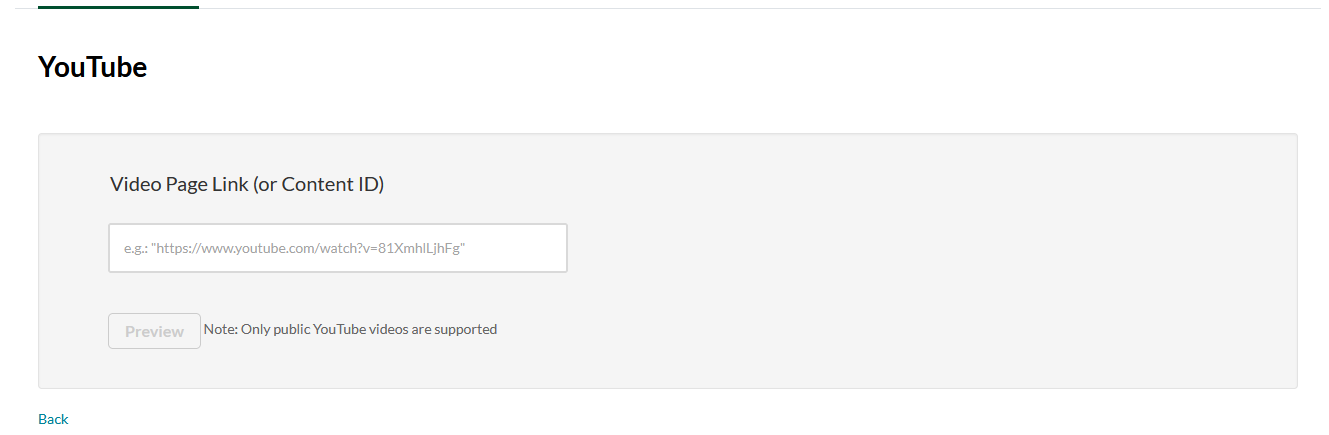
- On the Media Upload page, Copy and paste the YouTube video page link(or Content ID) that you wish to upload.
How to copy the YouTube video page link
- Navigate to the YouTube video and click SHARE button.
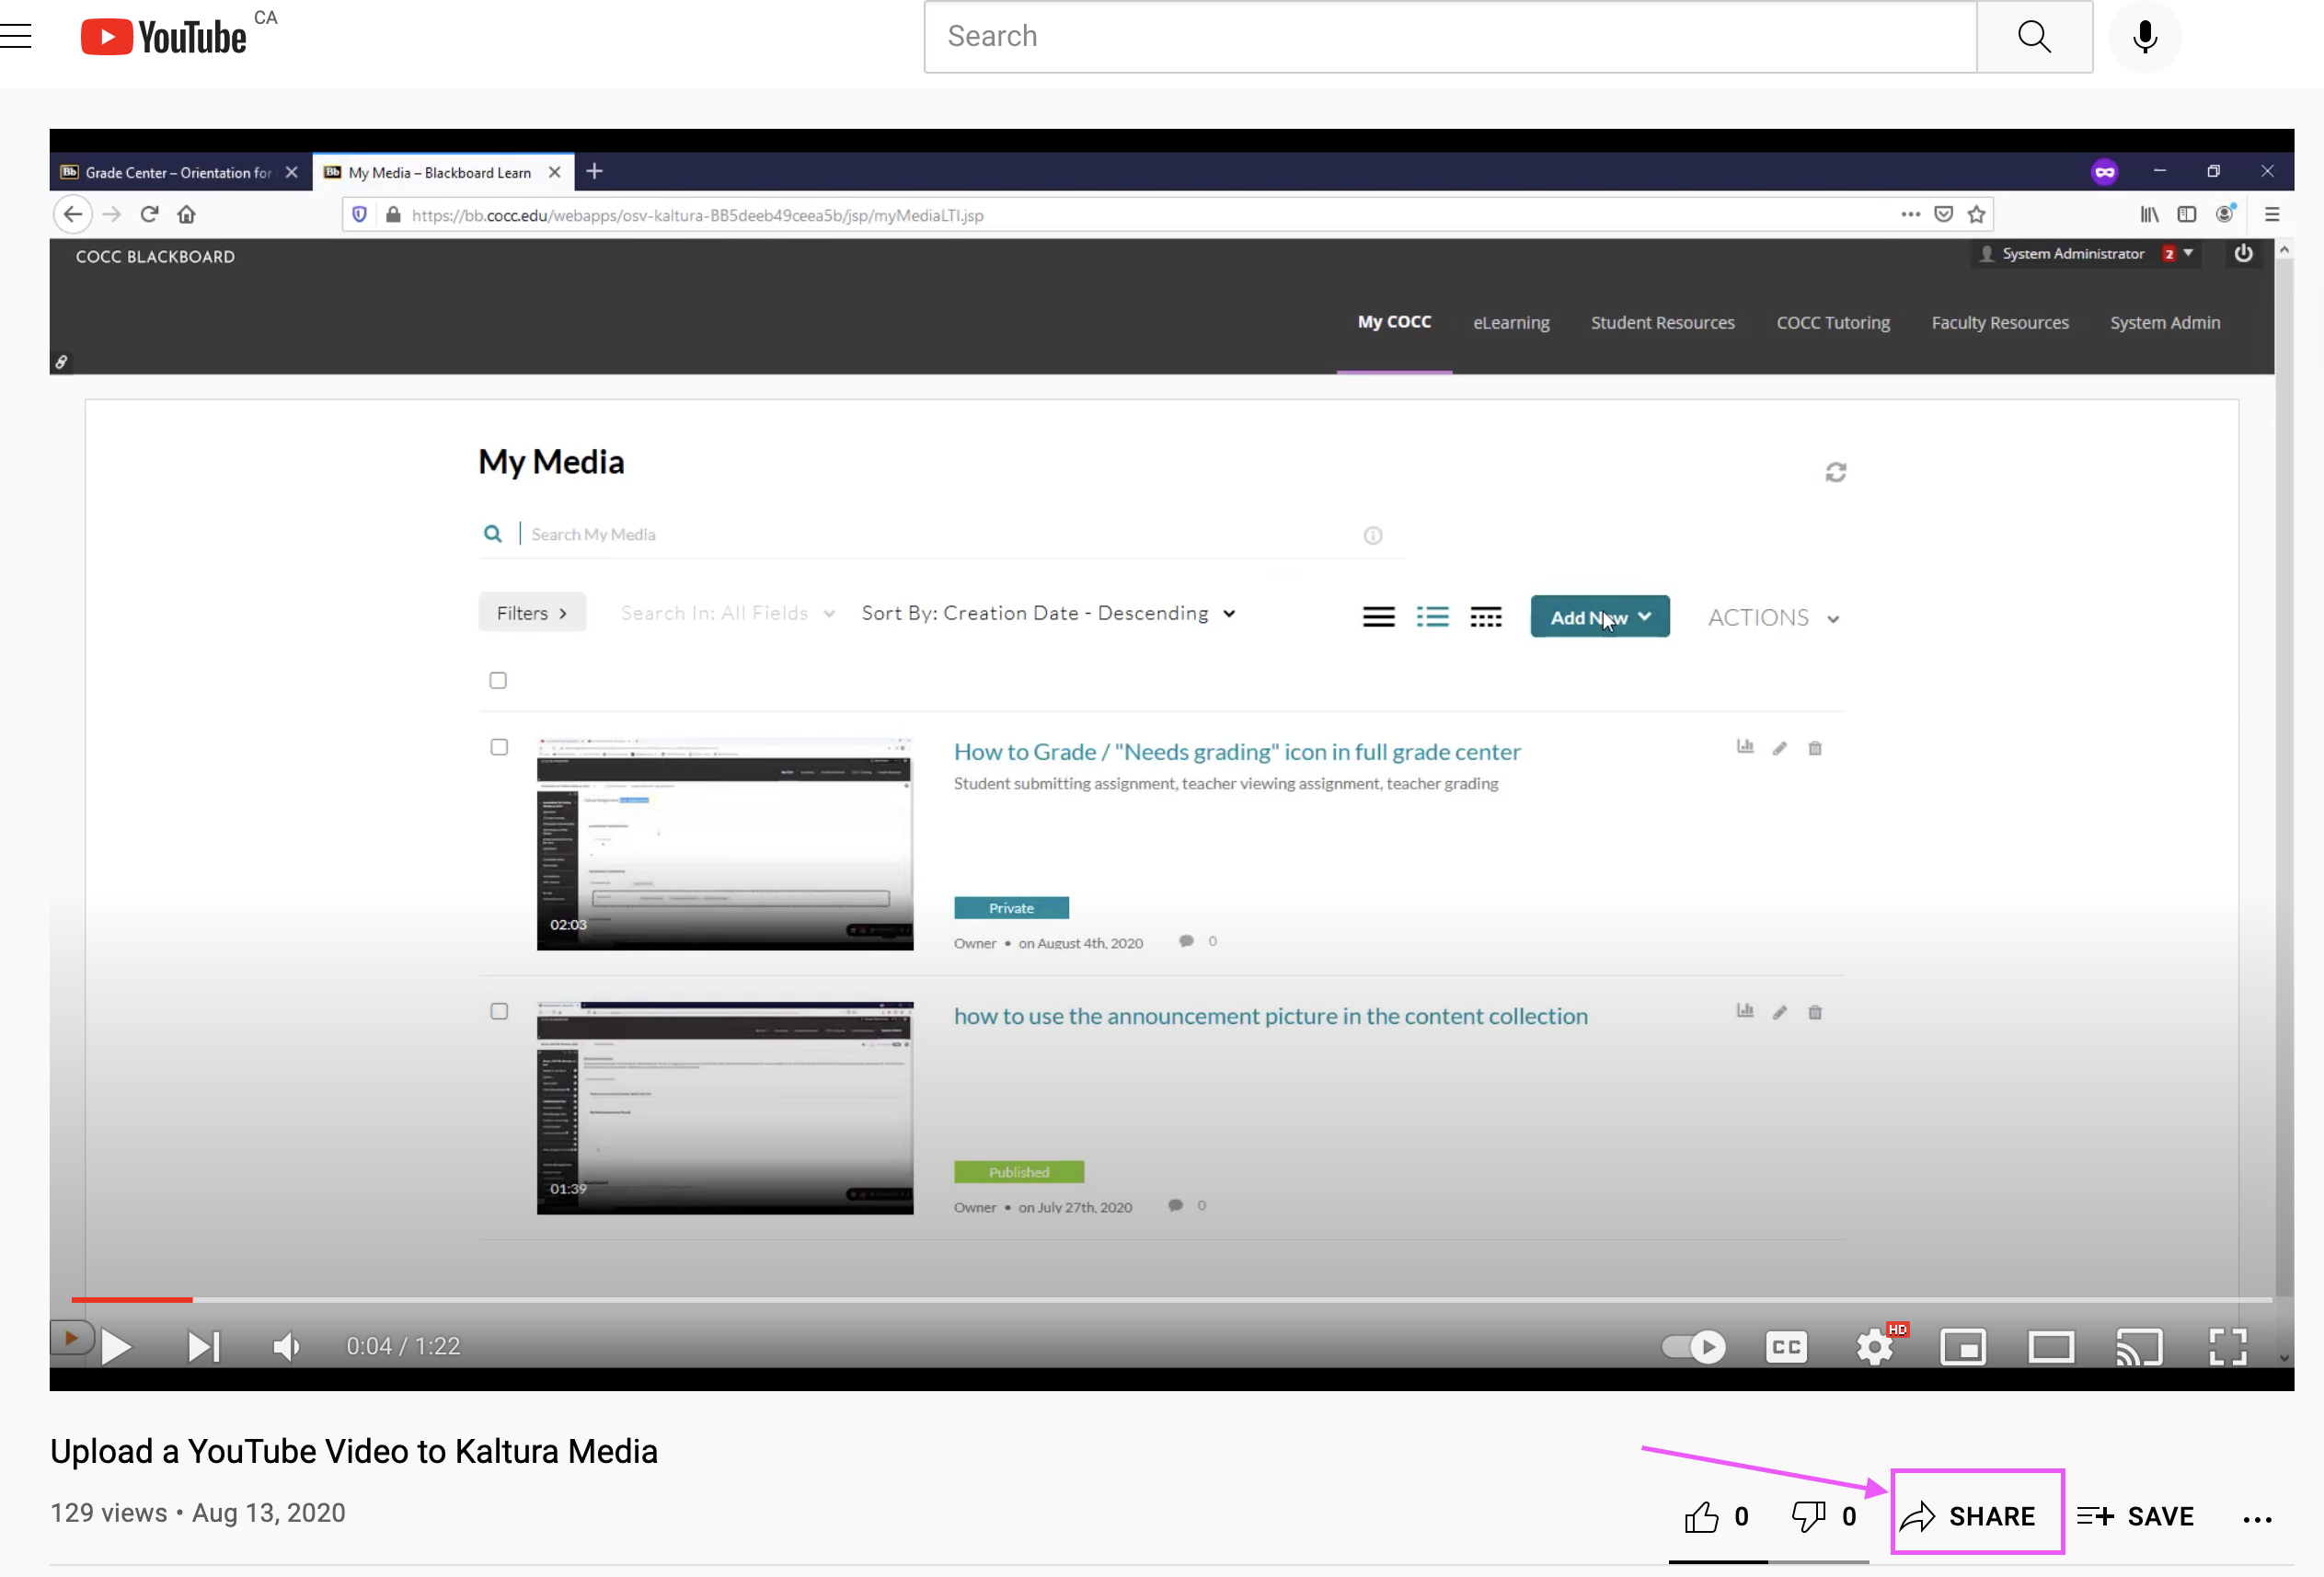
Copy the YouTube video link
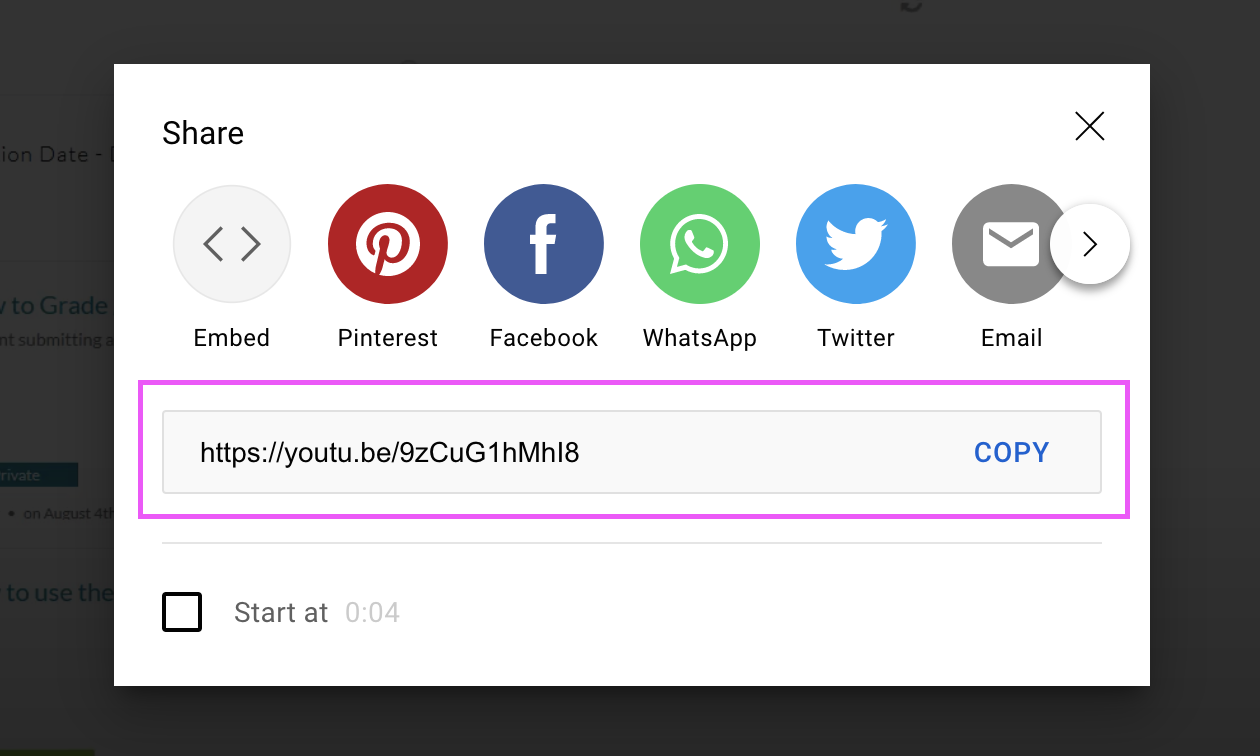
- Or right + click on the video and select copy video url option.
Note: Only public YouTube videos are supported
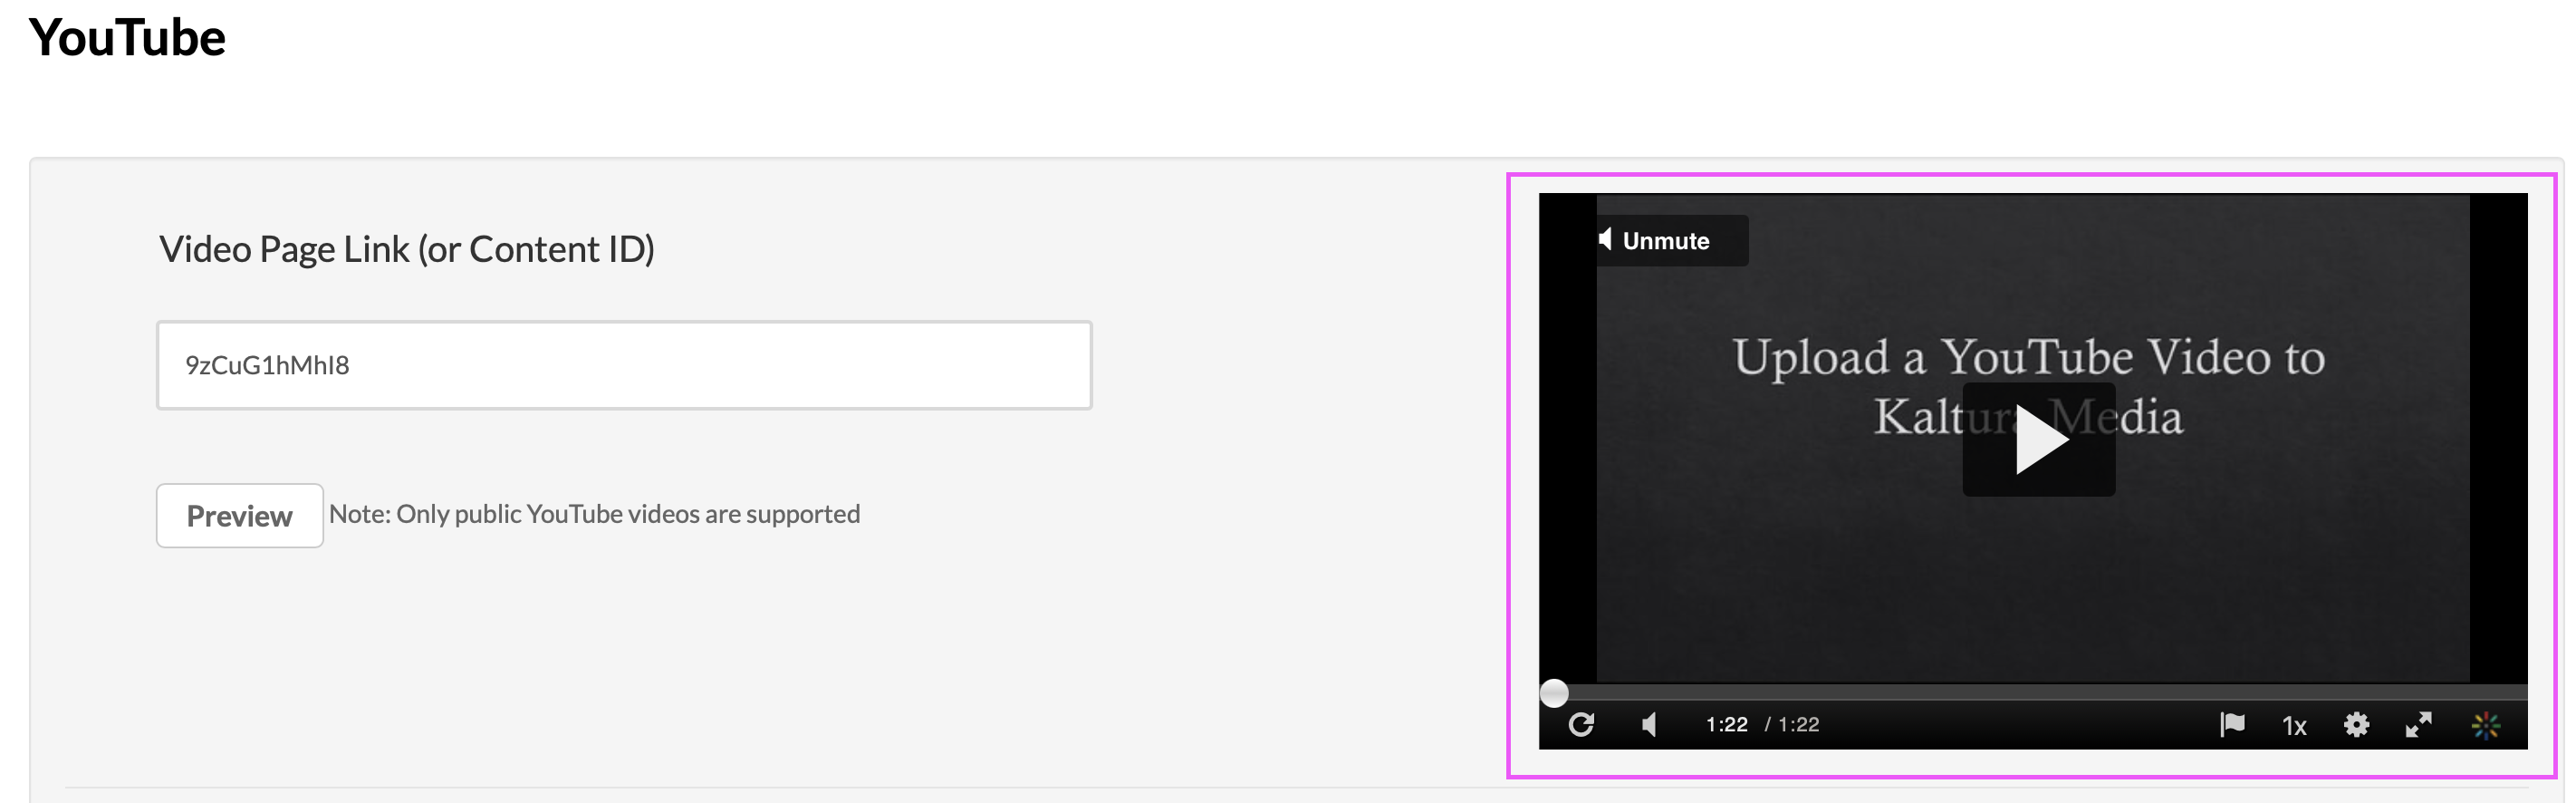
- Paste the YouTube video link then click Preview button.
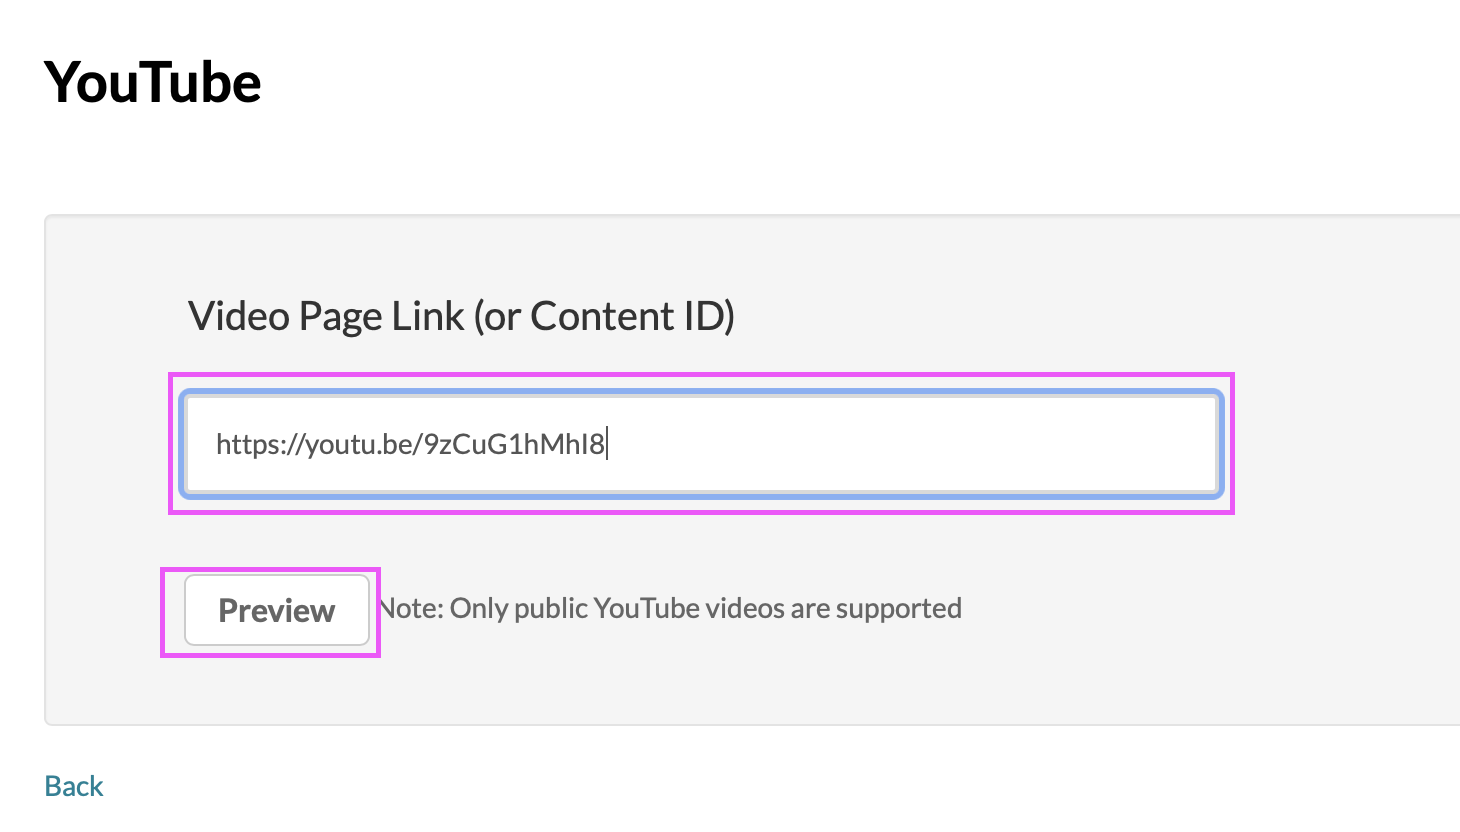
It should display a preview of the YouTube video that you are trying to upload.
Fill the form
Complete all the required fields and save the entry before you can select to publish it to categories or channels.
Note: that the upload process needs to complete successfully for the "Published" option to be enabled.
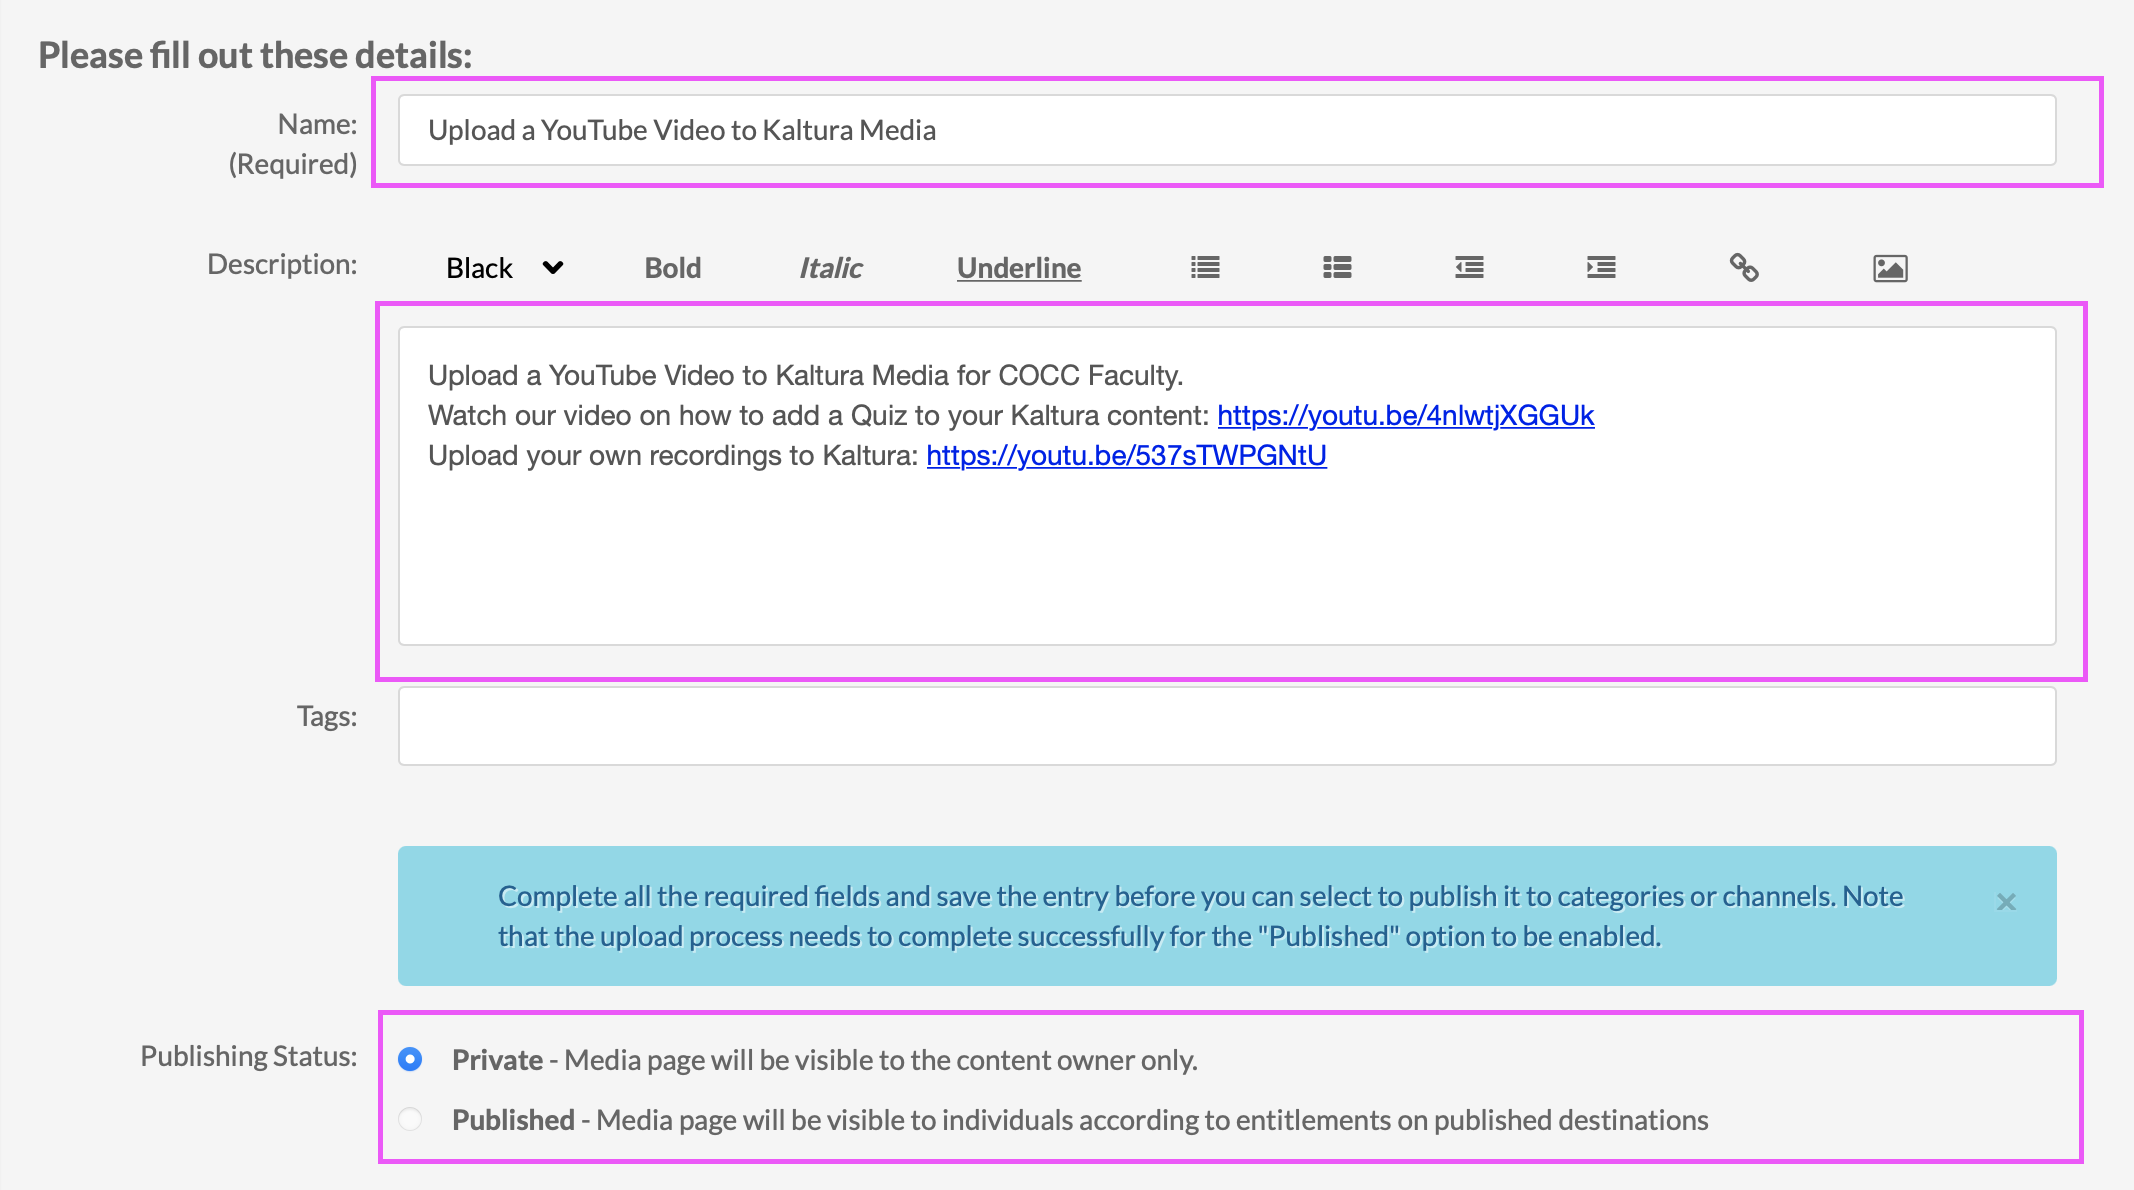
Once ready, click the Save button at the bottom of the form to complete the process.
-
On the My Media page, new video entry will be created with the YouTube icon on the top of the video Thumbnail


Collaboration
There may be times when you want to share media with colleagues or transfer ownership to someone else. To access the Collaboration options, follow the steps as outlined below.
Adjust Collaboration settings for media
-
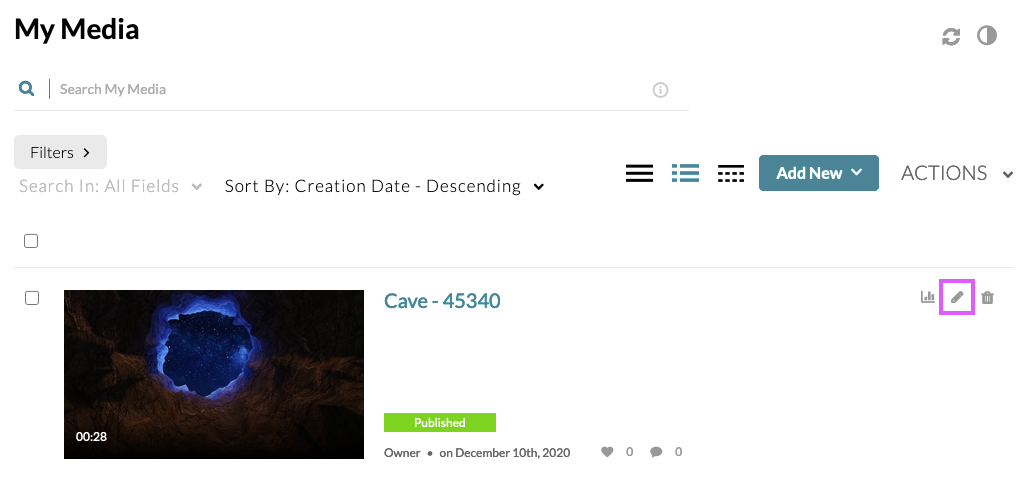
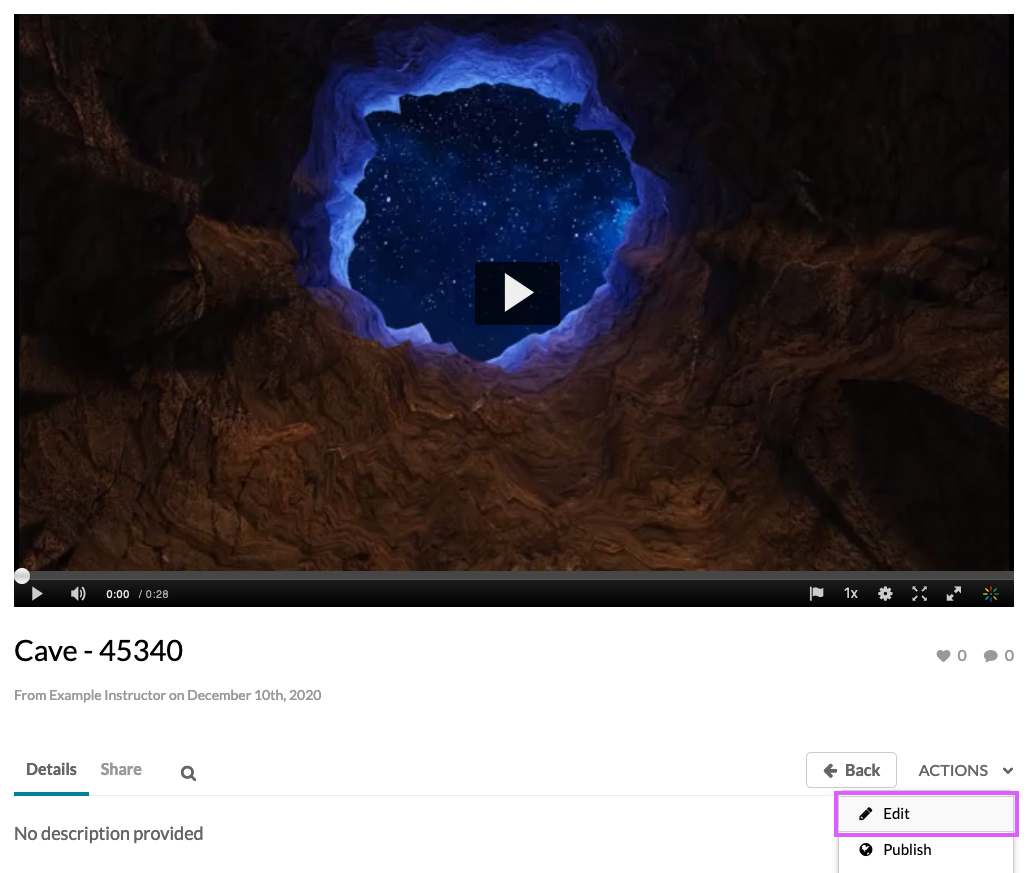
When viewing a media resource within My Media, click on the Pencil icon, or select Edit from the Actions menu.
-
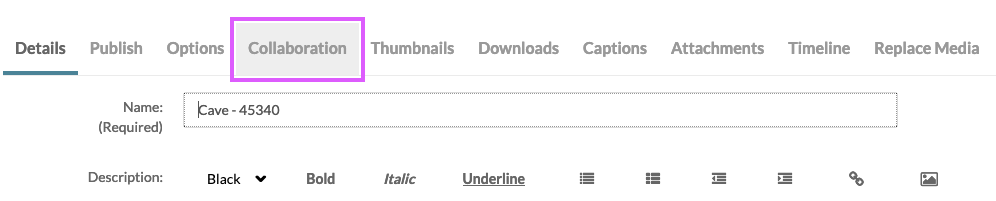
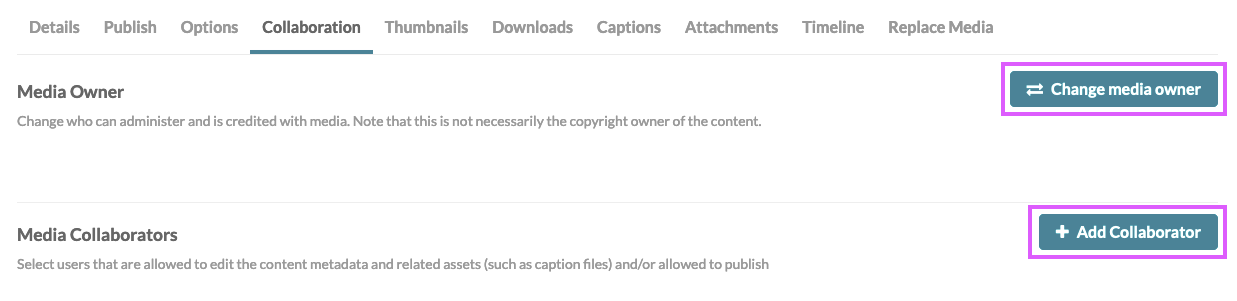
On the details page for your media, select the Collaboration tab.
-
The Collaboration settings allow you to change the Media Owner of the current media element, as well as add or adjust and Media Collaborators, people who you also want to be able to edit, publish, or view this media.
-
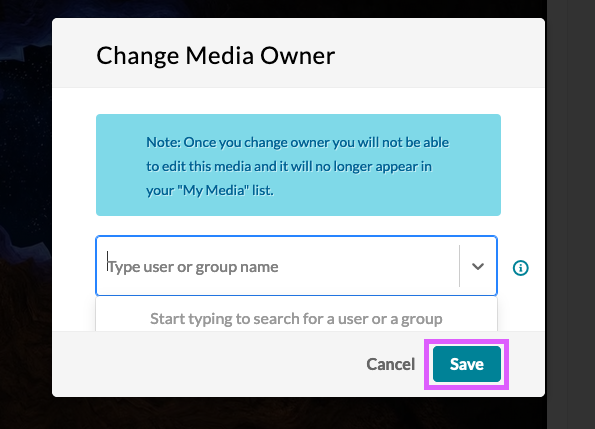
When changing the Media Owner, search for the new user by name, and once selected, click Save. The media will now belong to the user assigned, and will no longer appear within your My Media list.
-
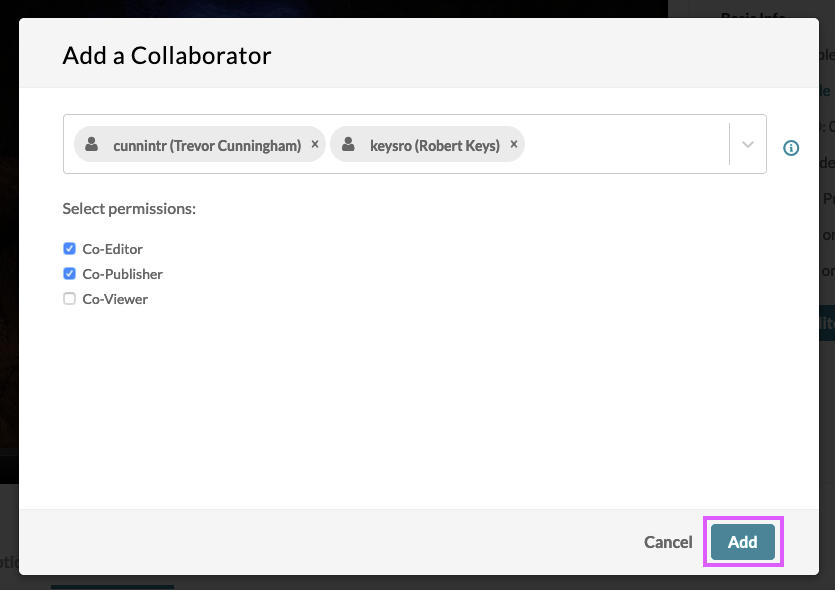
When adding Media Collaborators, search for them by name and select the desired permissions as appropriate.
- Co-Editors are able to edit and make clips of this media.
- Co-Publishers are able to publish and embed this media in courses.
- Co-Viewers are only able to view this media.
-
Once Media Collaborators have been associated with the media, you can edit and remove these permissions as appropriate.

Kaltura Video Resource
The Kaltura Video Resource embeds media on it's own page within your course, so that the media is only loaded when a student attempts to view it specifically.
Additional benefits of using a resource are that it can be hidden, conditionally released, and it avoids having media embedded on the main course page (which can reduce performance or cause problems on some devices).
To add a Kaltura Video Resource to your course, follow the steps outlined below.
With editing turned on, click the Plus Sign then Activity or resource

On the Resources tab, select the Kaltura Video Resource icon.

On the new Kaltura Video Resource page, scroll down to the video area and select Add media

A pop-up window will appear that allows you to select from media within your My Media library. You can also upload or record new media by selecting from the options within the Add New menu.
Once you have found your media resource, click the associated Embed button.
If you wish to customize the embedded player, first click the Cog button that appears before the associated embed button.
Adjust any other settings as required, and finally select either Save and return to course, which will take you back to the course main page, or Save and display, which will take you to the newly created Kaltura Video Resource page.

The Kaltura Video Resource will appear like other activities and resources in your course on the course homepage.

Kaltura Media Assignment
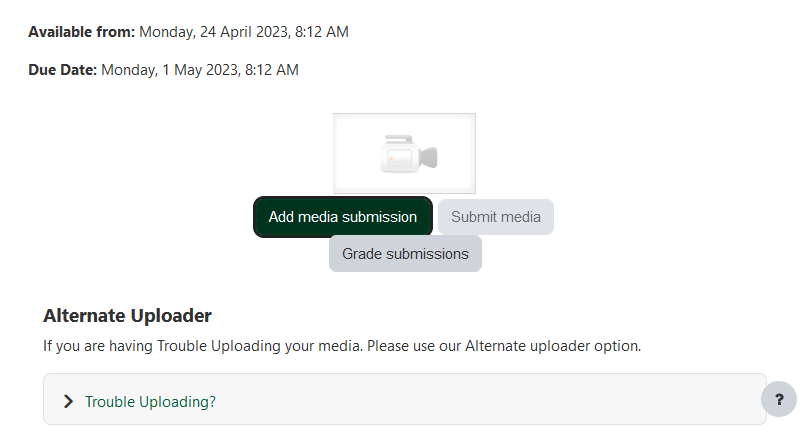
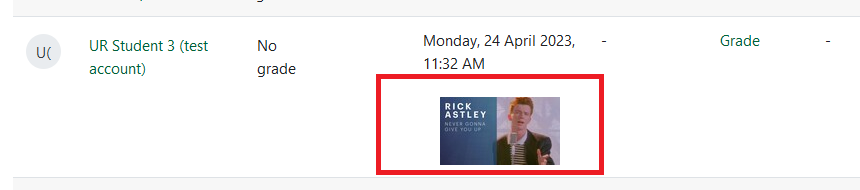
The Kaltura Media Assignment activity creates an assignment that allows students to upload recorded media. It is possible to allow resubmissions if desired. When grading, thumbnails of the video submission are presented in a table. Clicking on the thumbnail will start playback of the submission. Aside from that, grading the assignment should be similar to other assignment activities found within UR Courses.
To add a Kaltura Media Assignment activity to your course, follow the steps outlined below.
With editing turned on, click the Plus Sign then Activity or resource
On the Activitess tab, select the Kaltura Video Resource icon.
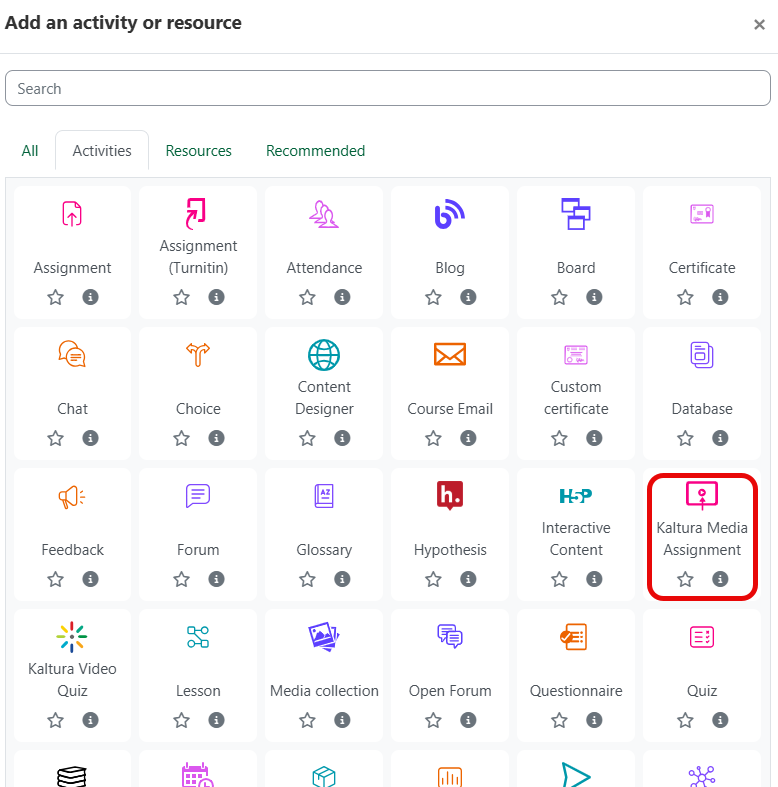
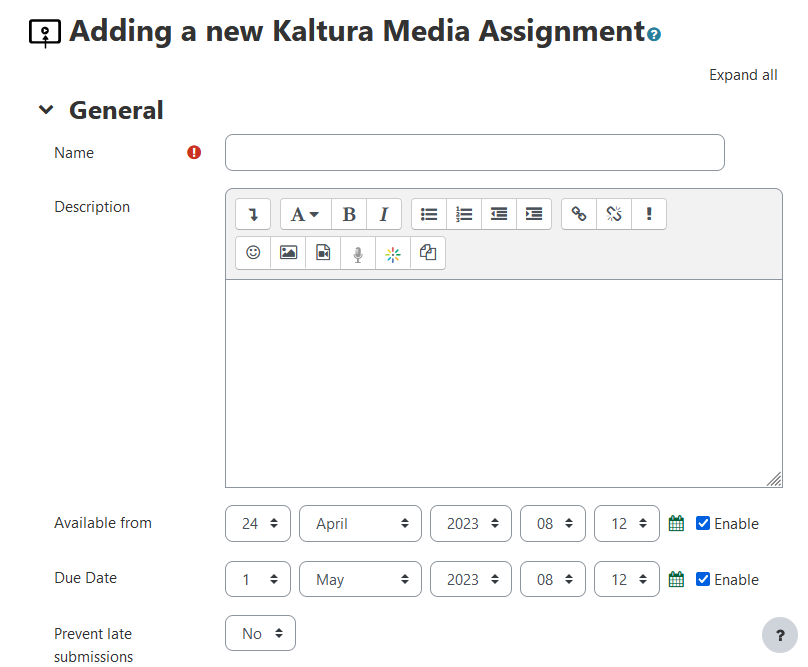
On the new Kaltura Media Assignment activity page, fill out the following options as appropriate:
Once students have made their submissions, click Grade submissions.
To quickly begin playback of a student submission, click on the submission thumbnail. The media will load in an overlay for your review.
To enter a grade and/or leave feedback for a student submission, click on Grade.
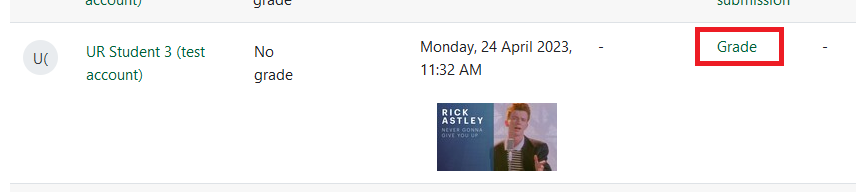
Select a grade for the submission, leave Feedback if desired, and finally select Save changes.

Course Media Gallery
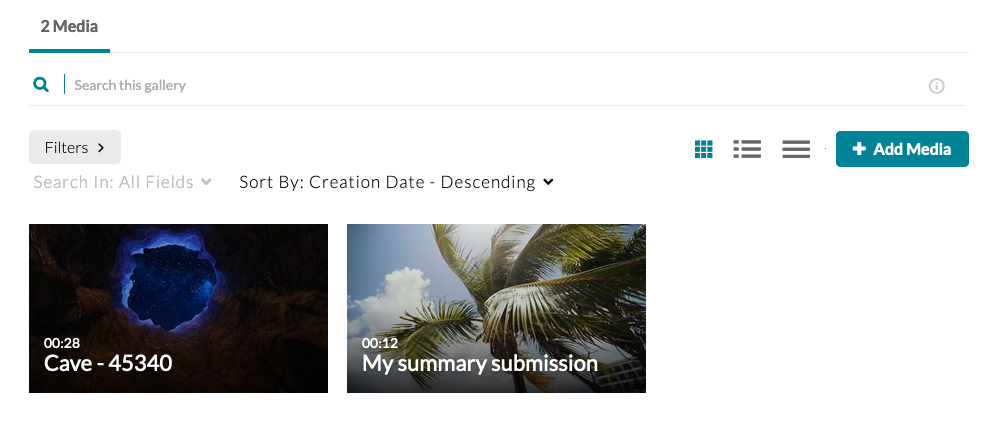
The course Media Gallery can be a place for students and instructors to share media, provides for the creation of playlists, and allows you to see course specific analytics for your media.
Media that has been shared with the course media gallery can be viewed by everyone enrolled in the course.
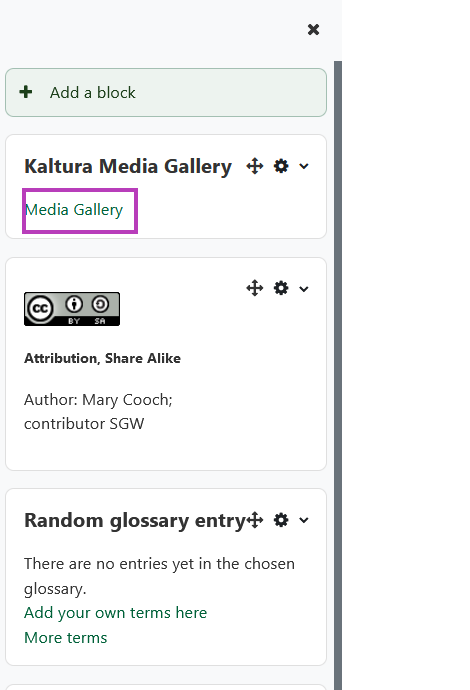
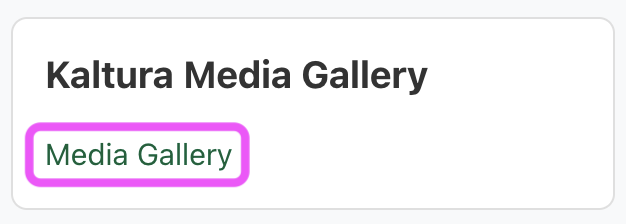
If the Media Gallery block has not yet been added to your course, turn on edit mode, select Add a block in blocks drawer on the right, and finally select Kaltura Media Gallery. To view the course media gallery, locate the media gallery link within the blocks drawer.
To publish media within your course, follow the steps outlined below.
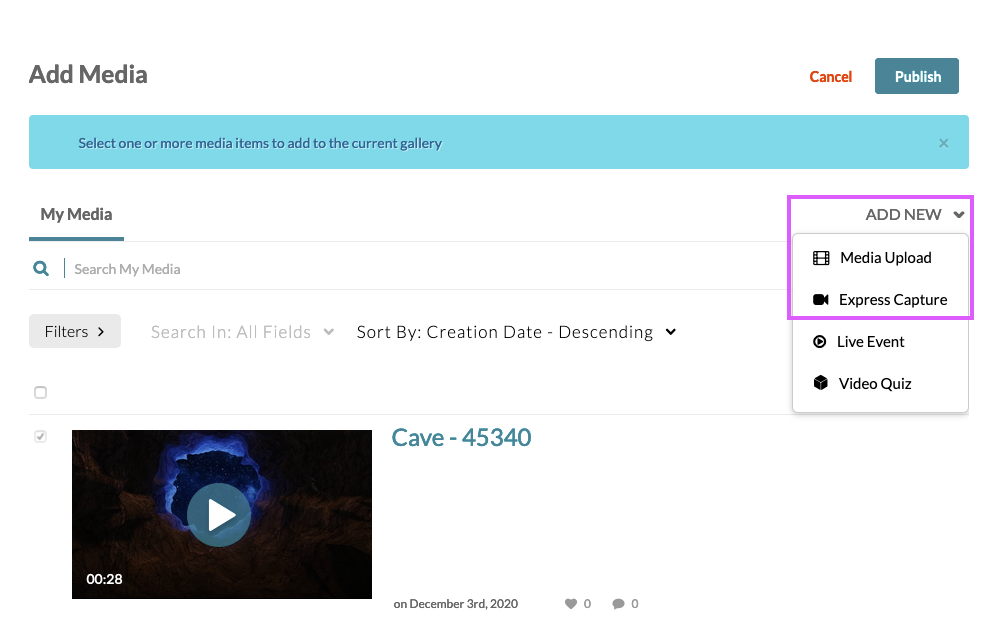
Navigate to the Media Gallery for your course and click Add media.
-
This will open a listing of the media available in your My Media area.
To add an existing recording that you have not yet uploaded, click Add new and select Media Upload. If you have not yet made a recording, you can do so with the Express Capture option.
Once your media has been uploaded, select the checkbox beside each item you wish to include in the gallery and choose Publish.
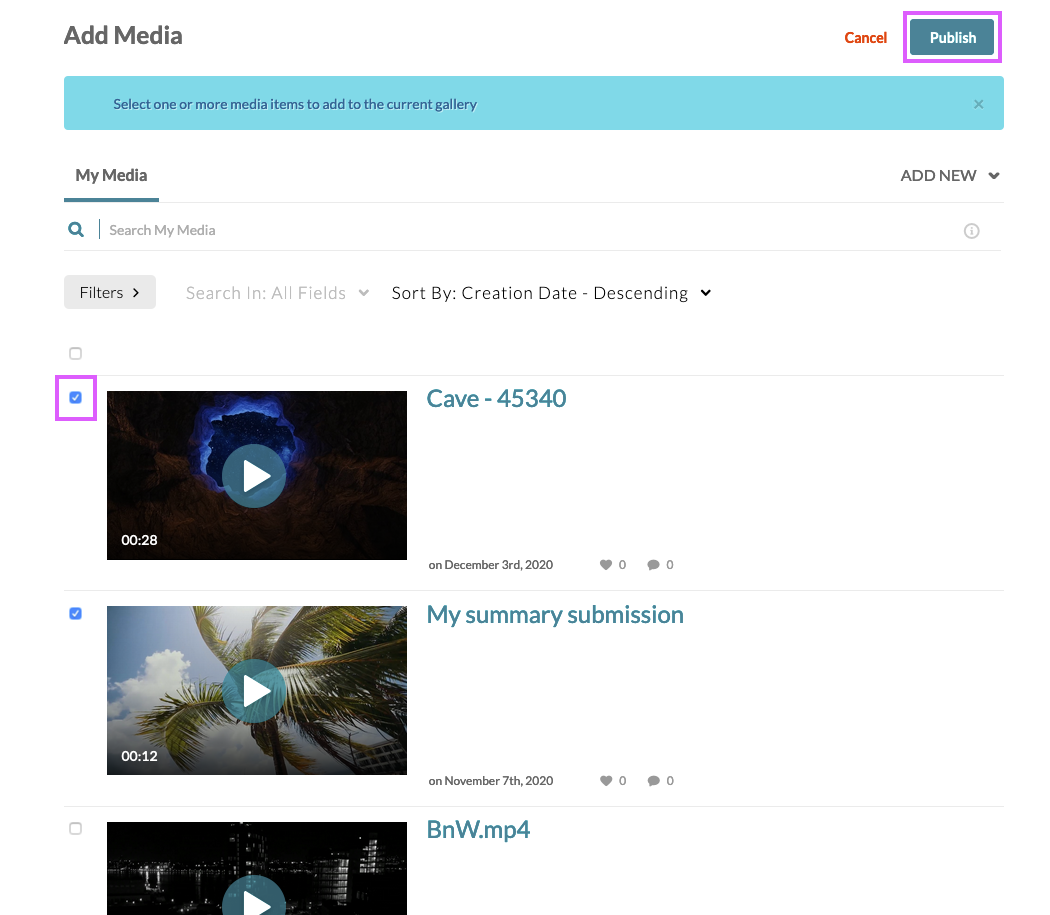
The selected media will now be viewable by everyone enrolled in the course.
Course Playlists
You can create course playlists within the course Media Gallery, that can then also be embedded elsewhere within the content of the course.
If the Media Gallery block has not yet been added to your course, turn on edit mode, select Add a block in blocks drawer on the right, and finally select Kaltura Media Gallery. To view the course media gallery, locate the media gallery link within the blocks drawer.
To create a playlist within your course media gallery, follow the steps outlined below.
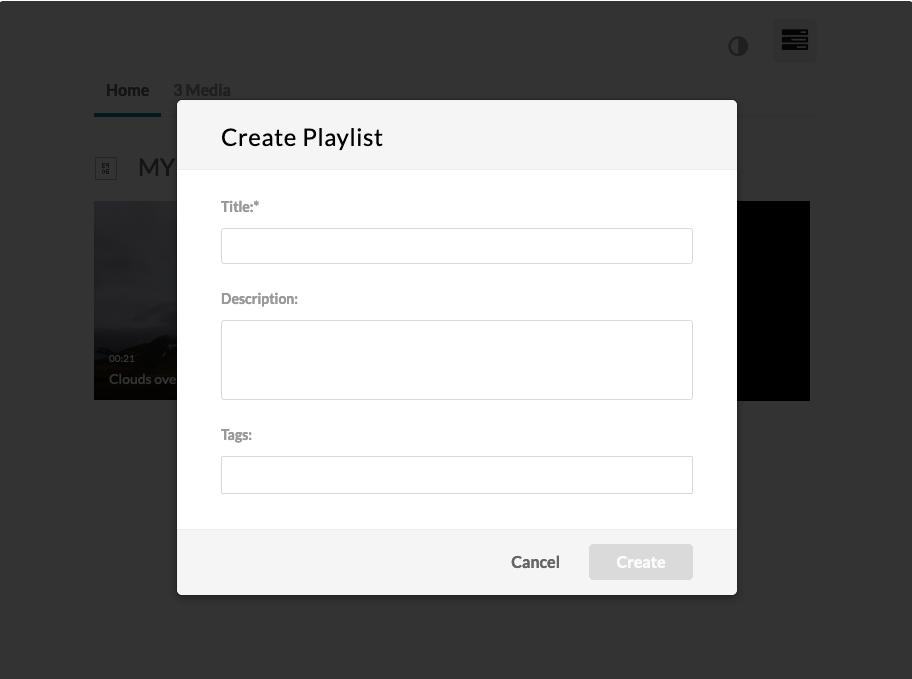
Navigate to the Media Gallery for your course and click Create channel playlist.

-
This will prompt you to give the new playlist a title, description, and associate tags.
You will arrive at the media selection screen. Select media to be in the playlist on the left by clicking the + icon.
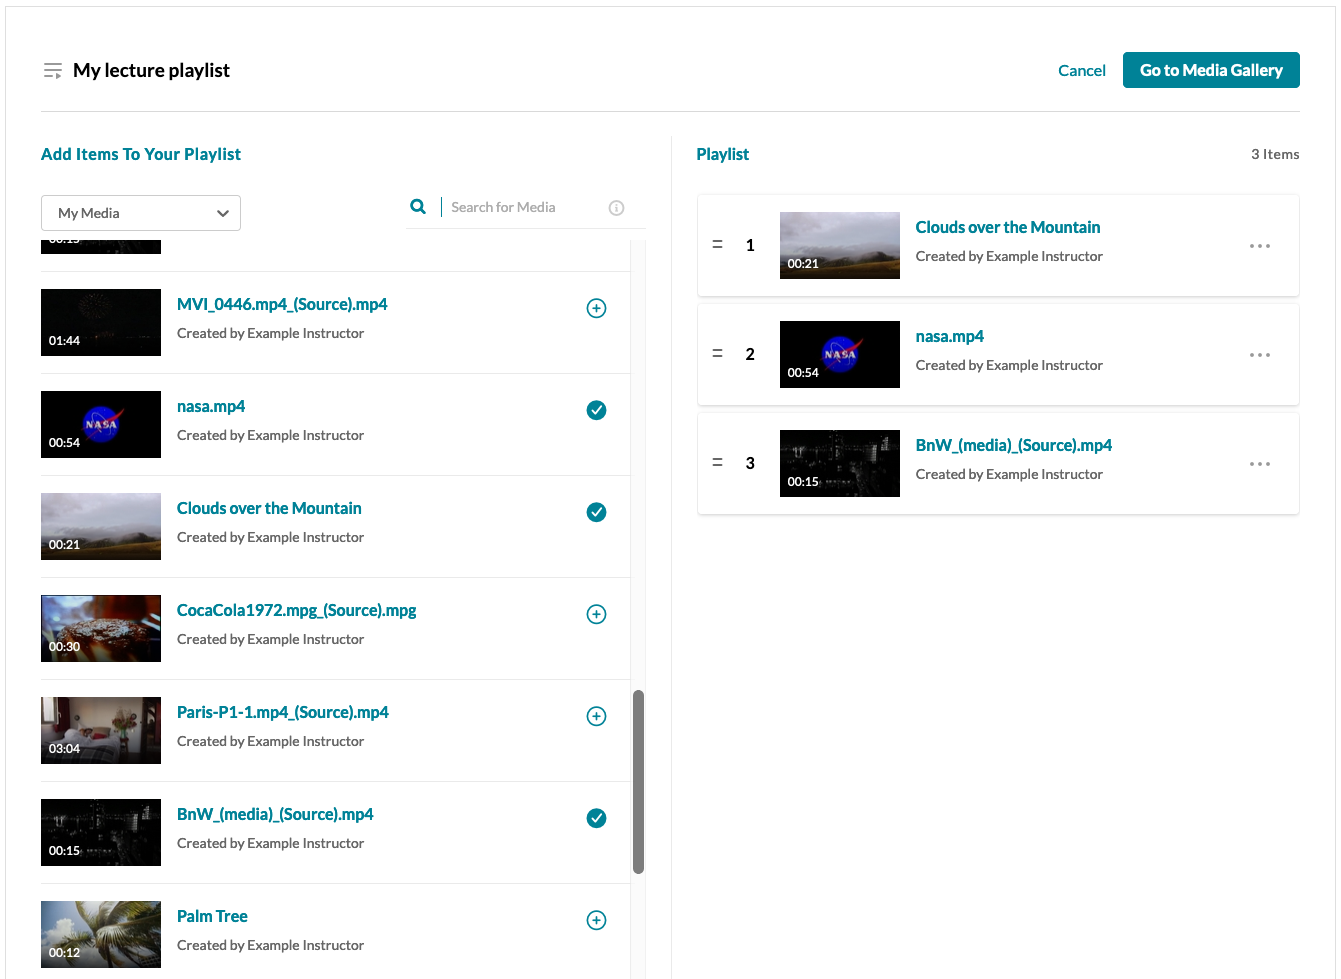
The selected media will now be associated with this playlist. Select Go to Media Gallery to update any further details.
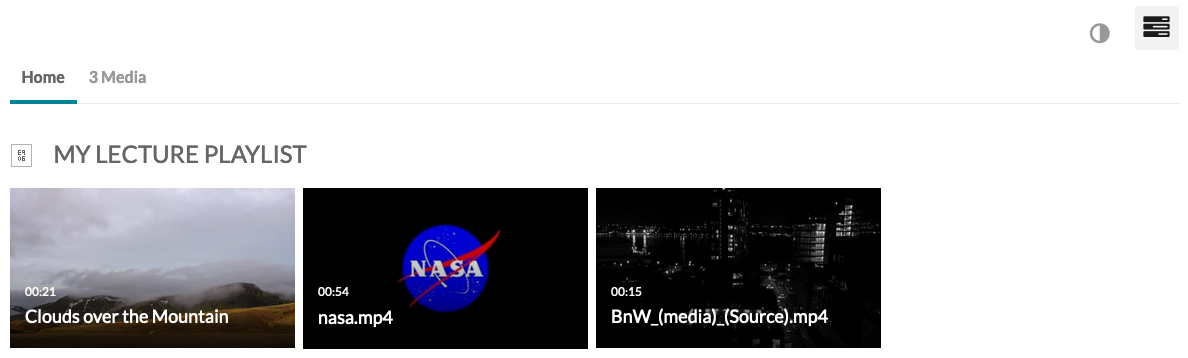
Returning to the media gallery will now list the newly created playlist.
NOTE: Media gallery playlists are not copied when a course is duplicated. You can import a playlist from another course into the current media gallery by following the steps below.
Import a playlist
Playlists created in the Kaltura Media Gallery are not copied when you duplciate a course, but it is easy to import a playlist from a previous course.
To import a playlist from another course media gallery, follow the steps outlined below.
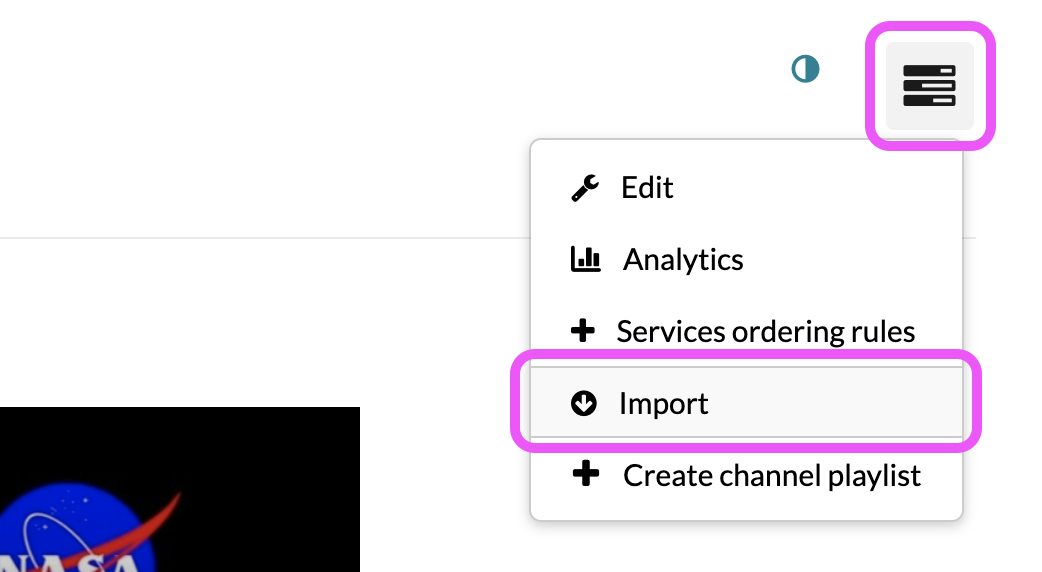
Navigate to the Kaltura Media Gallery block in your course and click the Media Gallery link.
-
Click on the Media Gallery menu and select Import.
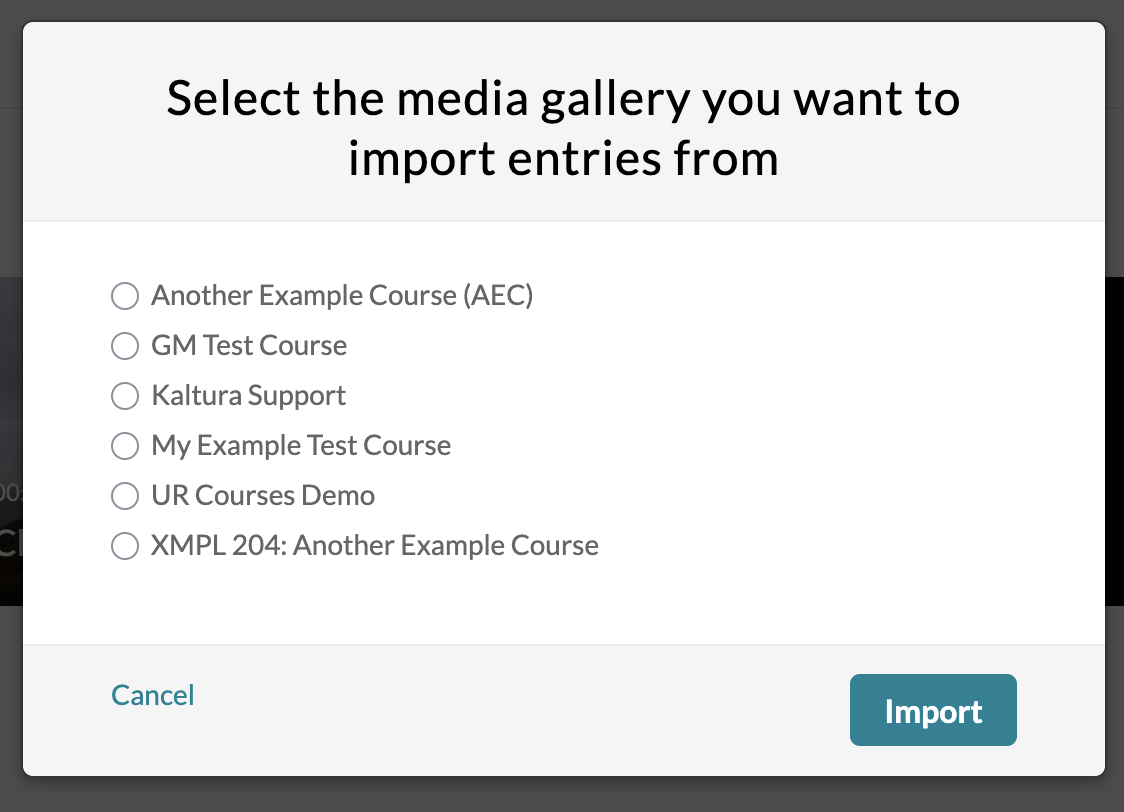
A menu listing other courses with media galleries will appear. Select the course you wish to import from and select Import.
A notice will appear to indicate that the import has started. Once the process is complete, media and playlists from the selected course will now also appear within the current course media gallery.
Embedding media
There may be times when you want to embed media within Books, Pages, or elsewhere within the course. Follow the steps as outlined below.
Insert media with the toolbar
-
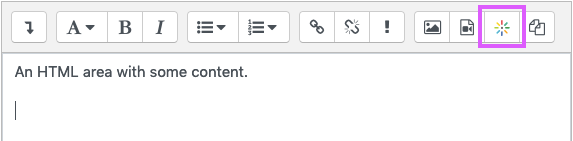
When editing content where you would like to embed the media file, click the Insert Video button on the editor toolbar.
-
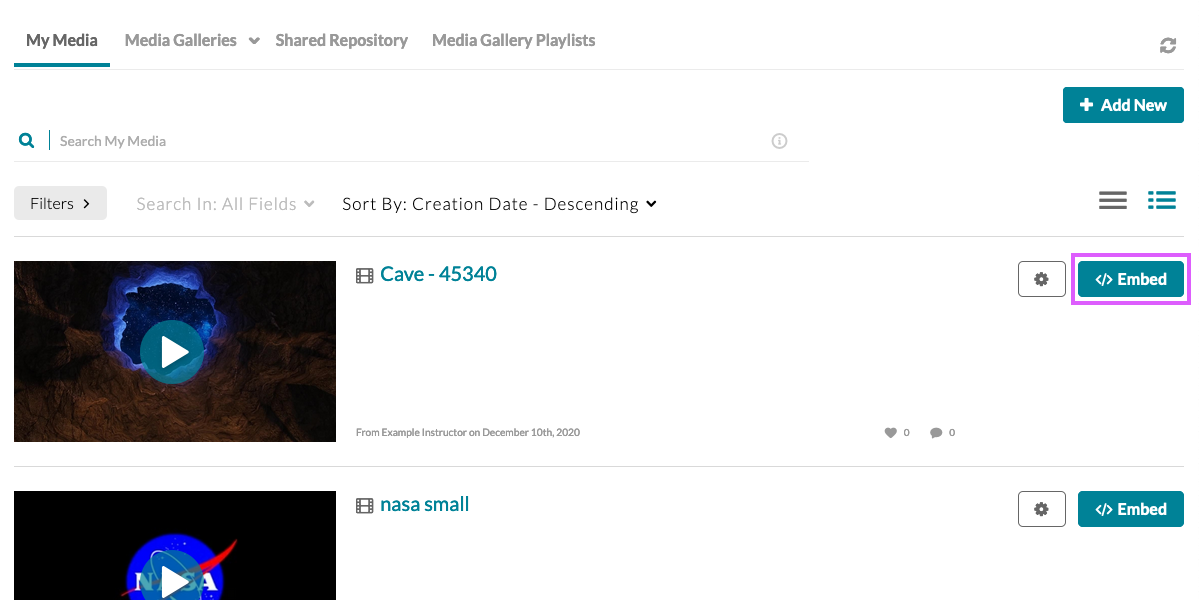
A pop-up window will appear that allows you to select from media within your My Media library. This window is known as the Browse, Search, and Embed (BSE) interface. You can also upload or record new media by selecting from the options within the Add New menu.
Once you have selected your media resource, click Embed.
-
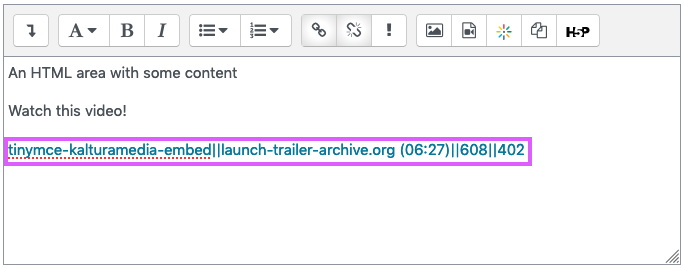
A link to the media will now have been inserted into the content area. Save your changes.
-
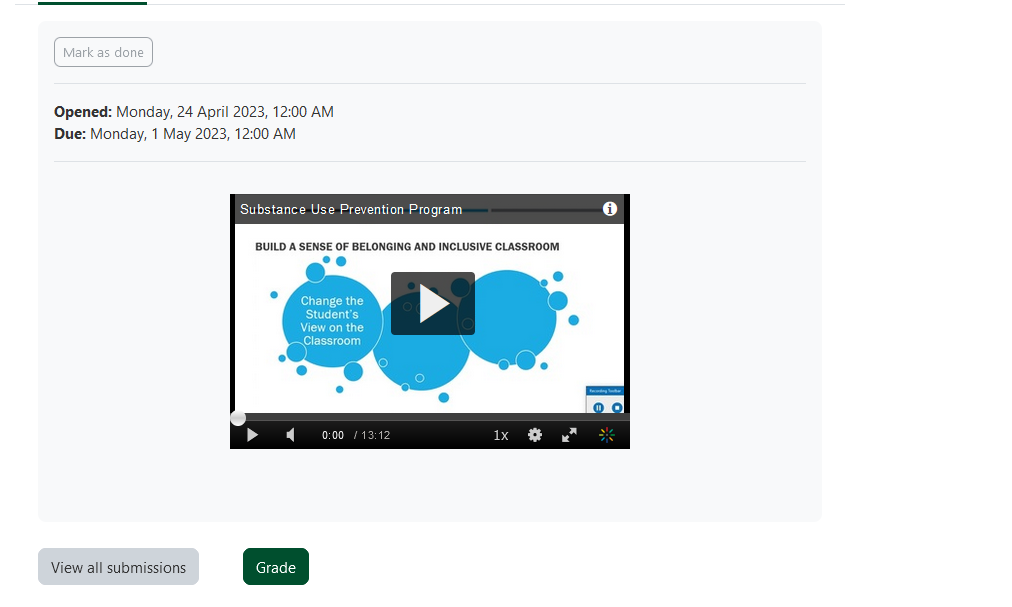
When viewed as content, the link should become automatically replaced by an embedded player, as illustrated below.
-
If an embedded player does not appear, you will need to ensure that the Kaltura filter has been enabled within the activity, or course, by following the steps outlined in Enabling the filter.
If the link is not turned into a player once saved, ensure that the Kaltura filter has been enabled for the course or activity that you are working with. This is key to turning the link into an embedded player within UR Courses.
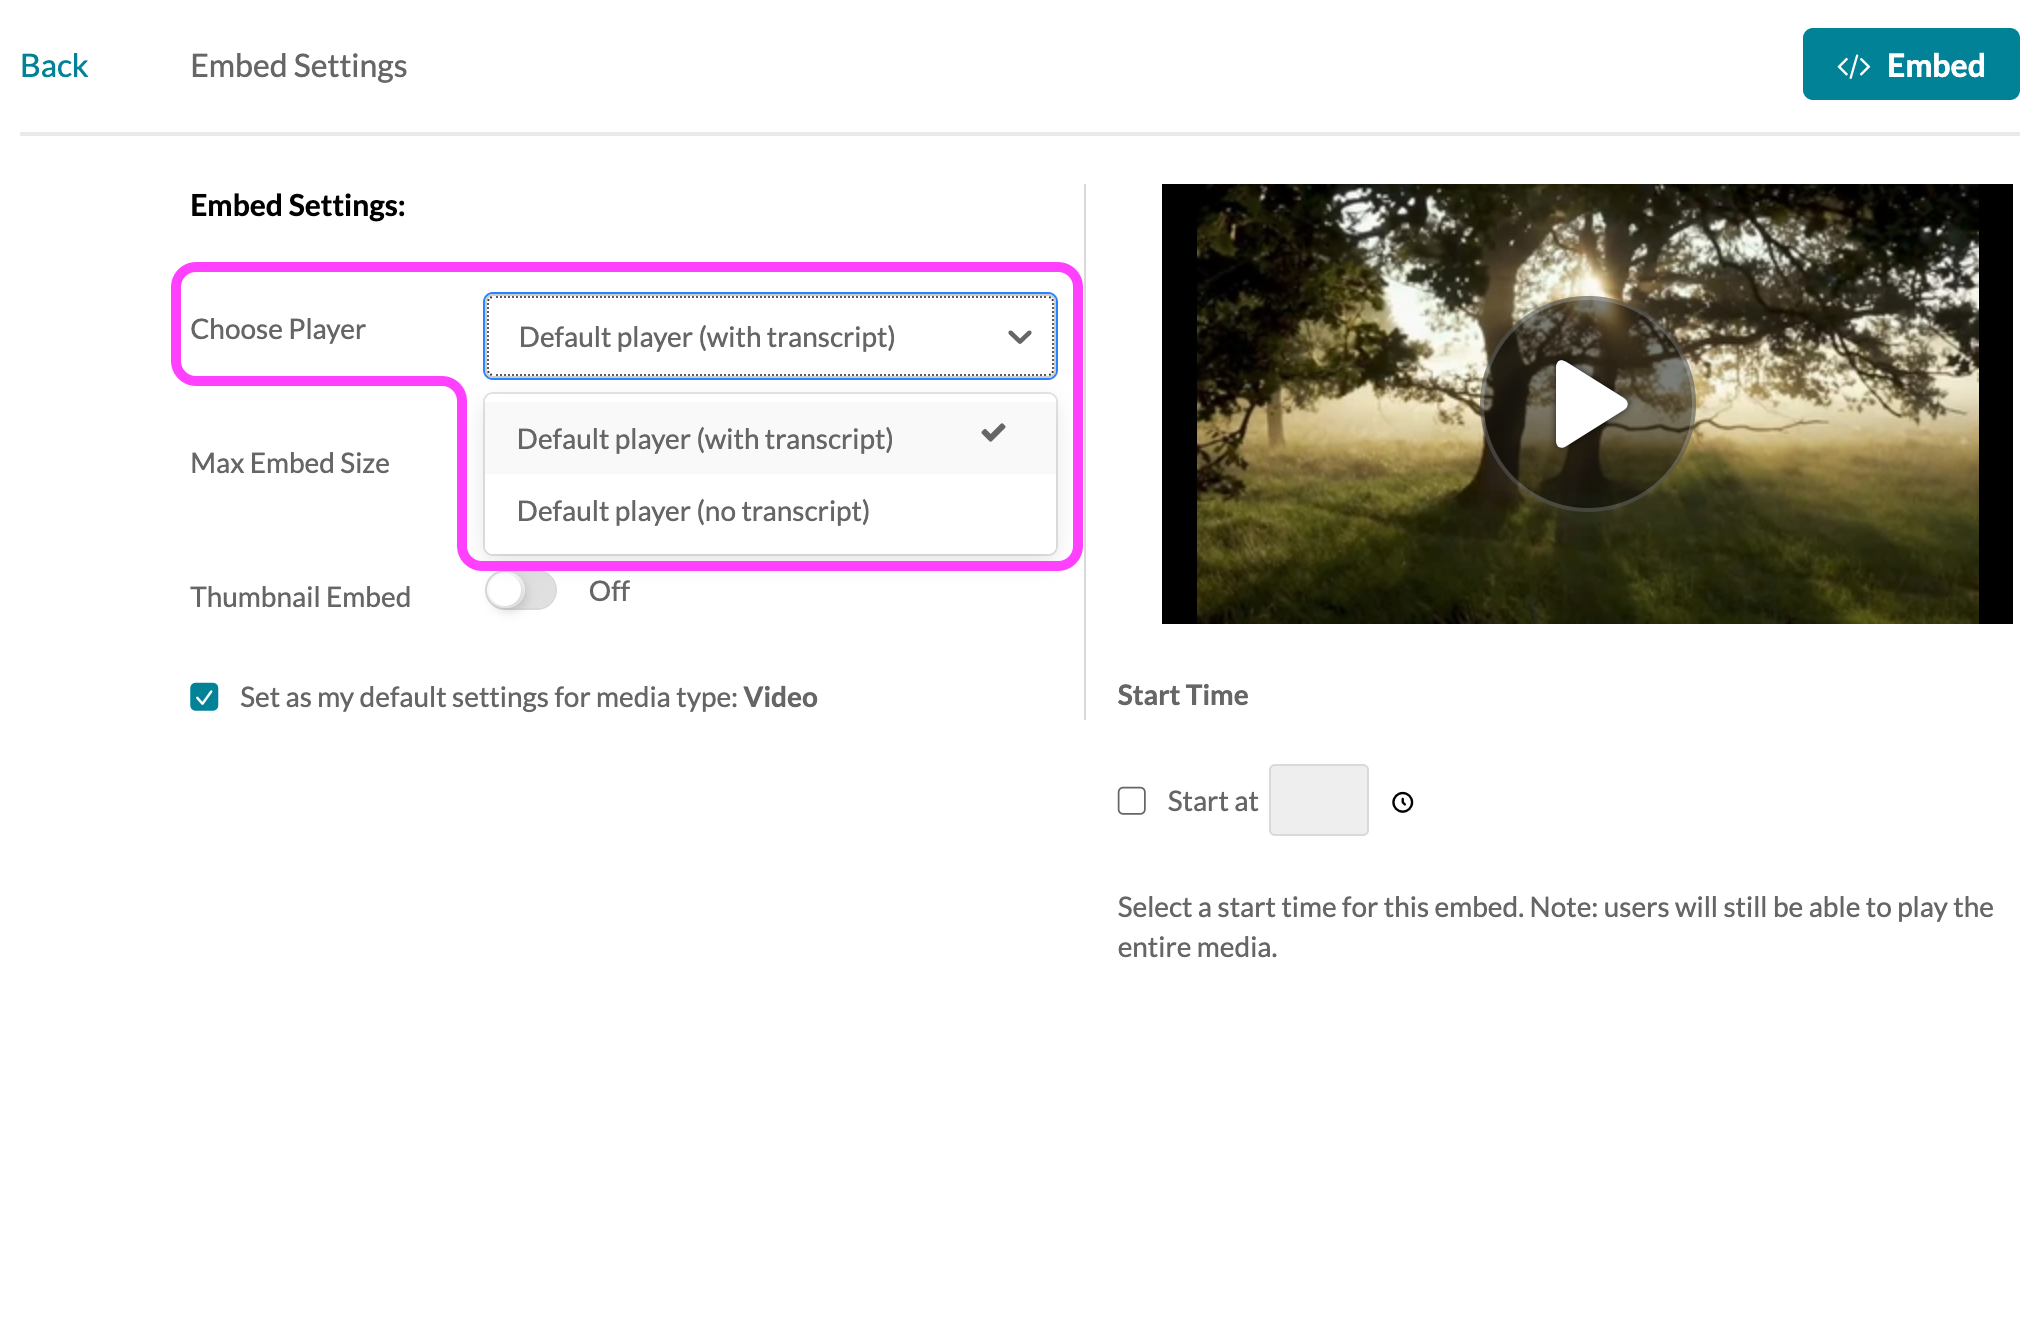
Changing the player
If you wish to prevent students from accessing the transcript of your video, you can do this by changing from the Default player (with transcript) to the Default Player (no transcript) option. This can be achieved by following the steps below when selecting media to embed within a content area or when using the Kaltura Video resource.
-
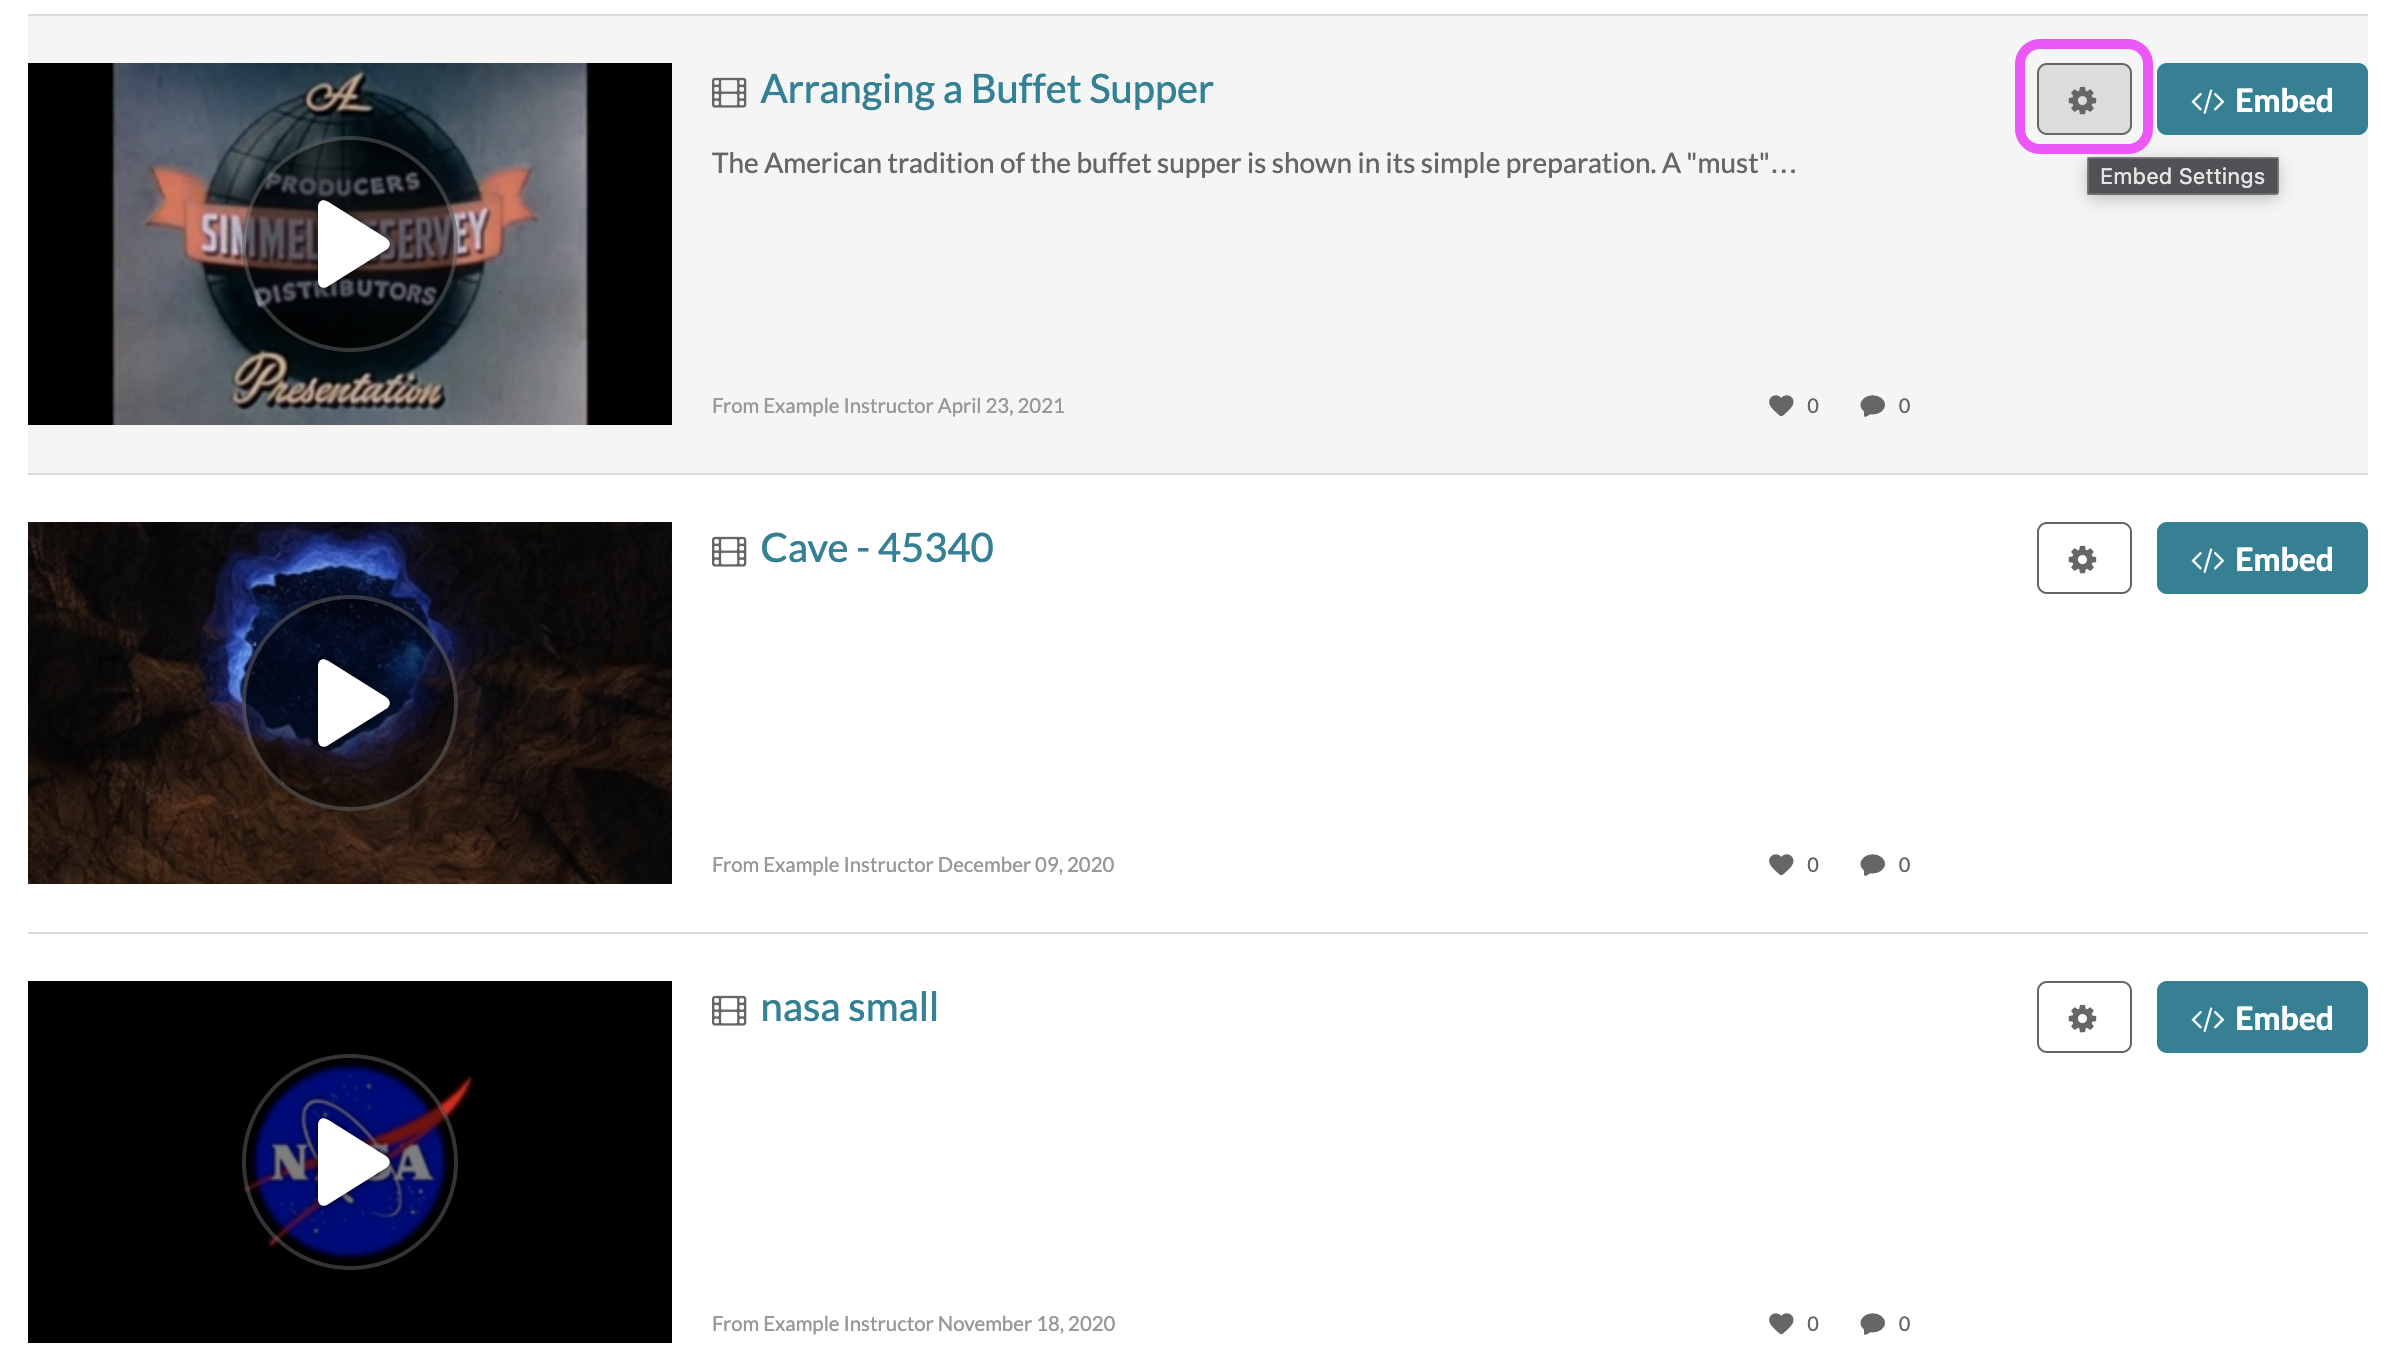
Once you have located your media resource within the Browse, Search, and Embed (BSE) interface, click the Embed Settings gear icon that precedes the Embed button.
-
Change the Choose Player option to the desired player.
-
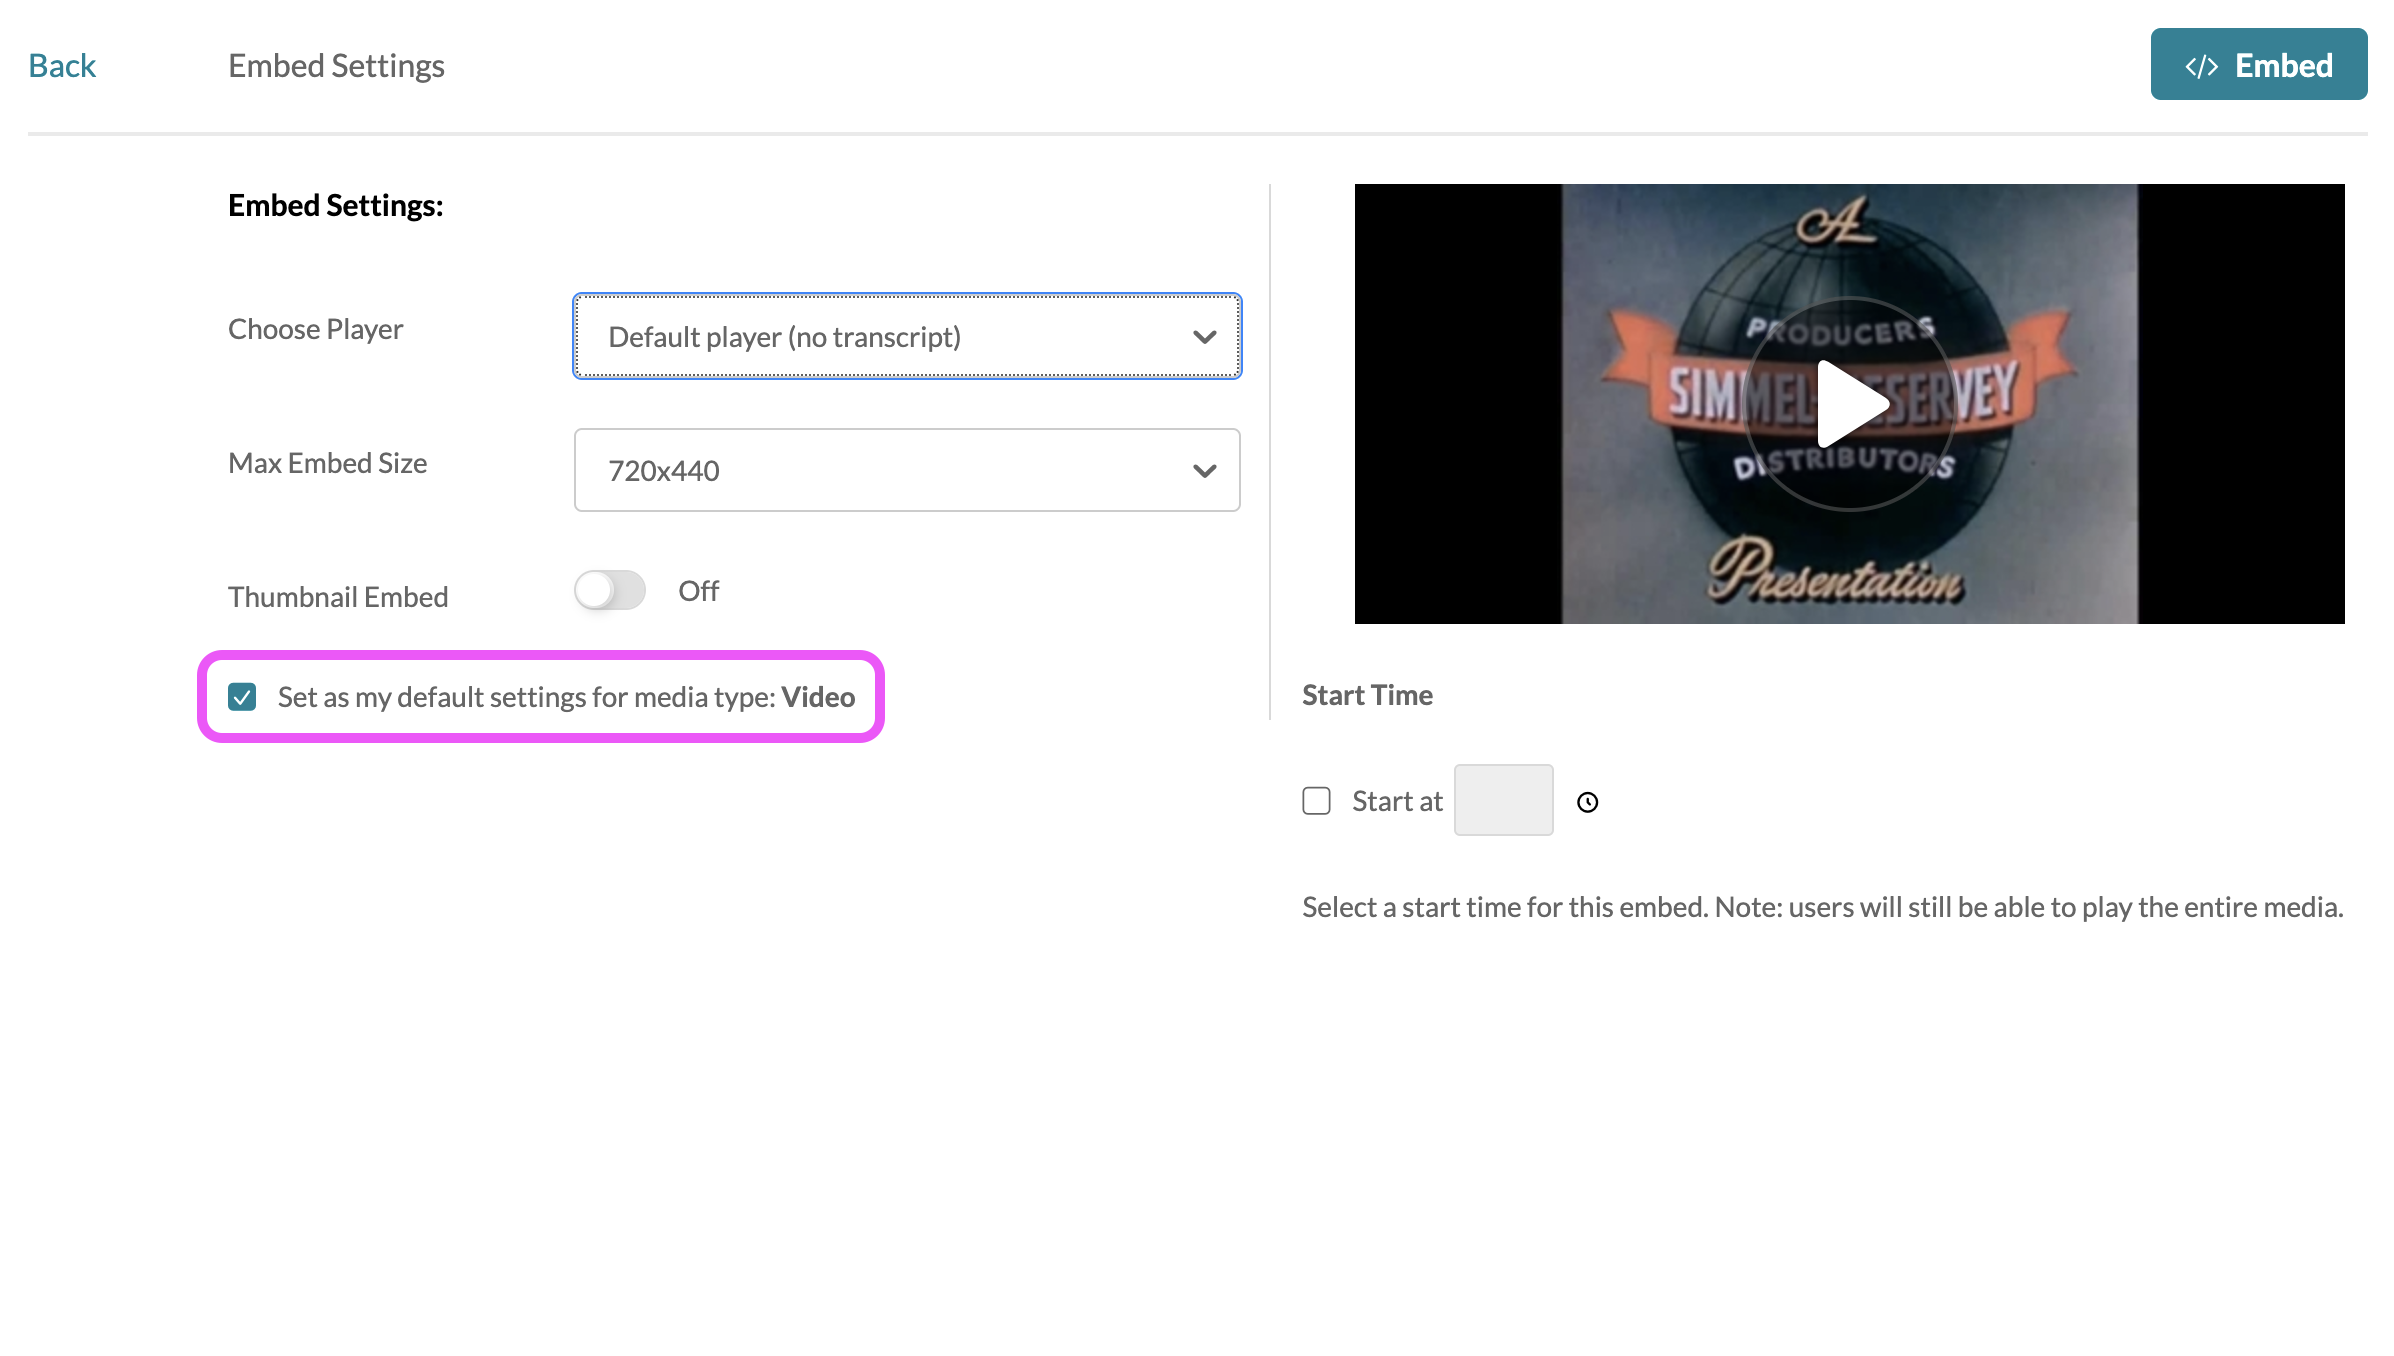
If you wish all future Video embeds to use these same settings, ensure that the checkbox is checked.
-
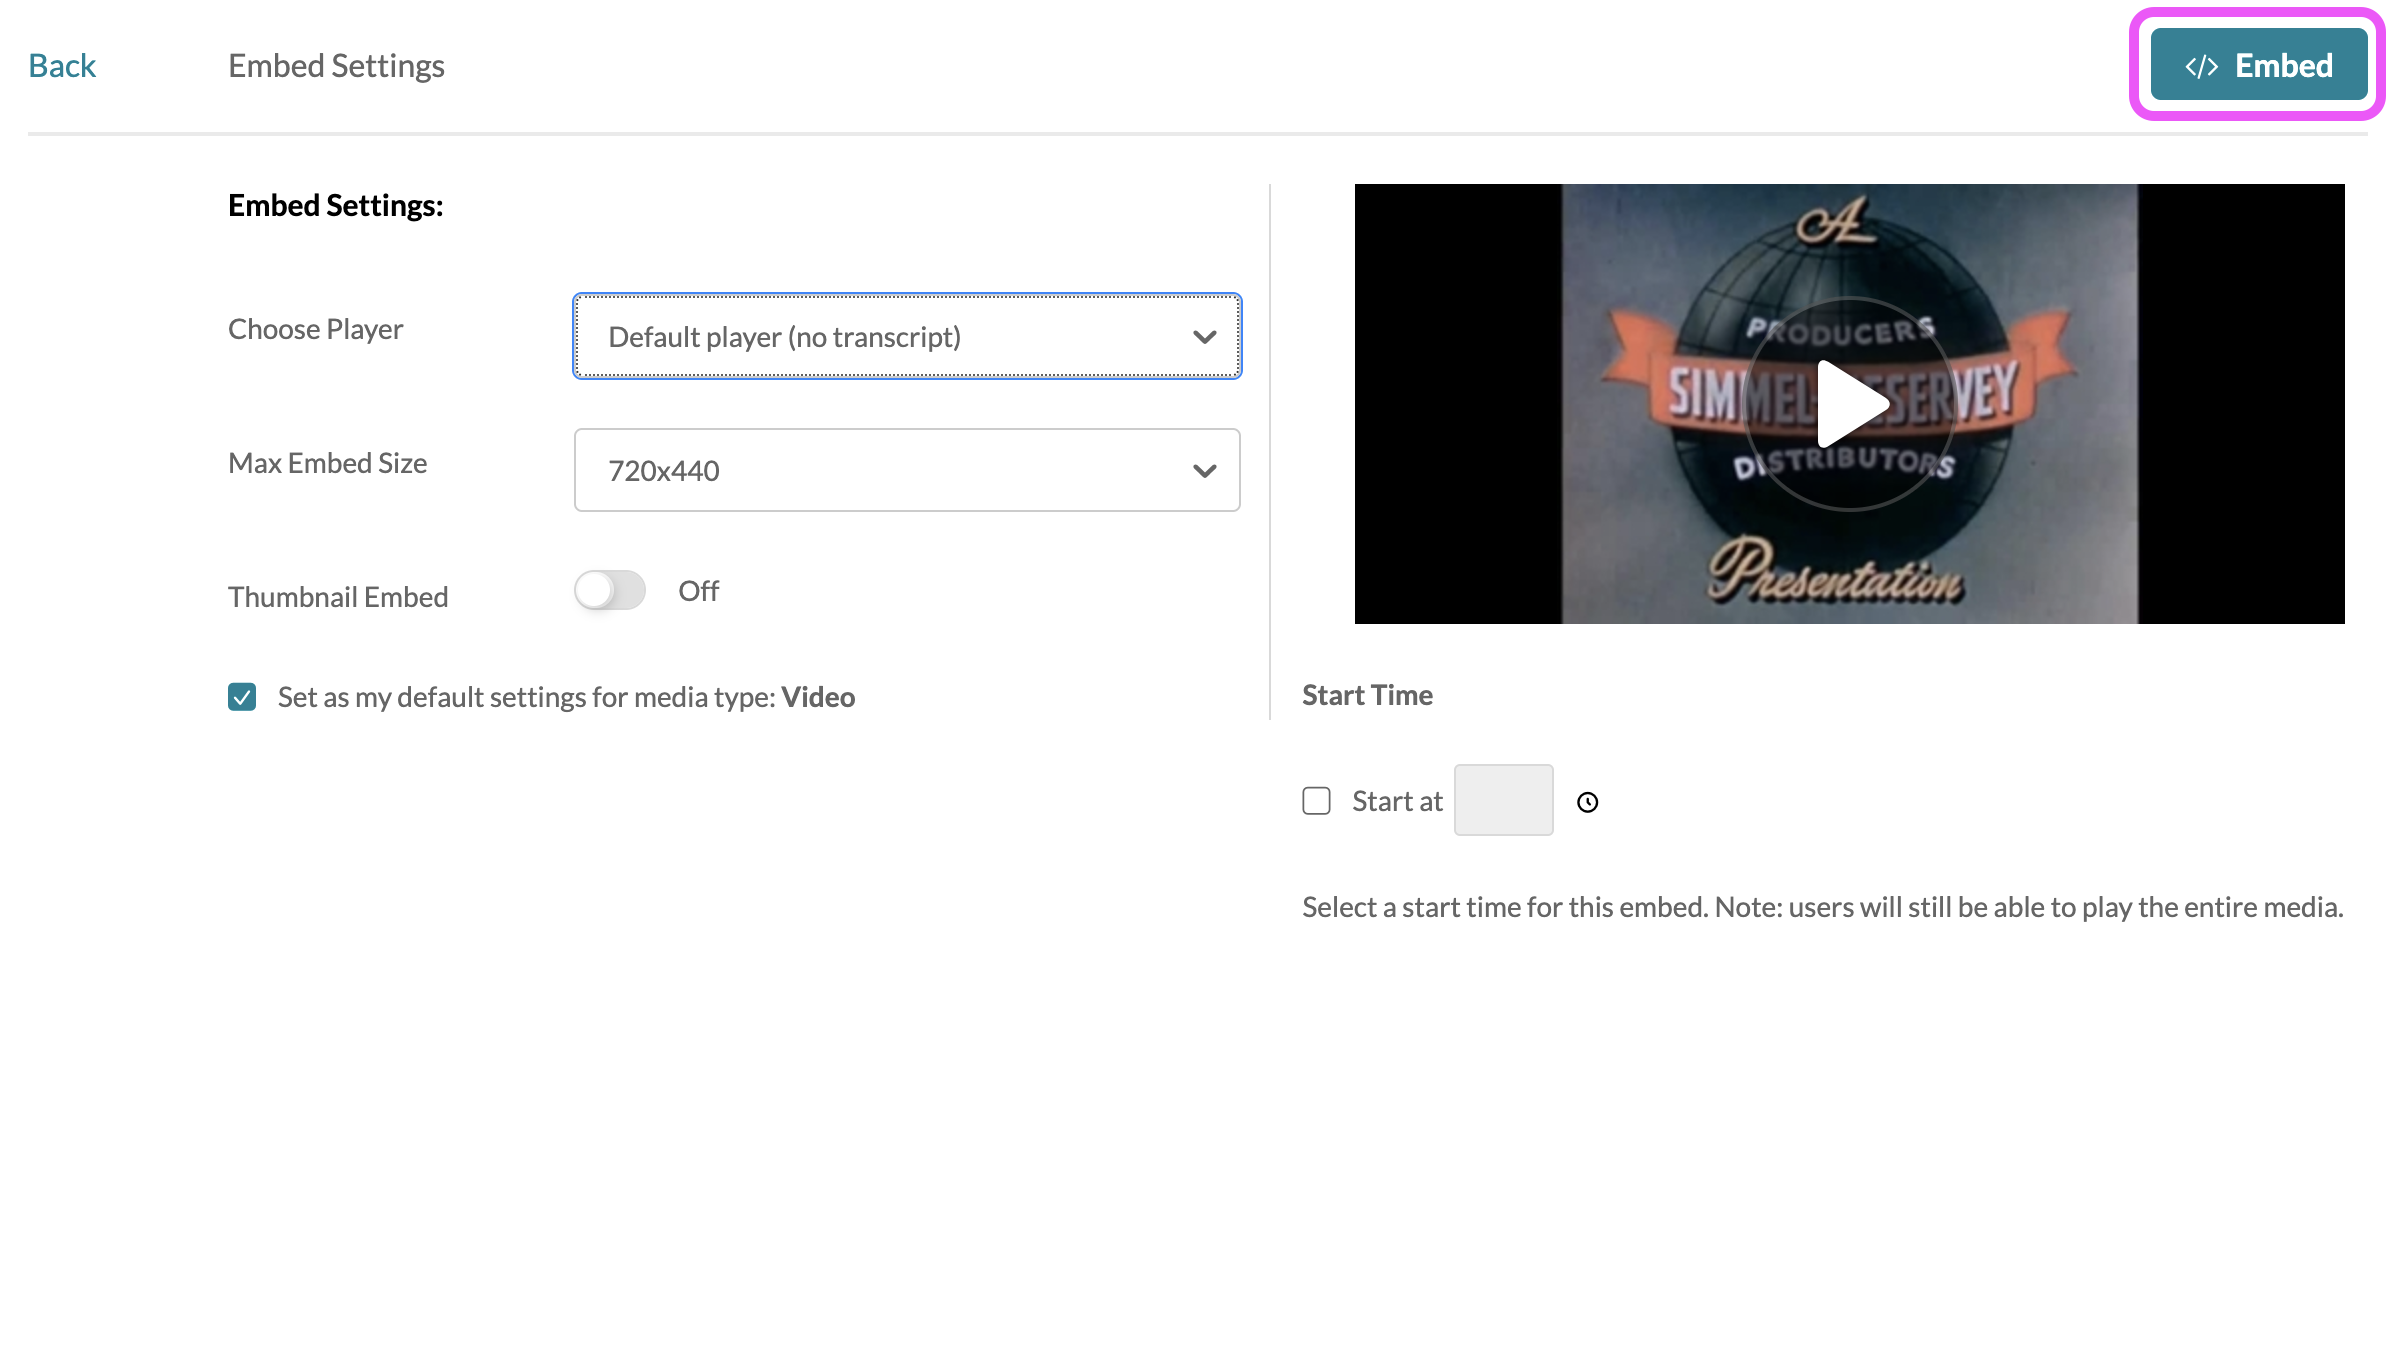
Click Embed to embed the media using the newly selected player.
If you have many videos already embedded in your course and you would like to change the player, you can do so by simply editing the playerSkin attribute specified within the embed URL. This can be done by using the link tool to edit the URL of the embed link itself, or by switching the view to display the HTML source code and editing the link(s) there.

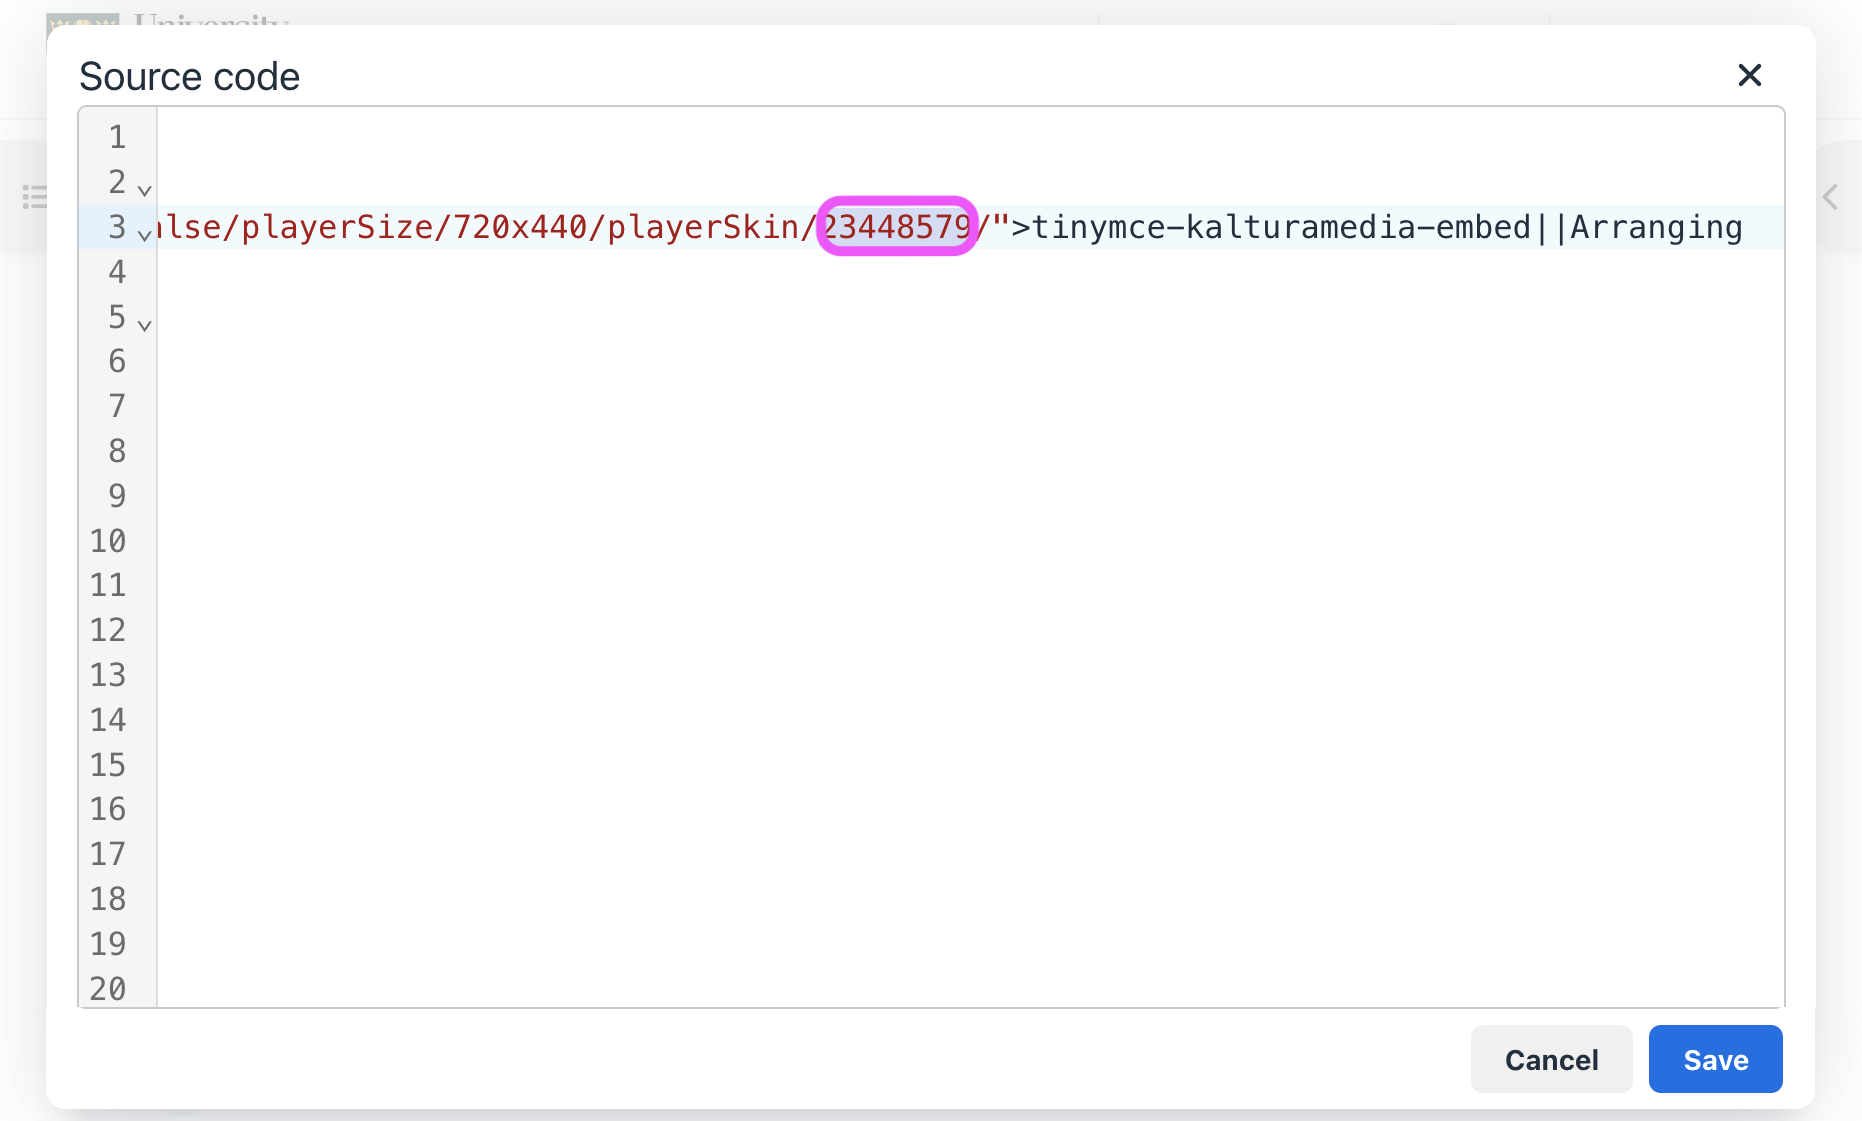
For example, changing the playerSkin value in the embed URL from 23448579 [Default player (with transcript)] to 23451243 [Default player (no transcript)] will change the player used for the embed.
Default player (with transcript)
http://kaf.urcourses.uregina.ca/browseandembed/index/media/entryid/.../playerSize/720x440/playerSkin/23448579/
Default player (no transcript)
http://kaf.urcourses.uregina.ca/browseandembed/index/media/entryid/.../playerSize/720x440/playerSkin/23451243/
Embedding course playlists
There may be times when you want to embed course playlists within Books, Pages, or elsewhere within the course. Follow the steps as outlined below.
Insert media with the toolbar
-
When editing content where you would like to embed the course playlist, click the Insert Video button on the editor toolbar.
-
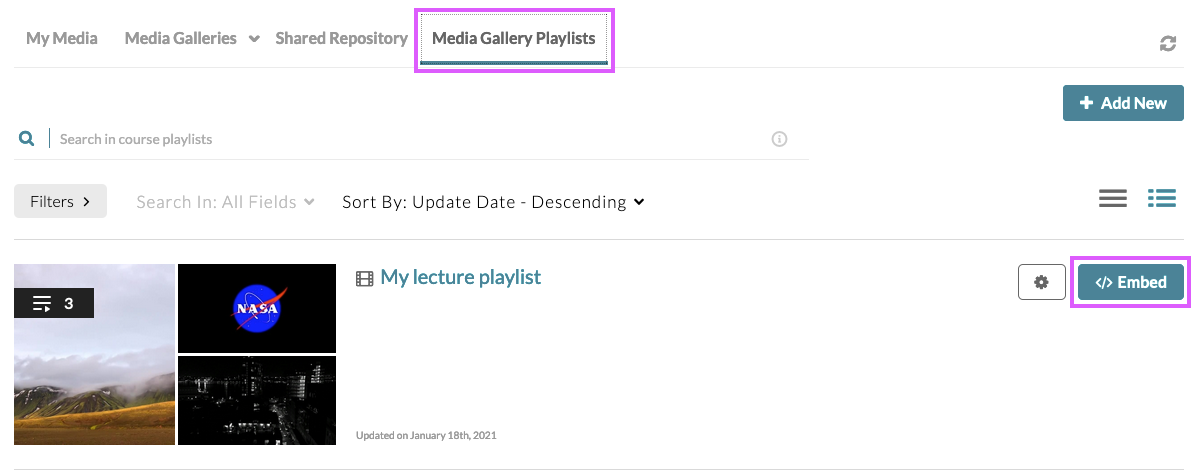
A pop-up window will appear that allows you to select from media within your My Media library. You can change to the Media Gallery Playlists tab to select an existing playlist.
Once you have selected the desired playlist, click Embed.
-
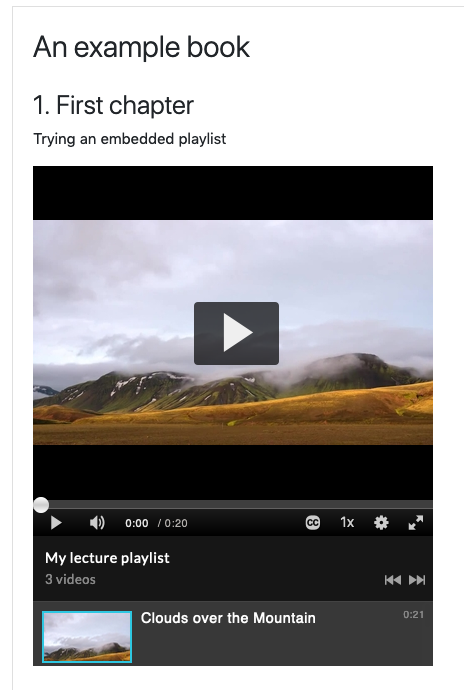
A link to the course playlist will now have been inserted into the content area. Save your changes.
-
When viewed as content, the link should become automatically replaced by an embedded playlist player, as illustrated below.
-
If an embedded player does not appear, you will need to ensure that the Kaltura filter has been enabled within the activity, or course, by following the steps below.
If the link is not turned into a player once saved, ensure that the Kaltura filter has been enabled for the course or activity that you are working with. This is key to turning the link into an embedded player within UR Courses.
Enabling the Filter
-
The Filters setting for the course or activity is available under the More menu.
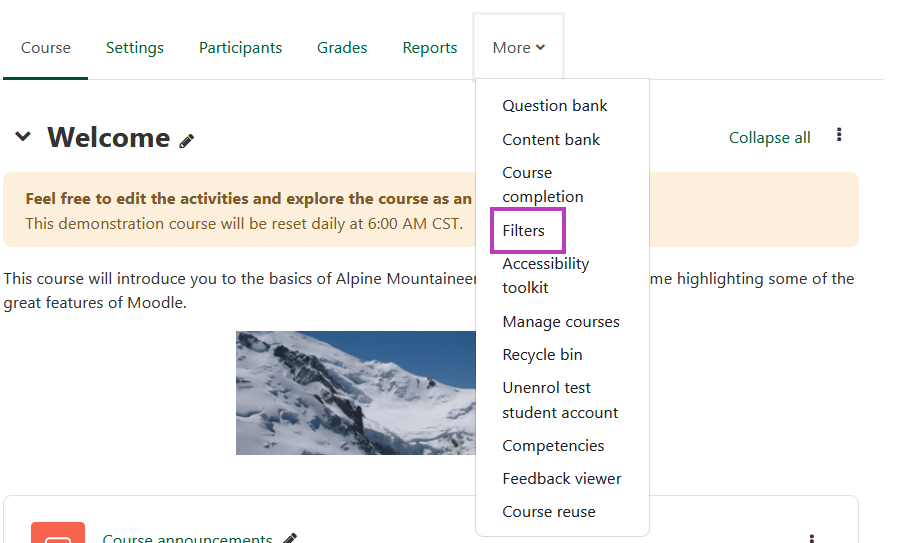
Ensure that Kaltura Media filter is set to the Default (On) or On.

Links to Kaltura hosted media should now appear as embedded videos within the course or activity.
Media Analytics
While you can view analytic information for individual media items from within My Media, these results are cumulative across courses and terms. By using the Kaltura Media Gallery block you are able to see analytic information for media within the specific context of the current course.
To view course media gallery analytics, follow the steps outlined below.
Navigate to the Kaltura Media Gallery block in your course and click the Media Gallery link.
-
Click on the Media Gallery menu and select Analytics.
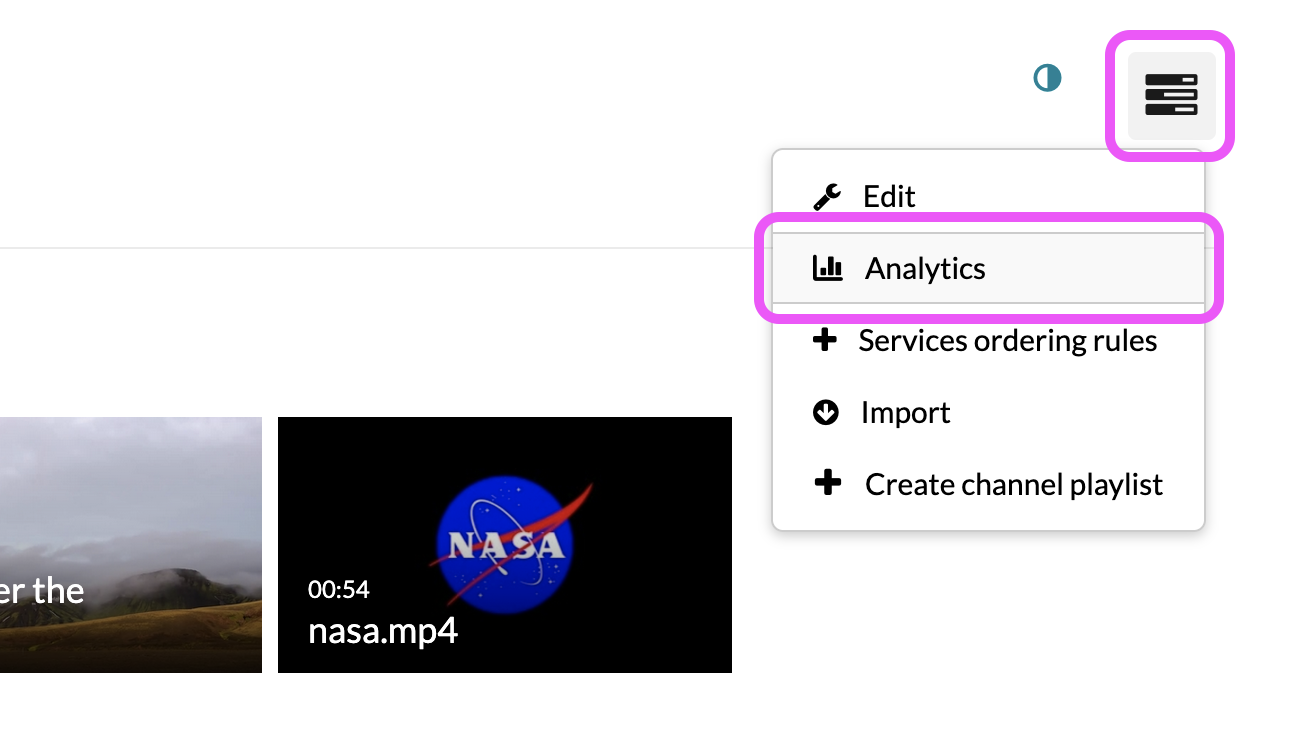
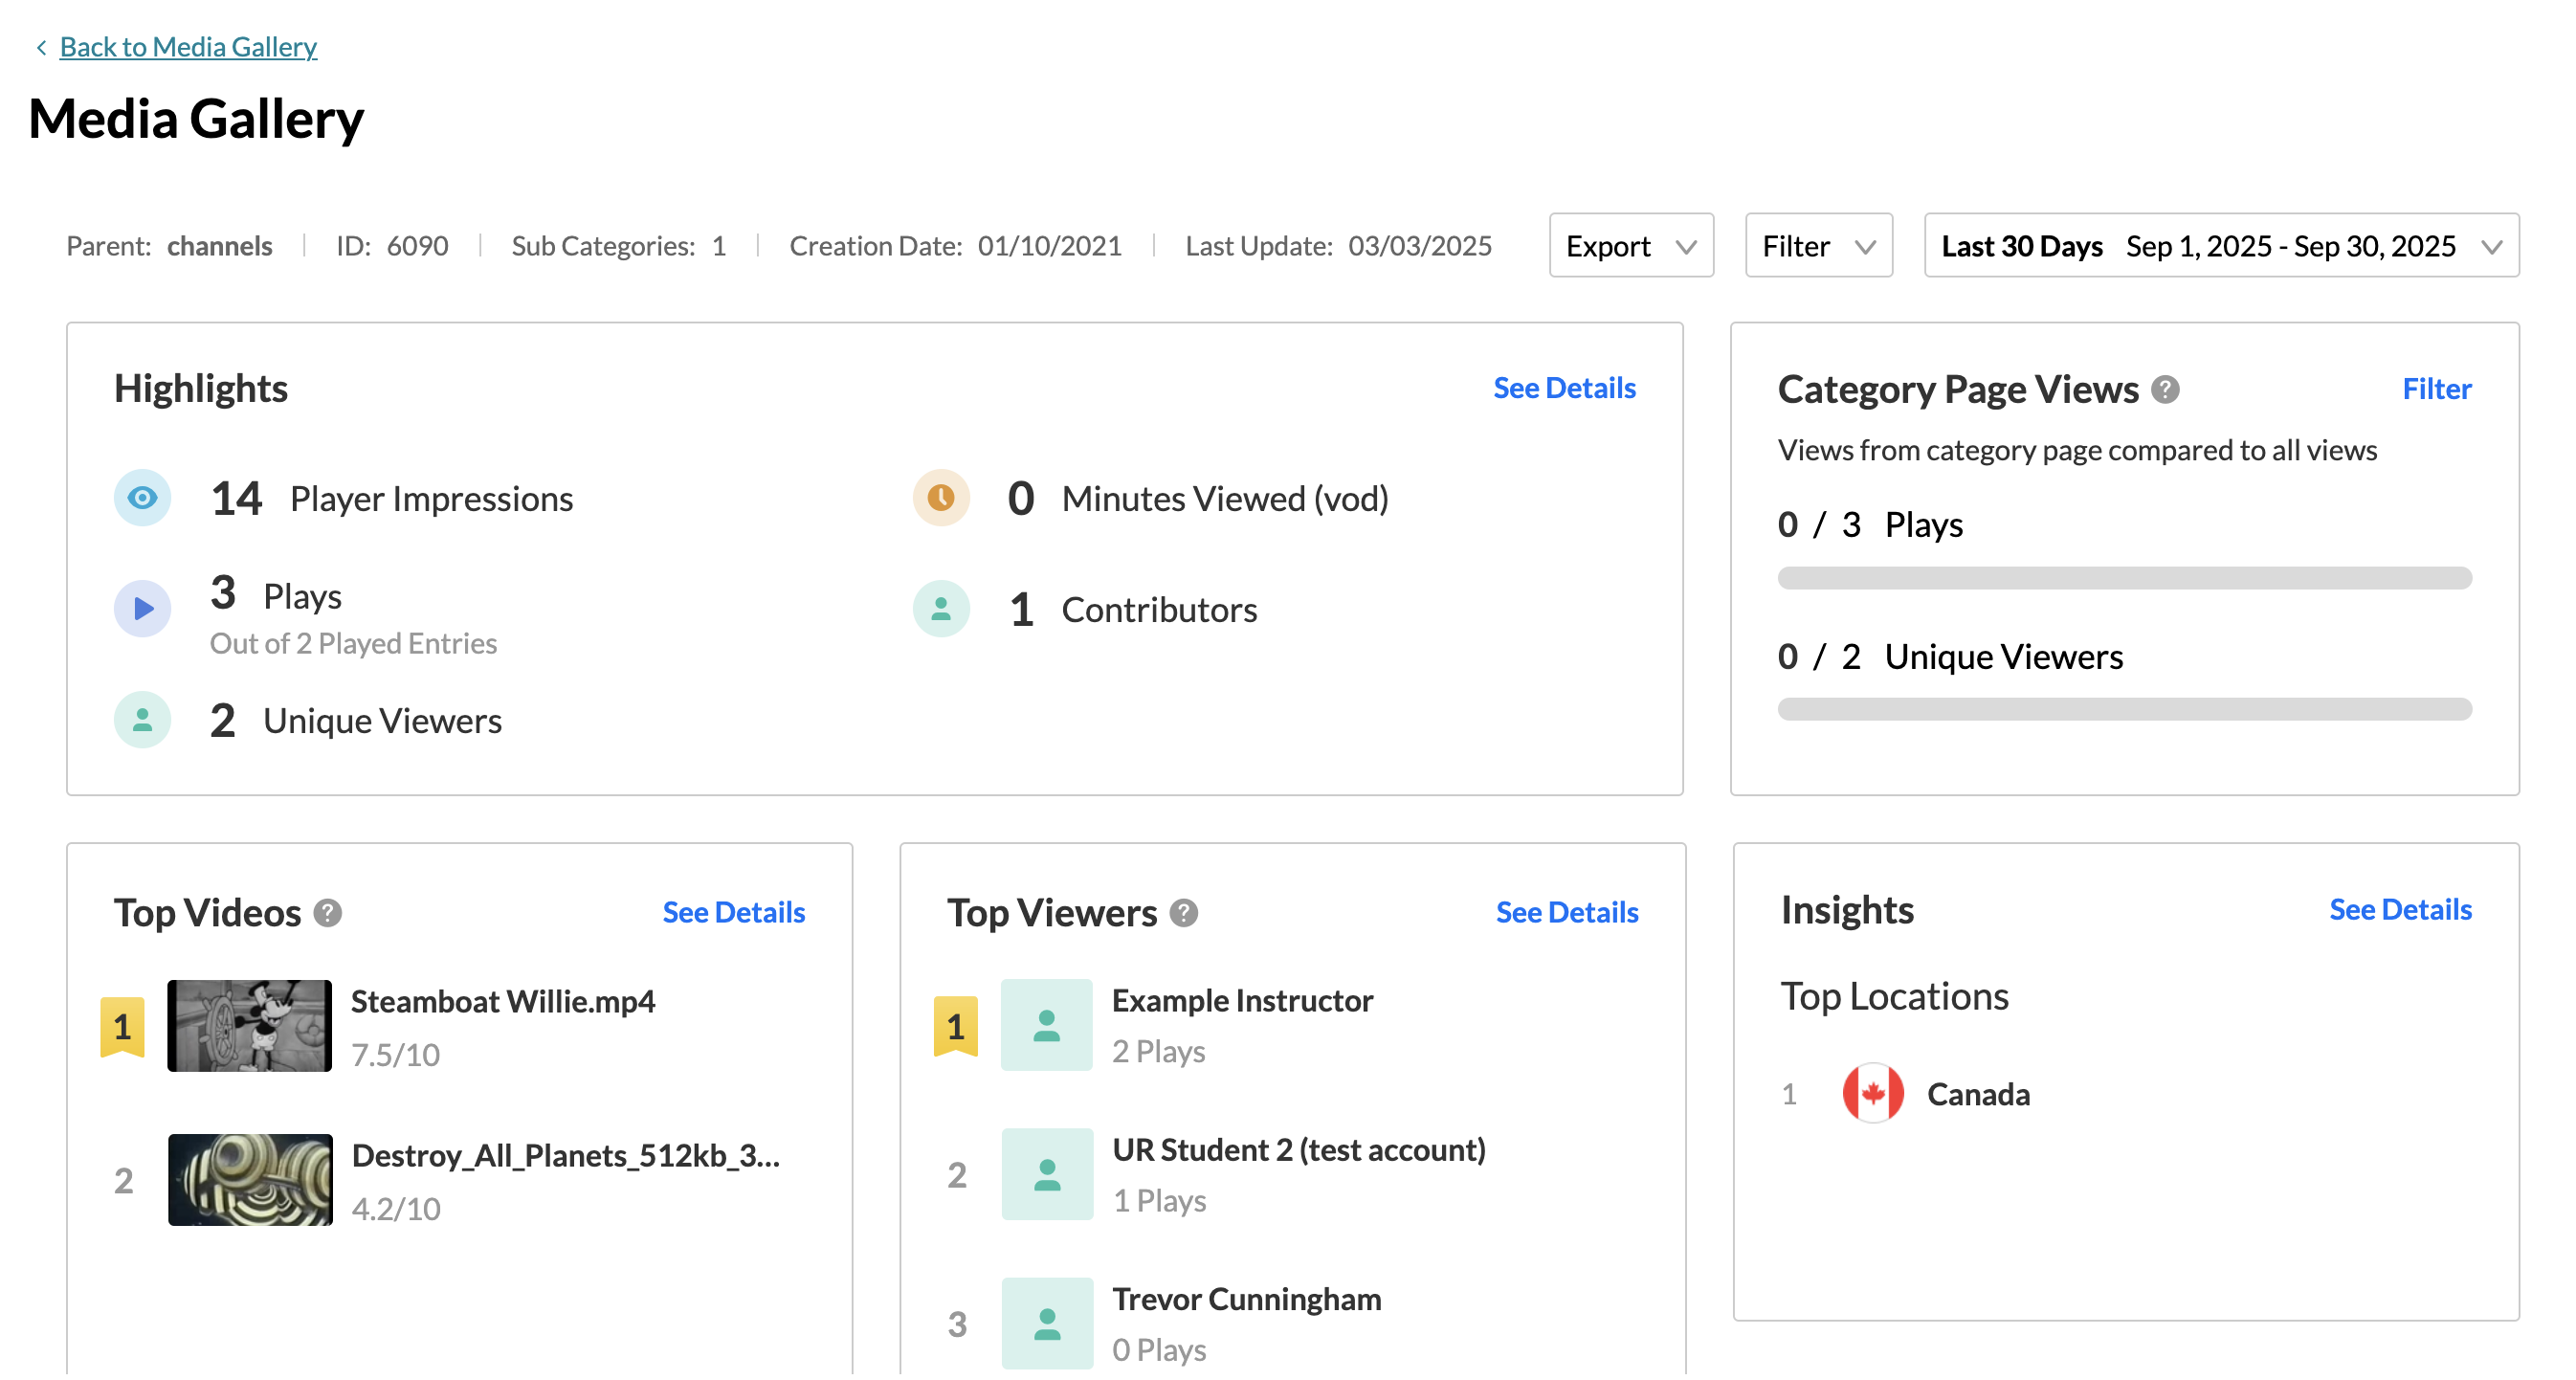
The resulting report screen will contain information about your media within the context of the course. This includes a variety of information, such as number of impressions, top viewers, performance over time, and so on.
About Kaltura
Kaltura is the primary video streaming service used at the University of Regina. The servers and data are hosted by the vendor (Kaltura) in the Amazon Canadian cloud.
The Kaltura platform enables video streaming, management, publishing, and syndication, as well as providing a robust framework for managing rich-media applications, and developing a variety of online workflows for video.
For additional information about Kaltura and MediaSpace, please refer to the Kaltura MediaSpace documentation.
Information Services supports the integration of Kaltura with UR Courses in order to enhance our media delivery and archiving practices.